Table of Contents
Advertisement
Quick Links
Advertisement
Table of Contents

Related Manuals for digicon dflow


Summary of Contents for digicon dflow
- Page 1 Product Manual...
- Page 2 Digicon S.A. Code: 069.31.220 Version: 04 - English This manual was elaborated by: Digicon S.A. Controle Eletrônico para Mecânica Documentation Sector – EDS...
-
Page 3: Table Of Contents
9.1 Dimensions ..................9.2 Additional Information ................ 10.Cleaning ................... 10.1 Door maintenance and storage ............10.2 Maintenance and preservation of the passage control sensor ....10.3 Maintenance and preservation of dFlow (glass and stainless steel plates) 11.Warranty and technical assistance ............ -
Page 4: Important Instructions
Below are the symbols that will appear throughout the manual, indicating important moments. It is essential to pay close attention to them. TIP: It will tell you something that Digicon considers important. CAUTION: Indicates when you must be very careful when handling the equipment/product. -
Page 5: Safety Instructions
2. Safety Instructions Symbols You may find this symbol in the document that accompanies this product. This symbol indicates important operating or maintenance instructions. You may find this symbol affixed to the product. This symbol indicates a live terminal where a dangerous voltage may be present. You may find this symbol affixed to the product. -
Page 6: Installation Site
Electric shock can cause personal injury or even death. Avoid direct contact with dangerous voltages at all times. The protective ground connection, where provided, is essential to safe operation and must be verified before connecting the power supply. Know the following safety warnings and guidelines: Dangerous Voltages ·... -
Page 7: General Servicing Precautions
2.3 General Servicing Precautions WARNING Avoid electric shock! Opening or removing this equipment's cover may expose you to dangerous voltages. WARNING To reduce risk of electric shock, before servicing, turn off the equipment's electrical power by switching the circuit breaker to the OFF position. -
Page 8: General Operation Precautions
Ÿ Keep this manual for future reference. Ÿ Digicon reserves the right to modify the characteristics of its products at any time Ÿ o adapt them to the latest technological developments. Digicon reserves the right to change the information contained in this Ÿ... -
Page 9: Features Of Dflow
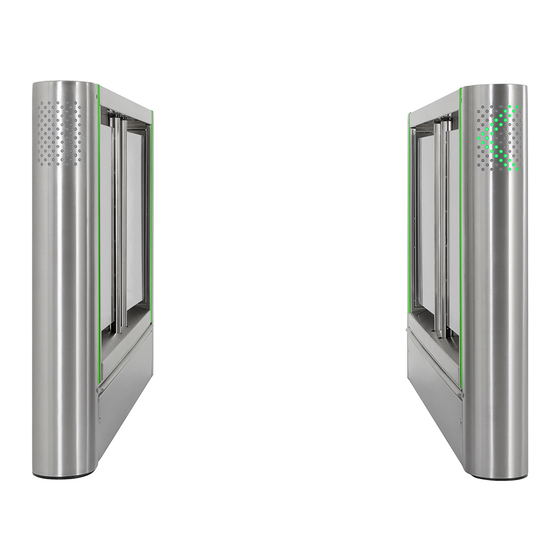
INFORMATION: dFlow is a reliable device and it can be supplied with the option of normally closed doors dFlow is the first access control device that fits perfectly into the Free Flow concept. Although it appears that dFlow is always open, it has doors. They are activated only when one or more unauthorized persons, including “rider users”, attempt... - Page 10 It can be configured for unidirectional and bi-directional access and with any passage width, from the traditional 500mm to 900mm (PNE passage). By identifying multiple users, including PNEs, a 900mm dFlow can be used by common users with the same 500mm dFlow identification efficiency. Using dFlow with its exclusive system of normally open doors in wider configurations allows passage comfort for users, even going in opposite directions.
-
Page 11: Operation Of Dflow
5.1 Operation of dFlow Figure 01 dFlow, for opening and closing the doors, uses the exclusive motor control that enables a controlled, soft, quiet and comfortable turn for the user. The drive unit is driven via direct current but converted through the drive to PWM signals for subsequent drive of the coil assemblies. -
Page 12: Installation And Asembly
6.1 Opening the package Since dFlow is configurable equipment, it is extremely important that careful visual inspection be done before starting the installation and assembly process. Digicon’s packaging is accompanied by a checklist, which guides this inspection. If any part is missing, contact a Digicon sales representative immediately. - Page 13 TIP: To tighten the screws, use a long extensor tool. - Fixing points - Optional fastening points ATTENTION: Check the dFlow model being installed and make sure the gateway span is correct (there are two models: 500 and 900). Figure 03 (9.05")
- Page 14 Transmitter Receiver /Transmitter Figure 04 With the ratchet fastening holes, install the fastening threaded bars according to the figure below. Digicon recommends using Hilti’s capsule chemical anchoring system (www.hilti.com). INFORMATION: Chemical fastening is recommended, but if preferred, use parabolt, make sure that the floor/ground is adequate..
- Page 15 Step by step: 1. Using a 12mm drill (0.47”) make a 90mm deep hole. (Threaded bar M10); 2. Clean the hole with a blower or vacuum cleaner to remove the dust residue; 3. Place the threaded bar into the hole to measure the depth. The bar has a mark that must be close to the floor/ground;...
- Page 16 9. Tightening torque and other information can be seen in the table below: Installation details...
- Page 17 50 mm diameter conduit Exit 6"x6" Cableway Cableway PASSAGE BOXES Cableway Cableway Preferencial Preferencial passage boxes passage boxes for AC cable for AC cable Cableway Cableway Passage 1 Passage assage 2 Figure 05 INFORMATION: The images above represent a two-passage installation.
-
Page 18: Required Free Area
6.2.1 Required free area dFlow has user detection sensing inside the dFlow at the start of the entrance and exit. Therefore, a free area must be foreseen in these areas, as shown below: INFORMATION: In this free area, no type of object must be placed, which stands still and the floor/ground must be uniform. -
Page 19: Access To Dflow After Assembly
OFF position. Refer all servicing to qualified service personnel only. Once dFlow is installed and assembled, access to the inside of the equipment can be done with the key that comes with the equipment by four ways: •... -
Page 20: Connections Between Equipent
OFF position. Refer all servicing to qualified service personnel only. The connection cables are located on the dFlow Receiver and must pass through the ducts as below: Communication cable connector duct AC Cable Connector Duct •... - Page 21 INFORMATION: • Digicon provides 4 meter long connection cables. • The depth of the ducts must be dimensioned so that the cables are sufficient. After passing the cables through the ducts, the cables must be connected to the dFlow transmitter terminal block as shown below:...
-
Page 22: Overhead Detection System
6.5 Overhead detection system dFlow has a high level of accuracy and reliability. With it, it is possible to control the passage direction (the system allows bi-directional operation), and can be configured to operate different passage directions. Overhead detection system:... -
Page 23: Overhead Detection System Installation
3.08m (with a tolerance of +/- 0.15 meters), to the ground/floor. Each sensor requires an AC power cord and an Ethernet network cable connected to its respective dFlow, respecting the maximum length according to specification of the used cable. - Page 24 • The arrow must always point to the exit side; • The dFlow receiver (R) will always be to the right of the Sensor; • The dFlow transmitter (T) will always be to the left of the Sensor.
- Page 25 Connections: Once the sensor is fastened, the cables must be connected between the sensor and dFlow. The sensor connection cables must always be connected to the dFlow receiver (R) of each passage, as shown below: Transmitter Receiver Figure 20 Entrance...
-
Page 26: Sensor Supply
6.5.2 Sensor supply dFlow has an exclusive output where the power cord must be connected. Follow the instructions below: WARNING To reduce risk of electric shock, before servicing, turn off the equipment's electrical power by switching the circuit breaker to the OFF position. -
Page 27: Sensor Communication
The dFlow CPU has a unique Ethernet port to connect the sensor communication cable. Follow the instructions below: • Connect one end. Figure 23 After connecting the cable, it must be connected to the other end in dFlow, as shown below: Location where the sensor communication cable must be connected. Figure 24... -
Page 28: Dflow Power Supply
OFF position. Refer all servicing to qualified service personnel only. To power the dFlow, AC power must always be connected to the dFlow receiver of each passage, as described below. -
Page 29: Selector Switch
Normal operation – rest position of selector switch (at any moment, you can put the Ÿ switch to position 0 and press OK and the dFlow will return to rest position; Sensor's calibration validating: briefly press the OK button; Ÿ... -
Page 30: Dflow Pictograms
The instruction pictogram is installed at the ends of the equipment and is represented by a green arrow > or red x. The red pictogram informs the user that dFlow is not operating in this direction or that at the moment his/her passage is not allowed or that it is busy. -
Page 31: Optional Items
Despite compatibility with most of the currently available access control technologies, Digicon also offers a number of optional items that allow enhancing and tailoring the operation of dFlow to customer needs. The following is a description of each of these items. -
Page 32: Display
Figure 30 7.4 Bar Code Reader The barcode used in dFlow is a 1D reader and also a 2D reader. The 2D reader, for example, is widely used in equipment installed at airports, because a QR code is printed on the boarding pass. -
Page 33: Biometrics
Figure 32 7.6 MCA MCA (Access Control Module) is a technology developed by Digicon to maximize the task of integrating access control systems that require processing power, agility in data manipulation and transfer, flexibility in the choice of aggregate technologies and, mainly, independence from the manufacturer when developing, changing and updating applications. -
Page 34: Troubleshooting
8. Troubleshooting Problem Possible causes Action dFlow does not turn on Equipment is not receiving Check circuit breaker and power from power grid. network or circuit breaker turned off. Door does not move upon Drive cables motor Check cable connection... -
Page 35: Technical Characteristics
9. Technical characteristics 9.1 Dimensions 1600(62,99") Figure 34 dFlow 900 dFlow 500 608(23,93") 408(16,06") (6,29") 528(20,78") 328(12,91") Figure 35... - Page 36 Figure 36 Figure 37 1800 (70.86") (13.77") (11.10") (3.14") Figure 39 Figure 38 INFORMATION: dFlow’s measures are shown in millimeters and (inches)
-
Page 37: Additional Information
9.2 Additional Information Technical Data Characteristics Power 100 - 240 V; 2,8 - 1,4 A Frequency 50/60 Hz Average time open/close door 1 second Operation Temperature 0 °C to 50 °C Approximate weight 190 kg per module Consumption: Initialization 140 ~ 150 W Operation (idle) 120 ~ 140 W Operation (two door in movement) -
Page 38: Cleaning
• The lenses are sensitive to abrasion, remember this when cleaning them. • Be sure to clean the plates properly, soap or alcohol residue can stain the lenses. 10.3 Maintenance and preservation of dFlow (glass and stainless steel plates) • Clean the equipment at least every month. Considering the environmental conditions of the location and the application, adjust the cleaning frequency according to the needs. -
Page 39: Warranty And Technical Assistance
11. Warranty and technical assistance Digicon is responsible for the design, good quality of labor and materials used in the fabrication of its products, ensuring that the equipment and all its parts are free from defects in material and fabrication. Digicon undertakes to replace or repair, in its sole discretion, at its Gravataí... - Page 41 Factory, Technical Assistance and Sales Address: Rua Nissin Castiel, 640 - Distrito Industrial. Gravataí/RS CEP 94045-420 Sales: 55-51-3489-8700/ 3489-8745 Technical Assistance: 55-51-3489-8903 Email: vendas.acesso@digicon.com.br Branch/ SP Development, Technical Assistance and Sales Address: Rua São Paulo, 82 - Alphaville. Barueri/SP CEP 06465-130 Phone: 55-ll-3738-3500 Email: vendas.acesso@digicon.com.br...
Need help?
Do you have a question about the dflow and is the answer not in the manual?
Questions and answers