Advertisement
Available languages
Available languages
H-8262
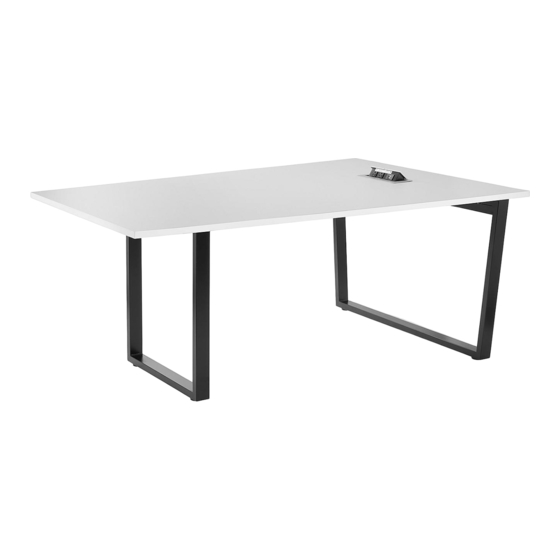
72 x 48" MEDIA
CONFERENCE TABLE
TOOLS NEEDED
Allen Wrench
Phillips
(Included)
Screwdriver
A
B
Bolt x 5
Bolt x 12
M6 x 45 mm
M6 x 15 mm
NOTE: Check that all parts are included. The
four M3.5 x 10 mm screws (F) come packaged
with the power center.
NOTE: Table also includes flat bracket and
six extra M6 x 15 mm bolts for the option to
connect two tables.
1.
Fit support rail (1) over corresponding bracket on
narrow leg (2). Secure using four M6 x 12 mm bolts
(D). Repeat to attach remaining support rail.
(See Figure 1)
2. Attach both support rails (1) to wide leg (3) using
eight M6 x 12 mm bolts (D). (See Figure 1)
NOTE: Do not fully tighten bolts until tabletop is
attached.
Follow hole patterns
on frame as shown
3
Figure 1
PAGE 1 OF 6
1-800-295-5510
uline.com
Two Person Assembly
Recommended
PARTS
C
Bolt x 6
M6 x 60 mm
ASSEMBLY
2
1
D
D
E
Bolt x 16
Flat Bracket x 1
M6 x 12 mm
3. Place tabletop (4) on assembled frame. Attach
tabletop (4) to narrow leg (2) using two M6 x 45 mm
bolts (A). Secure wide leg (3) using three M6 x 45 mm
bolts (A). (See Figure 2)
4. Attach tabletop (4) to brackets on legs using two
M6 x 15 mm bolts (B) per bracket. (See Figure 2)
5. Secure tabletop (4) to support rails (1) using three
M6 x 60 mm bolts (C) per rail. (See Figure 2)
Figure 2
B
A
6. Tighten bolts (D) installed in Steps 1 and 2 with Allen
wrench.
Para Español, vea páginas 3-4.
Pour le français, consulter les pages 5-6.
F
G
Screw x 4
Adhesive-Backed
M3.5 x 10 mm
Cable Clip x 4
4
2
3
1
C
0421 IH-8262
Advertisement
Table of Contents

Related Manuals for U-Line H-8262


Summary of Contents for U-Line H-8262
- Page 1 Para Español, vea páginas 3-4. Pour le français, consulter les pages 5-6. H-8262 1-800-295-5510 uline.com 72 x 48" MEDIA CONFERENCE TABLE TOOLS NEEDED Two Person Assembly Allen Wrench Phillips Recommended (Included) Screwdriver PARTS Bolt x 5 Bolt x 12 Bolt x 6...
- Page 2 ASSEMBLY CONTINUED Remove pop up outlets CONNECTING TWO TABLES (OPTIONAL) Figure 3 from power center Place wide legs of two tables together. casing by turning screws counterclockwise. 2. Align two flat brackets (E) with pre-drilled holes on (See Figure 3) underside of tables.
- Page 3 H-8262 800-295-5510 uline.mx MESA PARA VIDEOCONFERENCIAS DE 72 x 48" HERRAMIENTAS NECESARIAS Se Recomienda Armar Llave Allen Desarmador Entre Dos Personas (Incluida) de Cruz PARTES 5 Pernos 12 Pernos 6 Pernos 16 Pernos 1 Soporte Plano 4 Tornillos 4 Clips con...
- Page 4 CONTINUACIÓN DEL ENSAMBLE CONEXIÓN DE DOS MESAS (OPCIONAL) Retire el multicontactos Diagrama 3 abatible de la caja 1. Junte las patas anchas de las dos mesas. girando los tornillos en sentido contrario a las 2. Alinee dos soportes planos (E) con los orificios manecillas del reloj.
- Page 5 H-8262 1-800-295-5510 uline.ca TABLE DE CONFÉRENCE À MÉDIAS – 72 x 48 po OUTILS REQUIS Montage à deux Clé Allen Tournevis personnes recommandé (inclus) cruciforme PIÈCES Boulon Boulon Boulon Boulon Support plat x 1 Serre-câble avec M6 x 45 mm x 5...
- Page 6 MONTAGE SUITE Retirez les prises 11. Collez les serre-câbles avec dos adhésif (G) sous la Figure 3 rabattables du boîtier du surface de table (4) pour acheminer et maintenir les système d'alimentation en câbles. (Voir Figure 7) dévissant les vis dans le Figure 7 sens antihoraire.
Need help?
Do you have a question about the H-8262 and is the answer not in the manual?
Questions and answers