Table of Contents
Advertisement
Advertisement
Table of Contents

Related Manuals for Swissvoice XTRA 3355


Summary of Contents for Swissvoice XTRA 3355
- Page 1 Xtra 3355 USER’S GUIDE...
- Page 2 QUICK SETUP Set Language After first time power up (base station is also connected to main power, for details, refer to Section 5.1.2.). LANGUAGE? will appear on the screen. Press Ok on the handset. Press to select the desired language. Press Ok.
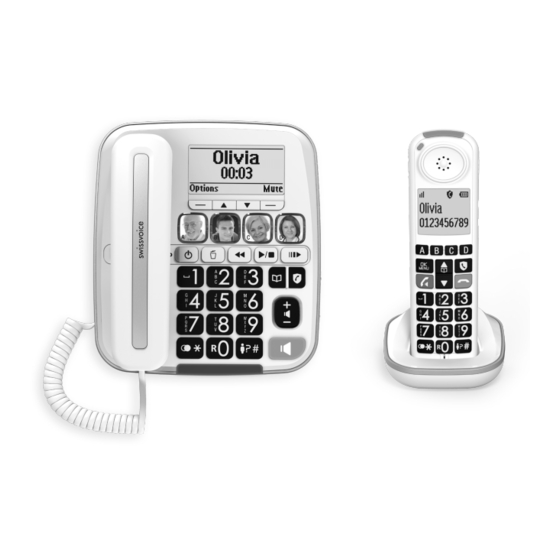
- Page 3 Package Contents This package contains the following items: Cordless handset Cordless handset charger Combo base unit Combo Handset unit Coiled Cord AC power adaptors (1 for combo base unit and 1 for cordless handset charger) Telephone line cord Telephone plug convertor (optional) 3pcs of AAA 500mAh NiMH rechargeable batteries 10.
-
Page 4: Table Of Contents
TABLE OF CONTENT IMPORTANT SAFETY INSTRUCTIONS................6 LOCATION........................6 INSTALLING YOUR PHONE....................7 3.1. Connecting the Base Station....................7 3.2. Connecting the Charger.......................8 3.3. Installing and charging the batteries..................8 GETTING TO KNOW YOUR PHONE..................9 4.1. Base Station Overview......................9 4.2. Display Icons and Symbols of Combo Base................11 4.3. - Page 5 9.4. Record Voice memo of the alarm reminder................27 SPEED DIAL KEYS (KEY 1 TO KEY 9)................28 10.1. Store a speed dial entry.....................28 10.2. View a speed dial entry.......................28 10.3. Edit a speed dial entry......................28 10.4. Delete a speed dial entry....................28 CALLER DISPLAY (network dependent)................29 11.1.
-
Page 6: Important Safety Instructions
IMPORTANT SAFETY INSTRUCTIONS When using your telephone equipment, basic safety precautions should always be sticked to reduce the risk of fire, electric shock and injury, including the followings: Read and understand all the instructions. Follow all warnings and instructions marked on the product. Unplug this product from the wall outlet before cleaning. -
Page 7: Installing Your Phone
INSTALLING YOUR PHONE 3.1. Connecting the Base Station Plug one end of the telephone line cord into the telephone jack on base bottom. Plug the small end of power adapter into a power jack on base bottom. Plug the large end of power adapter into a wall power outlet. Plug the other end of the telephone line cord in to the telephone jack or micro-filter. -
Page 8: Connecting The Charger
3.2. Connecting the Charger Plug the power adapter into a mains socket. If you have a Broadband line. If you connect your telephone to a line with a broadband connection, you will need to insert a micro-filter between the telephone and the telephone line, otherwise you may get interference between the telephone and the broadband, which could cause problems. -
Page 9: Getting To Know Your Phone
GETTING TO KNOW YOUR PHONE 4.1. Base Station Overview INCOMING CALL LED • Flashes when there is an incoming call. • On when there the phone is in use. • On when a device is being registered. • On when another telephone is in line on the same. MESSAGE LED •... - Page 10 • Press to repeat playing the current message from the beginning. • Press twice to skip backward to the previous message. • Press to play the message. • Press again to stop the message playback. • Press to delete the message currently playing. •...
-
Page 11: Display Icons And Symbols Of Combo Base
20. DOWN KEY • In menu mode: Press to scroll down the menu items. • In Phonebook list / Redial list / Call List: Press to scroll down the list. • While entering names or numbers: Press to move the cursor to the right. 21. -
Page 12: Menu Tree Of Base
4.3. Menu tree of base... - Page 13 Hearing Aid Compatibility: Special feature which helps to eliminate background noise and interference when you use this telephone with a hearing aid.
-
Page 14: Handset Overview
4.4. Handset Overview INCOMING CALL LED • Flashes when there is an incoming call/ the base is paging the handset. CHARGE LED • On when the handset is charging in the charger. • In menu mode: Press to scroll up the menu items. •... - Page 15 11. AUDIO BOOST • During a call: Press to increase at lot the hearing volume in earpiece. 40dB at maximum. Warning: The product may emit high volume of sound. Take extra care when you use audio boost key, it is recommended to reduce volume at minimum level before pressing audio boost key.
-
Page 16: Menu Tree Of Handset
4.5. Menu tree of handset... -
Page 18: Using Your Phone
USING YOUR PHONE 5.1. Set Date & Time and Language 5.1.1. Set Date & Time Through telephone base: Choose Menu. to select BS Setting, then press Ok. Press to select Date / Time, then press OK. Press Press to select Set Time, then press Ok , input the day, month, year, then press Ok, input hour (24HR format), and minutes, then press Ok , you hear confirmation tones. -
Page 19: Direct Dialing
5.2.2. Direct Dialing Through telephone base: Press or lift up corded handset and enter the phone number. Through cordless handset: Press to take the line and enter the phone number. 5.2.3. Call from the phonebook Through telephone base: Press OR press Menu and to select Phonebook then Ok to access the phonebook. -
Page 20: Set Photo A, B, C, D Key Memories
5.5. Set Photo A, B, C, D key memories 5.5.1. Input number and name A, B, C ,D memories are shared by base and handset (same memories). Once a direct memory is registred, it is automatically copied on the other appliance (base or handset). Through telephone base: Press Menu in idle mode. -
Page 21: Delete Voice Tag
Through cordless handset: Press on the handset in idle mode. Press to select Direct Mem., then press Press to select A, B, C, D, then press View appears, then press to select Voice Tag, press Playback apppears, then press Playing… will appear. The recorded voice will be playback. 5.5.4. -
Page 22: Adjust Earpiece And Handsfree Volume
Slide up and down on handset or on combo base to select Treble, Natural, or Bass.(refer to Section 4.4 item 13 (cordless handset) and Section 4.1 item 12 (for Xtra 3355 combo base) for details). 5.8. Redial Each cordless handset stores the last 10 dialled numbers (up to 17 digits each) in the redial list. -
Page 23: View A Phonebook Entry
6.2. View a Phonebook Entry Through telephone base: Select a desired entry in the phone book, and then press Menu. Add new appears then press to select View, press Ok to review name and number of the entry. Press Back to return previous menu. Through cordless handset: Select a desired entry in the phone book, and then press Add new appears then press... -
Page 24: Status Of Phonebook
6.8. Status of phonebook You can view how many phonebook records are stored out of total 100 records. Through both Cordless Hanset and Telephone Base: Press , press Add new appears then press to select Status, press Ok. X / 100 Used will display. PHONE SETTINGS 7.1. -
Page 25: Change The Flash Time
7.5. Change the Flash Time Through telephone base: Press Ok when idle. Press to select BS Setting, then press Ok . Press to select Flash Time, then press Ok . Press to select your desired flash time. (Short, Medium, Long are for your selection), then press Ok to confirm. You hear confirmation tones. 7.6. -
Page 26: Transfer A Call
8.4. Transfer a call During an external call, you can transfer the call from a cordless handset or the telephone base to another system device. To transfer a call from the telephone base: During a call, If the handset(s) is put in base or charger, just take it away from cradle, the call will be transferred from base to handset automatically. -
Page 27: Enriched Ringer
8.7. Enriched ringer When first call is not picked up and the same caller calls again within 5 minutes, the ringer level of handset and base will be automatically set to maximum, in order to alert elderly people or people far from the telephone that the phone is ringing. -
Page 28: Speed Dial Keys (Key 1 To Key 9)
SPEED DIAL KEYS (KEY 1 TO KEY 9) You can make use of key 1 to key 9 on handset as speed dial keys, by long pressing it to dial in idle mode or in talk mode. 10.1. Store a speed dial entry Through telephone base: Press Menu, press to select Phonebook, then press Ok. -
Page 29: Caller Display (Network Dependent)
CALLER DISPLAY (network dependent) This feature is available if you have subscribed the Caller Line Identification service with your telephone service provider. Your phone can store up to 100 received calls with date/time information in the Call List. The number will be shown on the LCD when the phone is ringing. -
Page 30: Delete An Entry In The Call List
11.4. Delete an entry in the Call List Through telephone base: Select a desired entry in the call list, and then press Ok. Press Ok and to select Delete. Confirm? will show, press Ok to confirm. You hear confirmation tones. Repeat steps 3 in part 5.2.4. -
Page 31: Manual Call Block Mode
12.1. Manual call block mode Manual call block is the easiest option when starting out. When you chose ON in the call block settings, all calling numbers registered in your blacklist will be blocked. You can add/remove numbers from that list at any time. How to block an incoming call: When the phone is ringing and before answering, press . -
Page 32: Automatic Call Block Mode
12.6. Automatic call block mode 12.6.1. VIPS only In this restrictive automatic mode, only calls from numbers registered as VIP in your phonebook will go through and make your phone ring. Menu Call block Block set. VIP OK* Contacts OK to select Call Block. -
Page 33: Set Block Anonymous Calls Off
12.8. Set Block Anonymous Calls OFF In idle mode, Repeat step 1 and 2 in Section 12.7.1. Press Ok, press to select Off, press Ok to confirm. will only disappear from the LCD if the regular call block (see 1. And 2.) is also set to OFF. VOICE MAIL (Network Dependent) By subscription to your operator, you can have your calls diverted to a voicemail box when you are absent. -
Page 34: Listen New Messages Through The Base
14.4. Listen new messages through the Base Press to listen to new messages through base speaker. After playback all new messages, a long beep will emit from the base. To playback old messages, press again to listen. Options during playback: •... -
Page 35: Play Your Outgoing Message (Ogm)
14.6.1. Play your Outgoing Message (OGM) Through telephone base: Press Menu in idle mode. Press to select Ans. Machine, then press Ok . Delete All appears and then press to select OGM, then press Ok. Ans & Rec appears and then press Ok. Play OGM appears then press Ok, Playing appears then it will play the default outgoing message. -
Page 36: Set The Answer Delay
14.8.2. Set the Answer Delay You can set the number of rings before the answering machine answers and starts playing your OGM. You can set the answering machine to answer after 2 to 10 rings or TOLL SAVE. With TOLL SAVE selected, the answering machine answers after 2 rings when you have new messages, and after 4 rings when you have no new messages. -
Page 37: Change The Remote Code
14.8.6. Change the remote code: Through telephone base: Repeat step 1 to 3 as above. Press to select Change Pin, then press Ok to enter a 4-digit number. Press OK to save. You hear confirmation tones. Through cordless handset: Repeat step 1 to 3 as above. to select Change Pin, then press Press to enter a 4-digit number... -
Page 38: Message Alert Tone
14.11. Message Alert Tone When the message alert tone is set to On, the telephone base beeps every 10 seconds to alert you to new messages. The tone stops when all new messages have been reviewed. Through telephone base: Press Menu in idle mode. to select Ans. - Page 39 No dial tone • Is the telephone cord plugged into the phone socket? • Check that the mains power is switched on. • Only use the telephone cord supplied with the phone. • The telephone line cord might be malfunctioning. Install a new telephone line cord. •...
-
Page 40: Guarantee
GUARANTEE Please carefully read the user guide included in this box. Xtra 3355 is approved equipment in accordance with European regulations, attested by the CE mark. The product you just bought is a technological product, it must be handled with care. -
Page 41: Safety
Hereby, ATLINKS EUROPE declares that the radio equipment type DECT is in compliance with Directive 2014/53/ EU. The full text of the EU declaration of conformity is available at the following internet address: www.swissvoice.net. Then, select: Documentation/Downloads EU declaration of conformity... - Page 42 92500 RUEIL-MALMAISON France RCS Nanterre 508 823 747 www.swissvoice.net Swissvoice is a trademark of Swissvoice International SA. ©Copyright Swissvoice International SA 2021 The Manufacturer reserves the right to modify the specifications of its products in order to make technical improvements or complywith new regulations.
Need help?
Do you have a question about the XTRA 3355 and is the answer not in the manual?
Questions and answers
How do I connect phone to a fibre router and VOIP
To connect the Swissvoice XTRA 3355 phone to a fibre router and VOIP:
1. Identify the telephone port on your fibre router (often labeled as "TEL" or "Phone").
2. Plug one end of the telephone line cord into the telephone port on the router.
3. If your router or setup includes a micro-filter, connect the other end of the line cord to the micro-filter.
4. Plug the micro-filter into the wall telephone socket (if required).
5. Plug the power adapter into a wall power outlet and connect it to the phone base.
6. Use only the cables provided in the box.
Note: Every telephone connected to a broadband line must have a micro-filter to avoid interference.
This answer is automatically generated