Table of Contents
Advertisement
INSTALLATION INSTRUCTIONS AND HOMEOWNER'S MANUAL:
Models marqued with * can only be sold in Quebec, Canada
INSTALLER / SERVICE TECHNICIAN:
Use the information in this manual for the installation/servicing of the furnace and keep the document near the unit for
future reference.
HOMEOWNER: Please keep this manual near the furnace for future reference.
Manufactured by: Dettson Industries Inc. Sherbrooke, Qc, Canada www.dettson.com
Gas furnace manufactured on or after May 1, 2017 are not permitted to be used in Canada for heating of buildings or structures under construction
Printed in Canada on
100% recycled paper
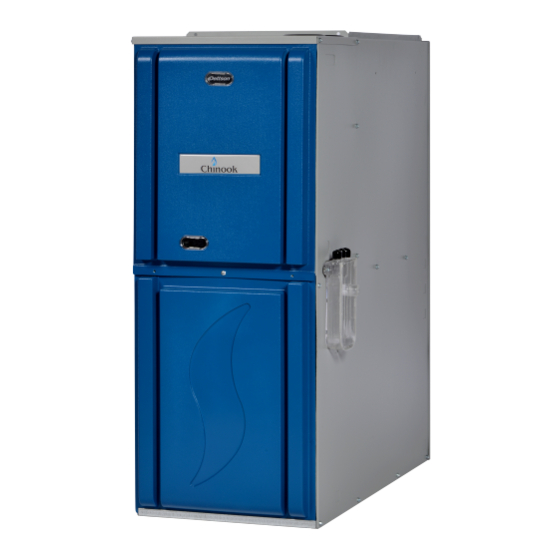
GAS FIRED FURNACE 2-STAGE ECM
2022-06
GAS FURNACE
MULTIPOSITION
Models:
C15-2-V
C30-2-V
C45-2-V
C60-2-V
C75-2-V
C105-2-V*
C120-2-V*
X40261 revA
Advertisement
Table of Contents

Subscribe to Our Youtube Channel
Related Manuals for Dettson Chinook C15-2-V


Summary of Contents for Dettson Chinook C15-2-V
- Page 1 HOMEOWNER: Please keep this manual near the furnace for future reference. Manufactured by: Dettson Industries Inc. Sherbrooke, Qc, Canada www.dettson.com Gas furnace manufactured on or after May 1, 2017 are not permitted to be used in Canada for heating of buildings or structures under construction...
-
Page 2: Table Of Contents
Table of content 7.1 GENERAL ........SAFETY 7.2 DIRECT VENT . - Page 3 List of figures List of tables Table 1: Codes and Standards ....Figure 1: Right side connection ....Table 2: Minimum clearance .
- Page 4 REQUIRED NOTICE FOR MASSACHUSETTS INSTALLATIONS - IMPORTANT The Commonwealth of Massachusetts requires compliance with regulation 248 CMR as follows: 5.08: Modifications to NFPA-54, Chapter 10. Revise 10.8.3 by adding the following additional requirements: For all side wall horizontally vented gas fuelld equipement installed in every dwelling, building or structure used in whole or in part for residential purposes, including those owned or operated by the commonwealth and where the side wall exhaust vent termination is less than seven (7) feet above finished grade in the area of the venting, including but not limited to decks and porches, the following requirements shall be satisfied:...
-
Page 5: Safety
the damage and to replace all critical parts that were in contact with water; 1 SAFETY 3. Do not store gasoline or any other flammable substances, such as paper or carton, near the furnace; 4. Do not stack items or boxing within the required 1.1 SAFETY LABELING AND clearances to combustible materials specified in Table 2;... - Page 6 1. Use only with type of gas approved for this furnace. Refer WARNING to the furnace rating plate and section 5 : GAS SUPPLY AND PIPING. 2. Install this furnace only in a location and position as ELECTRICAL SHOCK, FIRE OR EXPLOSION HAZARD specified in section 3 : INSTALLATION.
-
Page 7: Detection Systems
high carbon monoxide levels. WARNING Also, the house should be equipped with approved and properly maintained fire extinguishers. Your unit is equipped with safety devices that can prevent it from CARBON MONOXIDE POISONING HAZARD functioning when anomalies are detected such as a blocked Failure to follow the steps outlined below for each venting system. -
Page 8: Introduction
Table 1 – Codes and Standards TOPIC CANADA 2 INTRODUCTION Safety National Fuel Gas Code National Standard (NFGC) NFPA Canada, Natural Gas and 2009/ANSI Z223.1 Propane Installation Code the Installation Standards, (NSCNGPIC) CAN/CSA This multiposition Category IV condensing furnace is CSA Warm Heating B149.1... -
Page 9: Electrostatic Discharge
2.2 ELECTROSTATIC DISCHARGE When installing the furnace, provisions must be made to ensure the supply of adequate combustion and ventilation air in accordance with the “air for combustion and ventilation” section of the National Fuel Gas Code, NFPA 5/ANSI Z223. c1 or CAUTION applicable provisions of the local building code. -
Page 10: Installation
1. Remove the oblong knock-out from the right side of the casing. 3 INSTALLATION 2. Place the drain trap gasket on drain trap. 3. Install the drain trap on the right side. See figure 1. To ensure proper drainage of the condensate when 4. -
Page 11: Downflow
Figure 3 – Downflow position to reach the drain trap. The condensate tubing from the condensate box is 5/8” and it must be connected to the 5/8” stub of the drain trap. The condensate tubing from the ID blower and the vent flange are ½” and are connected to the ½”... -
Page 12: Horizontal Right
3.3 HORIZONTAL RIGHT tubing to connect the pressure switch (-0.2 in. w.c.) to this stub. (see figure 5) Figure 6 – Horizontal right position The pressure switch must also be electrically connected in series with the low fire pressure switch (top) using the brown jumper provided in the parts bag. -
Page 13: Horizontal Right
5. Install two 1/2” black caps on the unused inlets of the connect the pressure switch (-0.2 in w.c.) to this stub. This drain trap inside the furnace. tubing is provided with the furnace. Refer to figure 6 to see which port is associated to the horizontal right position. -
Page 14: Alternate Drain Trap Location In Horizontal Left Position
3.4.3 Horizontal left multiposition 8. Reroute the vent collector drain tube to one of the 1/2” stubs of the drain trap. Cut the provided 1/2" tubing at pressure switch connection the appropriate length to reach the drain trap. Figure 12 – Horizontal left pressure switch connection 9. -
Page 15: Duct External Static Pressure
As an alternative, fibrous ductwork may be used if constructed and installed in accordance with Dettson Industries also offers the Smart Duct System. Please the latest edition of SMACNA construction standard on fibrous refer to the Smart Duct Manual (X40240) for proper installation... -
Page 16: Gas Supply And Piping
comply with NFPA 90B as tested by UL Standard 181 for Class 3. Remove both regulator adjustment screws (beneath the 1 Rigid air ducts. cover screws). 4. Remove both Natural Gas regulator springs from GAS SUPPLY AND PIPING regulator sleeves. 5. -
Page 17: Inlet Gas Pressure
Figure 15 – Typical gas pipe arrangement 11. Turn outlet pressure test screw to seal the pressure port (clockwise, 7in-lb minimum) 12. Turn on the electrical power to the system. 13. Make a call for heat on the thermostat. 14. Using a leak detection solution or soap suds, check for leaks at the pressure boss screw. -
Page 18: Electrical Connections
(between 1 and 12 ALTERNATE POWER SUPPLY minutes). Dettson doesn’t recommend to operate the furnace on a Table 7 – Single stage t-stat with 2 stage ECM furnace generator or other alternate power supply. If so it must produce... -
Page 19: Venting And Combustion Air Piping
Contact alternate power supply manufacturer combustion air pipe. specifications and details. Below are important information that needs to be considered when installing the venting system: 7 VENTING AND COMBUSTION AIR PIPING • The vent pipe and combustion air pipe must of be the same diameter. -
Page 20: Special Venting Requirements For Installation In Canada
7.4 SPECIAL VENTING 9). Record the equivalent length of all the elbows for each pipe. REQUIREMENTS FOR 4. Record the equivalent length of the termination used (see INSTALLATION IN CANADA table 9 ). 5. Add the equivalent length of the elbows and termination In Canada, S636 certified primers and cements must be used to the linear distance measured for each pipe. -
Page 21: Combustion Air Pipe Connection
When 3" pipe is used, connect a 2" to 3" coupling to the 2" pipe. To connect the combustion air pipe, use the venting flange with the gasket and screw it to the chosen location. Secure the For proper installation of venting/exhaust pipe: combustion air pipe to the flange using glue. -
Page 22: Vent Termination
Figure 20 – side panel combustion air Figure 21 – Roof concentric termination Figure 22 – Sidewall concentric termination 7.9 VENT TERMINATION All clearance specified in this manual are in accordance with the current CSA B149.1, Natural and Propane Installation Code and the current ANSI Z223.1/NFPA 54, National Fuel Gas Code. - Page 23 Figure 24 – Standard horizontal termination Figure 26 – Alternate horizontal termination B Figure 27 – Alternate horizontal termination C Figure 25 – Alternate horizontal termination A Figure 28 – Venting gasket...
- Page 24 Figure 29 – Direct vent clearance...
- Page 25 Figure 30 – Other than Direct vent clearance...
-
Page 26: Table 10: Approved Combustion Air And Vent Pipe, Fitting And Cement Materials (U.s.a Installation)
Table 10 – Approved combustion air and vent pipe, fitting and cement materials (U.S.A Installation) ASTM SPECIFICATION MATERIAL PIPE FITTINGS SOLVENT CEMENT DESCRIPTION MARKED ON MATERIAL AND PRIMER D1527 PIPE D1765 PIPE Schedule-40 D2235 For ABS Solvent Cement For ABS D2241 PIPE SDR-21 &... -
Page 27: Start Up, Adjustment And Safety Check
8.2 SELECTING THE BLOWER SPEED 8 START UP, ADJUSTMENT AND SAFETY CHECK The selection of blower speed can be adjusted using dipswitches. Each selection (A,B,C,D) refers to a different 8.1 Starting the furnace airflow. The ideal airflow in heating and in cooling mode can be selected independently. -
Page 28: Delay To Fan Off
Table 15 – CFM C30-2-V - 0381124C Table 18 – CFM C75-2-V - 0381210C Dipswitch Max ESP 1st stage 2nd stage Temp. Dipswitch Max ESP 1st stage 2nd stage Temp. Settings "w.c. heating heating rise °F Settings "w.c. heating heating rise °F S4-3=OFF S4-3=OFF... -
Page 29: Dehumidification
After the thermostat is satisfied, the compressor is link https://form.jotform.com/213003790255044, also available de-energized and the control starts a blower 60 sec off delay. on www.dettson.com. 8.7 FAN ON MODE If the thermostat fan switch is moved to the ON position, the... -
Page 30: What To Do If You Smell Gas
9.1 WHAT TO DO IF YOU SMELL and water. Grease spots can be removed with a household cleaning agent. It is important that you conduct periodic physical inspections of your appliance, paying special attention to the gas burner WARNING and the flue outlet from the furnace. These components are located on the front of the unit. -
Page 31: Rollout Switch
10.4 ROLLOUT SWITCH 10.5 SAFETY INTERLOCK SWITCH This unit is equipped with a manual reset high temperature sensor or rollout switch. In the unlikely event of a sustained The blower compartment door on your high efficiency gas burner flame rollout, the rollout switch will shut off the flow of furnace is equipped with a safety interlock switch that will gas by closing the gas valve. - Page 32 Figure 31 – Dimensions...
- Page 33 Figure 32 – Two Stage ECM Wiring diagram...
-
Page 34: Furnace Specification
FURNACE SPECIFICATION Furnace model: ........... . Serial number: . -
Page 35: Table 25: Error Codes
Table 25 – Error Codes Green Amber Erreur/Conditions Comments/Troubleshooting FLash Flash Flash Furnace doesn’t operate. Control Door switch is defective or open. There is no board LED’s are off. 120V to the board. Flame sense when no flame should Verify the gas valve is operating and shutting be present. - Page 36 Figure 33 – Exploded view Cxx-2-V part 1...
- Page 37 Figure 34 – Exploded view Cxx-2-V part 2...
-
Page 38: Table 26: Part List Cxx-2-V
Table 26 – Part List CXX-2-V DESCRIPTION C15-2-V C30-2-V C45-2-V C60-2-V C75-2-V C105-2-V C120-2-V Left panel ass. B40509-01 B40509-01 B40509-01 B40509-01 B40509-01 B40509-01 B40509-01 Blower ass. B40604-01 B40604-02 B40604-03 B40604-04 B40604-05 B40604-07 B40604-08 Back panel ass. B40511-01 B40511-01 B40511-01 B40511-02 B40511-02 B40511-03 B40511-03...
Need help?
Do you have a question about the Chinook C15-2-V and is the answer not in the manual?
Questions and answers