Table of Contents
Advertisement
Quick Links
TRANSLATION OF THE ORIGINAL INSTRUCTIONS
We advise you to read this manual carefully, which contains all the instructions for
maintaining the appliance's aesthetic and functional qualities.
For further information on the product: www.smeg.com
Contents
4
4
7
7
7
8
8
8
9
9
9
10
11
11
12
15
15
15
15
16
17
17
17
19
20
22
3
Advertisement
Table of Contents

Related Manuals for Smeg Classic SA661X2


Summary of Contents for Smeg Classic SA661X2
-
Page 1: Table Of Contents
5.4 Electrical connection 5.5 Instructions for the installer TRANSLATION OF THE ORIGINAL INSTRUCTIONS We advise you to read this manual carefully, which contains all the instructions for maintaining the appliance’s aesthetic and functional qualities. For further information on the product: www.smeg.com... -
Page 2: Instructions
Instructions 1 Instructions • Cleaning and maintenance must not be carried out by unsupervised 1.1 General safety instructions children. Risk of personal injury • Be aware of how rapidly the cooking zones heat up. Do not let • During use the appliance and its pans heat up when dry, as there is accessible parts become very hot. - Page 3 Instructions • DO NOT USE AEROSOLS IN Risk of damaging the appliance THE VICINITY OF THIS • Do not use abrasive or corrosive APPLIANCE WHILST IT IS IN detergents (e.g. scouring USE. powders, stain removers and • Switch off the appliance metallic sponges) on glass parts.
- Page 4 Instructions • Take care not to spill acid • To avoid potential overheating, the substances such as lemon juice or appliance must not be installed vinegar on the hob. behind a decorative door or a panel. • Do not spill sugar or sweet mixtures on the hob during •...
-
Page 5: Appliance Purpose
Instructions • Activate the controls lock when 1.4 Disposal you have children or pets which This appliance must be disposed of could reach the hob. separately from other waste (Directives 2002/95/EC, 2002/ • After use the cooking zones 96/EC, 2003/108/EC). The appliance remain hot for a certain period of does not contain substances in quantities time after they have been turned... -
Page 6: Identification Plate
Instructions 1.7 How to read the user manual Our appliances are packaged in non- polluting and recyclable materials. This user manual uses the following reading • Deliver the packing materials to the conventions: appropriate recycling centre. Instructions Plastic packaging General information on this user Danger of suffocation manual, on safety and final disposal. -
Page 7: Description
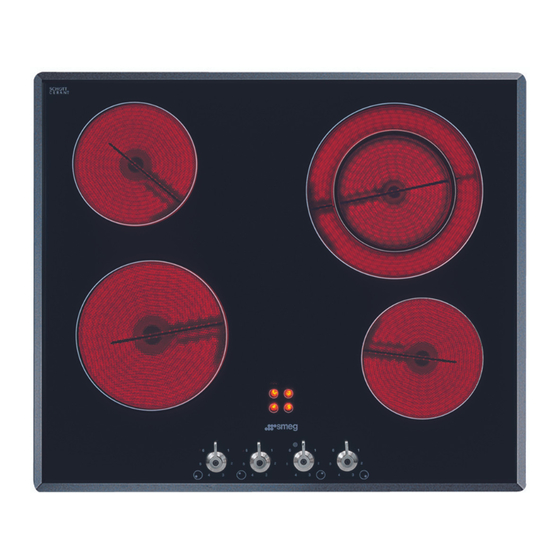
Description 2 Description The cooking zones are of the HIGH-LIGHT type, they turn on after a few seconds and 2.1 General Description the heating is adjustable using the controls on the front panel. The appliance features cooking zones with The cooking zones with two concentric various diameters and power levels rings allow dual heating: either the inner depending on the model. -
Page 8: Symbols
Description 2.3 Symbols Knobs Press and turn the knob clockwise or anticlockwise to increase or decrease the power level of the cooking zone from 1 to a maximum of 6. If the symbol is present, the knob the dual heating zone. controls Cooking zones Front left... -
Page 9: Use
3 Use Improper use Risk of damage to surfaces High temperature Danger of burns • Do not use the hob if the pyrolytic cycle is taking place inside any oven installed • Protect your hands by wearing heat- below. proof gloves during use. •... -
Page 10: Using The Cooking Hob
3.2 Using the cooking hob Switching off the cooking zones To switch off the cooking zones, turn the Switching on the cooking zones corresponding knobs to The appliance has cooking zones of different diameters and power levels. Dual heating zones Their positions and the edges of the To switch on the dual heating zones, heated area are shown by the markings... - Page 11 • When buying a saucepan, check Residual heat whether the diameter indicated is that of Improper use the base or the top of the container, as Danger of burns the top is almost always larger than the base. • Children cannot readily see the residual •...
- Page 12 Cooking information table Power Cooking mode Suitable for... level OFF setting Cooking small amounts of food (minimum Melting butter, chocolate or similar power) products. Keeping small amounts of water on the Cooking small amounts of food boil, whipping up sauces with egg yolk or butter.
-
Page 13: Cleaning And Maintenance
Cleaning and maintenance 4 Cleaning and maintenance 4.2 Ordinary weekly cleaning Clean and maintain the hob once a week Improper use using an ordinary glass cleaning product. Risk of damage to surfaces Always follow the manufacturer’s instructions. The silicon in these products creates a protective, water-repellent •... -
Page 14: What To Do If
Cleaning and maintenance 4.4 What to do if... Dirt which may have fallen on the hob while cleaning lettuce or potatoes can The hob does not work: scratch the hob when moving pans. • Make sure that the hob is connected and Consequently, remove any dirt from the that the main switch is turned on. -
Page 15: Installation
Installation 5 Installation 5.2 Section cut from the countertop The following operation requires 5.1 Safety instructions building and/or carpentry work Heat production during appliance and must therefore be carried out operation by a competent tradesman. Risk of fire Installation can be carried out on various materials such as masonry, •... - Page 16 Installation Hob seal 2. Then turn them upwards to fix them in place. To prevent leakage of liquid between the frame of the hob and the countertop, place the adhesive seal provided along the entire outer edge of the hob before assembly. Fixing brackets •...
-
Page 17: Mounting
Installation 5.3 Mounting On top of an empty kitchen unit or drawers Over built-in oven unit If there are other pieces of furniture (lateral The clearance between the hob and the walls, drawers, etc.), dishwashers or fridges kitchen furniture or other installed under the hob, a double-layer wooden appliances must be enough to ensure base must be installed at least 20 mm from... -
Page 18: Electrical Connection
Installation 5.4 Electrical connection Connection with plug and socket Make sure that the plug and socket are of Power voltage the same type. Danger of electrocution Avoid using adapters and shunts as these could cause overheating and a risk of •... - Page 19 Installation If the cable is replaced, the appliance can Fixed connection also function in the following modes: Fit the power line with an omnipolar circuit • 380-415 V 2N~ breaker in compliance with installation regulations. The circuit breaker should be located near the appliance and in an easily reachable position.
-
Page 20: Instructions For The Installer
Installation 5.5 Instructions for the installer • Do not bend or trap the power cable. • The appliance must be installed according to the installation diagrams. • If the appliance does not work correctly after having carried out all the checks, contact your local Authorised Service Centre.
Need help?
Do you have a question about the Classic SA661X2 and is the answer not in the manual?
Questions and answers