Table of Contents
Advertisement
Quick Links
Instruction Manual
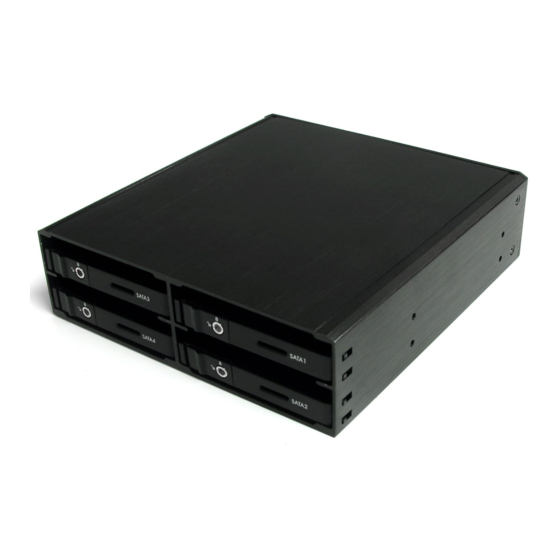
4 Drive Removable 2.5in SATA/SAS Backplane
Dual 2.5in SATA/SAS Removable Hard Drive + Slim Optical Drive Backplane
SATSAS425BK
SATSAS225ODD
DE: Bedienungsanleitung - de.startech.com
FR: Guide de l'utilisateur - fr.startech.com
ES: Guía del usuario - es.startech.com
IT: Guida per l'uso - it.startech.com
NL: Gebruiksaanwijzing - nl.startech.com
PT: Guia do usuário - pt.startech.com
Packaging Contents
• 1 x 5.25in bay backplane
• 1 x SATA to LP4 Molex power cable
• 1 x Set of keys
• 1 x Package of mounting screws
• 1 x Instruction Manual
System Requirements
• Computer case with available 5.25in front bay
• Available SATA or LP4 Molex power connector from power supply
• Internal SATA or SAS controller
NOTE: SATA drives can be used on SATA or SAS controllers, but SAS
drives can only be used on SAS controllers
• SFF-8087 mini-SAS cable
• 7-pin SATA cable (SATSAS225ODD only)
SATSAS225ODD
For the most up-to-date information, please visit: www.startech.com
SATSAS425BK
Installation
5.25in Backplane
1. Turn your computer off and any peripherals connected to the
computer (i.e. Printers, external hard drives, etc.). Unplug the
power cable from the rear of the power supply on the back of the
computer and disconnect all peripheral devices.
2. Remove the cover from the computer case, including any covers
for the 5.25in front bay. Refer to documentation for your computer
system for details.
3. Insert the 5.25in backplane into the front bay. Align the mounting
holes along the sides of the backplane, with the mounting points
of the computer case's 5.25in bay.
4. Fasten the backplane to the computer case (see documentation
for the computer case for details).
5. Connect an available LP4 Molex power connector from the system
power supply to the rear of the backplane.
*actual product may vary from photos
NOTE: If the computer system only has SATA power connectors, use
the included SATA to LP4 Molex adapter cable.
6. Connect an SFF-8087 cable into the rear of the backplane and
connect the other end to the SATA or SAS controller.
7. SATSAS225ODD: To use the optical drive bay, connect an
additional SATA 7-pin cable from the rear of the backplane to a
SATA controller port.
8. Place the cover back onto the computer case.
9. Insert the power cable into the socket on the power supply and
reconnect all other connectors removed in Step 1.
*actual product may vary from photos
Manual Revision: 06/07/2011
Advertisement
Table of Contents

Subscribe to Our Youtube Channel
Related Manuals for StarTech.com SATSAS225ODD


Summary of Contents for StarTech.com SATSAS225ODD
-
Page 1: Packaging Contents
• 1 x Set of keys • 1 x Package of mounting screws • 1 x Instruction Manual System Requirements • Computer case with available 5.25in front bay • Available SATA or LP4 Molex power connector from power supply • Internal SATA or SAS controller NOTE: SATA drives can be used on SATA or SAS controllers, but SAS drives can only be used on SAS controllers • SFF-8087 mini-SAS cable • 7-pin SATA cable (SATSAS225ODD only) SATSAS225ODD For the most up-to-date information, please visit: www.startech.com SATSAS425BK Installation 5.25in Backplane 1. Turn your computer off and any peripherals connected to the computer (i.e. Printers, external hard drives, etc.). Unplug the power cable from the rear of the power supply on the back of the computer and disconnect all peripheral devices. 2. Remove the cover from the computer case, including any covers for the 5.25in front bay. Refer to documentation for your computer system for details. 3. Insert the 5.25in backplane into the front bay. Align the mounting holes along the sides of the backplane, with the mounting points of the computer case’s 5.25in bay. -
Page 2: Specifications
Optical Drive (SATSAS225ODD only) 1. Remove the cover for the optical bay on the backplane 2. Firmly insert the Slimline SATA optical drive into the bay until it makes contact. Hard Drive Tray 1. Ensure the drive tray is unlocked (key turned counter clockwise). 2. Slide the door release latch to open the release arm, and pull the tray out of the bay. 3. Secure the 2.5in hard drive to the tray from the bottom with the provided mounting screws. 4. Slide the drive tray back into the bay and close the release arm. 5. Lock the drive tray (key turned clockwise). Specifications Drive Bays Host Interface External Connectors LEDs Fans Compatible Hard Drives Insertion Rating Key Lock Temperature Alarm Enclosure Material Operating Temperature Storage Temperature Humidity Dimension (LxWxH)
Need help?
Do you have a question about the SATSAS225ODD and is the answer not in the manual?
Questions and answers