Table of Contents
Advertisement
Quick Links
HOFFRICHTER GmbH
Mettenheimer Strasse 12 / 14
19061 Schwerin
Germany
Phone: +49 385 39925 - 0
Fax:
+49 385 39925 - 25
E-mail:
info@hoffrichter.de
www.hoffrichter.de
TREND III _ I Klinik ENG_2022-01-18_4.0
5
0
0
0
0
7
6
7
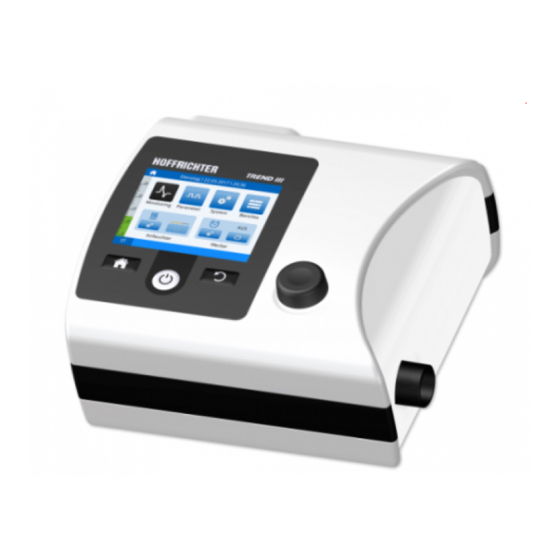
TREND III
Respiratory therapy device
User's manual
for physicians and medical professionals
valid for:
TREND III CPAP (device type 5CPD20, 5CPD21)
TREND III BILEVEL S (device type 5CPD40, 5CPD41)
TREND III BILEVEL ST (device type 5CPD30, 5CPD31)
TREND III AutoCPAP (Gerätetyp 5CPD10, 5CPD11)
TREND III AutoBILEVEL S (device type 5CPD60, 5CPD61)
TREND III AutoBILEVEL ST (device type 5CPD50, 5CPD51)
from device software 2.01
Advertisement
Table of Contents

Related Manuals for Hoffrichter TREND III CPAP


Summary of Contents for Hoffrichter TREND III CPAP
- Page 1 User’s manual for physicians and medical professionals valid for: TREND III CPAP (device type 5CPD20, 5CPD21) TREND III BILEVEL S (device type 5CPD40, 5CPD41) TREND III BILEVEL ST (device type 5CPD30, 5CPD31) TREND III AutoCPAP (Gerätetyp 5CPD10, 5CPD11) TREND III AutoBILEVEL S (device type 5CPD60, 5CPD61) TREND III AutoBILEVEL ST (device type 5CPD50, 5CPD51) from device software 2.01...
- Page 3 ©2022 HOFFRICHTER GmbH All rights reserved. The content published in this user’s manual is the sole property of HOFFRICHTER GmbH. All forms of reproduction, editing, distribution and use of any kind, even in part, require the prior written consent of HOFFRICHTER GmbH.
- Page 4 Serial number Every HOFFRICHTER GmbH device is supplied with a serial number for traceability purposes. Please enter your device’s serial number here. You will find the serial number on the rat- ing plate on the bottom of the device..........
-
Page 5: Table Of Contents
Contents Chapter 1 ..................11 Introduction ......................11 Scope of delivery ...................... 12 Symbols ........................13 Intended use ......................17 User qualification ..................... 20 Chapter 2 ..................21 Safety Information ....................21 General safety instructions ..................22 Installation requirements and transport ..............25 Instructions before commissioning ................ - Page 6 Chapter 5 ..................57 Therapy Modes ..................... 57 CPAP mode ......................58 APAP mode ......................59 T mode ........................60 ST mode ........................62 S mode ........................63 A-S mode (auto S mode) ..................64 Chapter 6 ..................65 Operating the Device .................... 65 Menu structure (clinic mode) ..................
- Page 7 Maintenance work ....................106 Troubleshooting ..................... 107 Device technical specifications ................108 Data management ....................109 Error messages ....................... 110 Technical data ......................111 Measured values ....................115 Setting ranges and control precision ............... 116 Factory settings ...................... 119 Replacement parts and accessories ................ 122 Manufacturer’s declaration on electromagnetic compatibility .........
- Page 8 List of figures Figure 1: Rating plate (example) ..............14 Figure 2: Top of device ................... 30 Figure 3: Bottom of device ................31 Figure 4: Rear of device ................. 32 Figure 5: Setting up the device ............... 38 Figure 6: Mains connection via power supply unit ..........
- Page 9 Figure 41: Reports screen in home mode: Indicators ........87 Figure 42: Reports screen in home mode: Therapy ........... 87 Figure 43: Filter cassette structure ..............100 Figure 44: Block diagram for the device ............108 Figure 45: Pneumatic block diagram .............. 109 List of figures...
- Page 10 List of figures...
-
Page 11: Chapter 1
Chapter 1 Introduction Chapter 1: Introduction... -
Page 12: Scope Of Delivery
Scope of delivery Figure Name Respiratory therapy device TREND III Power supply FUHUA ELECTRONIC CO., LTD. - UES65- 240270SPA1 Mains cable Leakage tube circuit (L = 180 cm, ∅ 22 mm) Carrying case Respiratory therapy device User’s manual for patients User’s manual for patients TREND III... -
Page 13: Symbols
Symbols Symbols on the packaging Symbol Meaning European Article Number Article number Serial number CE mark and number from the notified body. The medical device complies with the applicable regulations of EU 93/42/EEC for medical products. Transport and store package with arrows pointing up at all times. Fragile contents Protect from moisture! Do not use if packaging is damaged. -
Page 14: Figure 1: Rating Plate (Example)
TREND III AutoBILEVEL ST Type: 5CPD31 M a d e i n G e r m a n y DC-Input SN : max. 2.7 A DFmyyxxxxx HOFFRICHTER GmbH Mettenheimer Str. 12/14 IP22 19061 Schwerin Germany Figure 1: Rating plate (example) Symbol Meaning Follow the instructions in the user’s manual. - Page 15 Symbols on the device Symbol Meaning Connections DC connection USB interface and Micro-USB interface Control Home key Escape key On/off key Chapter 1: Introduction...
- Page 16 Symbols used in this user’s manual Important information is denoted by symbols in this user’s manual. Please ensure that you follow these instructions in order to prevent accidents, personal injury and mate- rial damage. In addition, the local accident prevention regulations and general safety regulations in force in the area of use must be observed.
-
Page 17: Intended Use
Intended use The device "TREND III" is used for non-invasive pressure-controlled breathing support. The device is suitable for the treatment of obstructive sleep apnea in patients over 30 kg, especially when required by higher pressures and / or forms of respiratory failure. Therapy pressure is administered via a breathing mask, which must be equipped with a passive exhalation valve to ensure exhalation air discharge. - Page 18 The following therapy modes are available with the TREND III, depending on the device type. Overview of the device types and modes Typ / Modus CPAP APAP TREND III CPAP • TREND III AutoCPAP • • TREND III BILEVEL S •...
- Page 19 Combination of spontaneous breathing and controlled breathing (timed) - if the patient is capable of breathing on their own, the device works in S mode. If the patient is no longer able to breathe spontaneously, the device automati- cally enters T mode and ventilates the patient with the set frequency. The mode is switched to T mode after a set delay time lapses.
-
Page 20: User Qualification
Side effects Administering respiratory therapy may result in undesired side effects. Causes for side effects can include improper therapy settings, incorrect use or non-compliance with clean- ing instructions. Generally the side effects go away after the cause has been eliminated. You will find suitable countermeasures for several side effects on see also page 107. -
Page 21: Chapter 2
Chapter 2 Safety Information Chapter 2: Safety Information... -
Page 22: General Safety Instructions
General safety instructions Risk of injury due to incorrect device settings! • Only qualified, trained, specialist medical staff under the specification of a physician may make adjustments to the respiratory therapy device. • Please be sure to check the therapy parameter settings after all servicing work. - Page 23 • For the operation of the device only the supplied power adapter may be used. Accessories or power supplies that have not been approved by HOFFRICHTER GmbH for this respiratory therapy device can lead to increased emission of electromagnetic radiation, reduced immunity to interference or increased patient leakage current.
- Page 24 • Do not try to open the device or the power supply unit. Maintenance and repairs may only be performed by personnel authorised by HOFFRICHTER GmbH. • Do not touch live parts of the mains cable or power supply unit if defective. Replace a defective mains cable/power supply unit.
-
Page 25: Installation Requirements And Transport
Installation requirements and transport Risk of injury due to insufficient air supply! The device must not be covered or positioned in a way that impairs its operation or function. Ö Do not place the device near curtains that prohibit the flow of cooling air and thus can cause the device to overheat. -
Page 26: Instructions Before Commissioning
Instructions before commissioning Risk of injury due to incorrect pressure measurement! Atomisation or humidification can increase the resistance of respiratory system filters. The operator must regularly check the respiratory system filter for increased resistance and blockages to ensure the therapeutic pressure is generated. •... -
Page 27: Using Oxygen
IT network. • In the event of a cybersecurity-related accident, contact HOFFRICHTER Service if a HOFFRICHTER device is involved. Chapter 2: Safety Information... - Page 28 Chapter 2: Safety Information...
-
Page 29: Chapter 3
Chapter 3 Description of Device Chapter 3: Description of Device... -
Page 30: Top Of Device
Top of device Figure 2: Top of device Display Housing panel Cover when the device is operated without a humidifier. Connection leakage tube circuit / integrable humidifier The leakage tube circuit is connected here. Multifunction knob MFK The multi-function button is used for menu navigation, parameter configuration and other operating actions. -
Page 31: Bottom Of Device
BILEVEL ST Type: 5CPD30 M a d e i n G e r m a n y DC-INPUT SN : max. 3.75A DDA1700011 HOFFRICHTER GmbH Mettenheimer Str. 12/14 IP22 19061 Schwerin Germany Figure 3: Bottom of device Rating plate 1 With finishing of the current therapy start function, the regular therapy begins. -
Page 32: Rear Of Device
Rear of device Figure 4: Rear of device Micro-USB connection (PC connection) Here, you can connect a PC using a Micro-USB 2.0 cable. In order to be able to com- municate with the device, the PC software "easySET" must be installed on the PC. Please note: Only devices that meet standards IEC 60601-1 and IEC 60950-1 may be connected. - Page 33 Explanation of symbols on the home screen Symbol Meaning Humidifier heating is on → Level 1 lowest heating level → Level 5 highest heating level Humidifier heating is in standby Humidifier heating is off Humidifier error Humidifier is not connected Alarm Clock on Alarm Clock off 1 You can find more detailed information in the instructions for use of the AquaTREND III-NG...
- Page 34 Explanation of the toolbar icons Symbol Meaning Clinic mode active Home mode active PC is connected via the Micro-USB port, connection to "easySET" available USB stick is connected When warnings occur, no sound is emitted. There are currently device errors. A list of these errors can be called up in the sys- tem menu via the "Show Device Errors"...
- Page 35 Explanation of symbols on the pressure bar Symbol Meaning Spontaneous breathing detected The device has detected spontaneous breathing by the patient. This triggered the inspiration trigger. The symbol will remain visible during inspiration and will shut off with the beginning of the expiration. Safety cycle active The patient is not breathing spontaneously.
- Page 36 Chapter 3: Description of Device...
-
Page 37: Chapter 4
Chapter 4 Commissioning Chapter 4: Commissioning... -
Page 38: General Information
• Never operate the device without the air filter. • Only use original HOFFRICHTER filters. • If the device was previously in an environment where the air temperature was not the same as in the new operating location, allow approximately 1 hour until the temperatures have evened out before commissioning. -
Page 39: Power Supply
Power supply The respiratory therapy device can be supplied with power via two different sources: • Mains connection via power supply unit • Battery operation with an external battery (optional accessory) The device can be connected to a power source continuously without posing a risk. Mains operation via power supply unit Connect the device to the mains supply as follows: A Socket B Mains cable C Power supply unit D DC plug E DC connector socket... -
Page 40: Figure 7: Start Screen
4. The device boots. Booting... SW-Version x.xxx TREND III CPAP A Loading bar B Status C Software version Figure 7: Start screen After boot-up, the display switches to the home screen. The device requires up to 1 minute to boot before it is ready for use. -
Page 41: Connect Bluetooth Adapter
Connect Bluetooth adapter For the respiration therapy device to be connected to the "TRENDapp" patient app, a connection must be established via Bluetooth. A Bluetooth adapter B USB interface Figure 8: Connect Bluetooth adapter Plug the Bluetooth adapter into the USB interface. The connection is then automatically established between the adapter and the device. -
Page 42: System Structure
System structure Danger of suffocation! Use masks and accessories with the device in order to ensure the therapeutic pressure is generated and to reduce rebreathing of CO to a minimum. Ö Only use masks with exhalation valves and suitable accessories. During respiratory therapy, the user must always be able to exhale. -
Page 43: Figure 10: Connecting Aquatrend Iii-Ng
Operation with humidifier AquaTREND III-NG Risk of infection due to germs! Condensation of water in the tube circuit can result in germ formation. Ö Increase the room temperature, reduce the heat output of the humidifier or use heated tubes. Please note: Before using the AquaTREND III-NG, be sure to read the instructions for use of the humidifier AquaTREND III-NG, including the safety and cleaning instructions. - Page 44 4. Connect the leakage tube to the tube connection on the humidifier. When con- necting a heated tube, make sure that you place the contacts without twisting or canting. The heated tube Comfort Tube System can be found under „Accesso- ries“...
- Page 45 Overview of humidifier parameters Parameter Setting range Description Heating level Setting the heating level for the humidifier 1 – 5 → Level 1 lowest heating level → Level 5 highest heating level Brightness LED Brightness setting for the status-LED in the humidifier 0 –...
-
Page 46: Figure 11: Disconnecting Aquatrend Iii-Ng From The Device
Disconnecting the humidifier from the device Figure 11: Disconnecting AquaTREND III-NG from the device 1. Make sure that therapy has been switched off. 2. Disconnect the tube circuit from the humidifier. 3. Press the humidifier release button and remove the humidifier from the device. Chapter 4: Commissioning... -
Page 47: Calibrating The Tube Circuit
Calibrating the tube circuit Risk of injury due to incorrect pressure measurement! Atomisation or humidification can increase the resistance of respiratory system filters. The operator must regularly check the respiratory system filter for increased resistance and blockages to ensure the therapeutic pressure is generated. Ö... - Page 48 4. If the calibration was not successful, “Error” Tuesday l 22.03.2017 l 20:36 will appear. Calibrate Tube Error 100 l/min In the event of an error, check the entire sys- tem. Resistance in the overall system may be too high. Then rerun the calibration. Press the MFK to continue If you do not perform a tube calibration, the calibration data from the last tube calibra- tion are used.
-
Page 49: Figure 12: Connecting The Bacterial Filter
Connecting additional accessories Connecting the bacterial filter If the device is intended for use by more than one patient (e.g., in operation in clinics), a suitable bacterial filter (e.g., Medisize Barr-vent S) should be used continuously to pro- tect the device from contamination by human pathogens. Please note: •... -
Page 50: Figure 13: Connecting A Pc
• Service functions (only available to authorised service staff) Please note: • Only the HOFFRICHTER “easySET” PC software may be used to exchange data with the device. • The software itself does not control the device or other devices on IT networks, and does not affect the performance of the device directly. -
Page 51: Figure 14: Inserting A Usb Stick
Using a USB stick To be able to pass on therapy data, you can copy the data to a USB stick. Please note: We recommend using USB sticks with a minimum of 8 GB memory. In order to be able to use a USB stick, the USB stick may have to be formatted before- hand. -
Page 52: Figure 15: Nserting A Usb Stick
Format the USB stick as follows: 1. Insert the USB stick into the USB connection on the rear of the device. then appears on the toolbar. Figure 15: nserting a USB stick 2. On the home screen, navigate to “System” and press the MFK. 3. -
Page 53: Using Oxygen
Using oxygen Risk of fire and burning! Oxygen sources should be placed at least 1 m away from the device to prevent a risk of fire and burning. Please note: • Before using oxygen, read the safety instructions from see also page 27. •... -
Page 54: Switching The Device On And Off
Supplying oxygen via an adapter Connect the oxygen supply as follows: source B Tube as per EN ISO 5359 C CPAP mask D Leakage tube E Adapter O supply safety valve Figure 17: Supplying oxygen via an adapter Starting the supply of oxygen 1. -
Page 55: Beginning Therapy
Beginning therapy 1. Put on the mask. 2. Press the on/off key. If the mask test and soft start are not enabled, therapy begins with the set therapeutic pressure. 3. If the mask test is enabled, the device starts with the set max. therapeutic pressure for the set time (0 –... - Page 56 Chapter 4: Commissioning...
-
Page 57: Chapter 5
Chapter 5 Therapy Modes Chapter 5: Therapy Modes... -
Page 58: Cpap Mode
Depending on the device type, TREND III features the following therapy modes: Mode CPAP APAP Device type TREND III CPAP • TREND III AutoCPAP • • TREND III BILEVEL S • • TREND III BILEVEL ST • • • • TREND III AutoBILEVEL S •... -
Page 59: Apap Mode
APAP mode Automatic positive airway pressure Main features • Automatic adjustment of the therapeutic pressure (CPAP) • Pressure controlled • Independent respiration APAP mode is an extension to CPAP mode and offers the additional function of automatic adjustment to the therapeutic pressure (CPAP) within specific limits. When obstructive events are detected , the pressure is increased until the airways are almost completely open or the upper pressure limit has been reached. -
Page 60: T Mode
T mode Main features • Pressure controlled • Device or patient triggered • Time controlled • Spontaneous breathing possible when trigger function enabled In this therapy mode, therapy is controlled exclusively by the device when the trigger function is disabled. Spontaneous breathing on the patient’s part is not possible. The ventilation period is based on the set frequency and a defined I:E ratio. -
Page 61: Figure 24: Diagram Of T Mode With Trigger Function
p (hPa) IPAP EPAP Ⓐ Ⓐ Ⓜ Ⓜ Ⓐ t (s) spontaneous breathing Ⓜ Mandatory ventilation Ⓐ Pressure controlled supported ventilation IPAP = 20 hPa EPAP = 8 hPa I:E = 1:2 IPAP = 20 hPa EPAP = 8 hPa I:E = 1:1 (2 s : 2 s) (2 s : 4 s) f = 10 bpm f = 15 bpm Figure 24: Diagram of T mode with trigger function... -
Page 62: St Mode
ST mode Main features • Pressure supported • Device or patient triggered • Flow controlled • Background frequency • Spontaneous breathing possible If the patient is capable of breathing on their own, the device works in S mode. If the patient is no longer able to breathe spontaneously, the device automatically enters T mode and ventilates the patient with the set frequency. -
Page 63: S Mode
S mode Main features • Pressure supported • Patient triggered • Flow controlled • Device only responds to spontaneous breathing • Apnoea sound The transition from the EPAP to the IPAP is triggered by the patient’s spontaneous breath- ing alone. The pressure is decreased to the EPAP when the inspiration flow ends. In addi- tion, a safety frequency can be activated. -
Page 64: A-S Mode (Auto S Mode)
A-S mode (auto S mode) Main features • Automatic adjustment of therapy pres- • Flow controlled sure (IPAP and EPAP) • Device only responds to spontaneous • Pressure supported breathing • Patient triggered • Apnoea sound Auto-S mode is an extension of S mode and offers the additional function of automatic adjustment of therapy pressure (IPAP and EPAP) within certain limits. -
Page 65: Chapter 6
Chapter 6 Operating the Device Chapter 6: Operating the Device... -
Page 66: Menu Structure (Clinic Mode)
Menu structure (clinic mode) Start screen Booting... TREND III CPAP SW-Version x.xxx Home screen Humidifier settings Alarm Clock settings Tuesday l 22.03.2017 l 20:36 Tuesday l 22.03.2017 l 20:36 Tuesday l 22.03.2017 l 20:36 Level Heater Alarm Clock Brightness LED... -
Page 67: User Profiles
User profiles The device can be operated in two different profiles - clinic and home The currently active user profile is shown on the toolbar. You can set the user profile on the system screen. Tuesday l 22.03.2017 l 20:36 Notification Sound Time Screen Change 2 min... -
Page 68: Changing The Pin Code
Changing the PIN code You can change the PIN code for changing the user profile via the start screen: 1. On the system screen, navigate to “Change Tuesday l 22.03.2017 l 20:36 PIN” and press the MFK. User Profile Clinic Mask Type Pressure Unit Volume Unit... -
Page 69: Home Screen
Home screen You can enable these screens from the home screen: • Monitoring screen Monitoring measurements (numerical) • Parameter screen Setting the therapy parameters • System screen System settings, calibrations, counters and device information • Report screen Therapy analyses In addition, you can switch the humidifier heating and alarm clock on and off as well as open the corresponding settings on the home screen. -
Page 70: Figure 33: Standby Screen
To enable a screen: 1. Navigate to the desired screen by turning Tuesday l 22.03.2017 l 20:36 the MFK. Selected screen symbol Monitoring Parameter System Reports → black 09:25 Symbol not selected Humidifier Alarm Clock → blue 2. Press the MFK to activate the selected screen. Changing the display mode In the factory state, the screen switches automatically 2 minutes after the last operation to the home... -
Page 71: Monitoring Screen
Monitoring screen In the monitoring screen, the therapy parameters are shown in real time. Depending on the configuration, the following therapy parameters are shown: • Pressure (p), • Volume (V • Frequency (f) • Leak rate (l/min) • Inspiration to expiration ratio (I:E) Tuesday l 22.03.2017 l 20:36 14,8 0,570... - Page 72 Figure 34 depicts the default configuration as per factory settings. You can configure the measurement for each measurement box. To configure the measured values: 1. Navigate to “Monitoring” on the home screen and press the MFK. 2. Navigate to the measurement box you want Tuesday l 22.03.2017 l 20:36 to configure.
-
Page 73: Parameter Screen
Parameter screen The parameter screen is split up into “comfort” and “therapy”. In the “Comfort” area, you will find comfort parameters, such as Soft Start Time, Soft Start Init. Pressure, Mask Test and Stop Automatic Delay. These can be enabled in both clinic mode and home mode and are intended to provide comfortable therapy. - Page 74 Overview of therapy parameters Parameter Setting range Description • • The pressure is the CPAP mode Pressure therapy pressure, which is applied 4 – 20 hPa to the patient continuously. In APAP mode, this determines the start pressure of the therapy. •...
- Page 75 Parameter Setting range Description • • In T mode, setting the frequency sets Frequency a fixed breathing rate for the machine 4 – 30 bpm (trigger off). In ST mode as well as T mode (trigger on), the set frequency is defined as the minimum frequency, which can be increased by sponta- neous breaths of the patient.
- Page 76 Parameter Setting range Description • • • The "Ti Min” setting defines the mini- Ti Min mum inspiration time so that a pre- Off; 0.4 - 5 s mature switchover to the expiration phase is prevented. • • • • The I-Slope determines the pressure I-Slope increase at the outset of an inspira-...
- Page 77 Parameter Setting range Description • • • • The inspiration trigger is a volume Inspiration Trigger trigger. It specifies the inspiration Auto; Level 1 – 10 efforts of patient required to obtain pressure or volume support from the Thresholds: ventilator in the case of spontaneous breathing.
- Page 78 Parameter Setting range Description • • • To safeguard the minimum volume, Additional Pressure the IPAP is increased to the set addi- – 10 hPa tional pressure in gradual steps of [Additional Pressure max. 2 hPA per breath. The additional ≤...
- Page 79 Overview of comfort parameters Parameter Setting range Description The duration of the soft start can be set here. Soft Start Time Off, 1 – 60 min Fixed pressure difference between IPAP and EPAP. Fixed Pressure Difference On, Off Initial pressure for soft start Soft Start Init.
- Page 80 Warning parameter overview Parameter Setting range Description • • • • • • The setting determines the time when Disconnection the mask warning is triggered after Off; 0 - 60 s disconnection of the tube system. • • This setting defines the time after Apnoea Warning which the notification "Apnoea"...
- Page 81 Parameter Setting range Description • • • • • • If the measured pressure is lower Low Pressure Tolerance than the set pressure minus the set- 1 – 10 hPa ting “Low Pressure Tolerance”, the “Low pressure” message is issued. Changing comfort or therapy parameters Change a comfort or therapy...
-
Page 82: System Screen
System screen On the system screen, you will find all general device system settings. Here, you can change basic settings such as the date, time, language or Notification Sound. The Noti- fication Sound can be set "On" or "Off". In addition, you will also find the functions for copying therapy data ("Copy data"), for- matting a USB stick ("Format USB stick") or tube calibration ("Calibrate tube") here along with other functions. - Page 83 Overview of system parameters Can be Parameter changed Setting range Description (Home mode) Calibrate Tube Calibrating the connected tube circuit Copy data Copying data to the USB stick Format USB Flash Drive Cleaning the USB stick and preparing it for data If device errors occur during booting or during ope- ration, these are indicated by the symbol in the...
- Page 84 Can be Parameter changed Setting range Description (Home mode) Setting – which standby screen will be shown Clock: Black: 06:30 12:32 Standby Screen Black, Clock Thursday, 23.02.2017 Any symbols and notes are shown both on the black screen and on the standby screen with the clock. Brightness Display ...
- Page 85 Can be Parameter changed Setting range Description (Home mode) Hours during which the device was connected to the Operating Counter – mains or operated with external battery Period after which the device has to be serviced for Blower Service in –...
-
Page 86: Figure 38: Reports Screen In Clinic Mode: Ratings
Reports screen: Clinic mode In clinic mode, the report screen is split up into two areas: “Ratings” and “Indicators”. In the "Ratings" section you will find rating parameters such as usage, therapy quality and mask fit for a selected date. In the “Indicators”... -
Page 87: Figure 40: Reports Screen In Home Mode: Ratings
Reports screen: Home mode In home mode, the reports screen is split up into three areas: “Ratings”, “Indicators” and “Therapy”. In the "Ratings" section you will find rating parameters such as usage, therapy quality and mask fit for a selected date. In the “Indicators”... - Page 88 Navigating in the reports screen (home mode): 1. On the home screen, navigate to “Reports” and press the MFK. 2. The reports screen is divided into the “Ratings”, Tuesday l 22.03.2017 l 20:36 “Indicators” and “Therapy” areas. Ratings Indicators Therapy Period ∅...
- Page 89 Overview of therapy data on reports screen Parameter Description The day you want to view the ratings for use, therapy quality and Date mask position Useage Duration of use on the selected day Therapy Quality Colour rating of the therapy quality Mask fit Colour rating of the mask position Humidifier...
- Page 90 Overview of therapy quality The quality of the parameters therapy quality, mask fit, humidifier and Heater Tube are rated and shown by coloured symbols on the Report screen. Quality is considered as the average value for the duration of therapy: Quality indication Description The completed therapy / mask seat / humidifier is considered high-quality...
-
Page 91: Chapter 7
Chapter 7 Notifications / Messages Chapter 7: Notifications / Messages... -
Page 92: General Information
General information Sound Message Description yes/no Power failure During ongoing therapy, this can result in the user rebreath- ing expired air. After restoring the power supply, the “Power failure” message appears. You can acknowledge it by pressing the MFK. ... - Page 93 Sound Message Description yes/no Pressure Too High If the pressure is higher than the “High Pressure Toler- ance” setting, the message “Pressure Too High” appears. You can acknowledge it by pressing the MFK. Pressure Too Low If the pressure is lower than the “Low Pressure Tolerance” ...
-
Page 94: Technical Messages
Technical messages Below, you will find an overview of technical messages that could appear on the TREND III unit. If one of these messages appears, restarting the device may be the solution. If restarting does not help, contact your dealer or service staff: Message sound Message yes/no... -
Page 95: Chapter 8
Chapter 8 Cleaning and Disinfection Chapter 8: Cleaning and Disinfection... -
Page 96: Important Information
• Do not immerse the device in water or solvents. • Follow the accessory manufacturer’s instructions for cleaning and disinfection. Overview The following overview table describes the cleaning intervals of articles delivered by HOFFRICHTER. For articles by other manufacturers, please follow their cleaning instructions. Component Name Cleaning... - Page 97 Component Name Cleaning Disinfect Replace Carrying case as needed with every new patient Filter cassette as needed with every new (without filter) patient Coarse filter weekly instead of cleaning, with every new patient Fine filter monthly, if severely contaminated, or with every new patient Bacterial filter...
-
Page 98: Cleaning The Device
Cleaning the device Domestic use Clean the device once a week. To do so, proceed as follows: 1. Unplug the mains plug. 2. Wipe the device with a cloth slightly dampened with soapy water. 3. Dry the device with a cloth. Please note: Do not use chemical cleaning agents or solvents to clean the device surface. -
Page 99: Cleaning The Tube Circuit
Cleaning the tube circuit The supplied leakage tube circuit is intended for use on one patient only. It must not be used for other patients. If the device is used by only one patient, the leakage tube can be cleaned. For reasons of hygiene, clean it once a week. -
Page 100: Cleaning / Exchanging The Air Filter
Cleaning / exchanging the air filter Please notes: • If the air filter is clogged, the breathing air may be overheated. • Under certain environmental conditions, germs may form in the air filter. Observe the instructions on exchanging and cleaning it. •... - Page 101 Replacing the fine filter Replace the white fine filter monthly, or in case of heavy soiling. 1. Pull the filter cassette from the device. 2. Remove the coarse filter (black). 3. Remove the fine filter (white) and replace it with a new one. 4.
-
Page 102: Using The Device For More Than One Patient
Using the device for more than one patient If the device is intended for use by more than one patient (e.g., operation in clinics), a suitable bacterial filter (e.g. Medisize Barr-vent S) should be used continuously to pro- tect the device from contamination by human pathogens. The bacterial filter must be changed daily. - Page 103 Before using the device for another patient you must complete the following procedures: Component What action is required? Bacterial filter Replace Coarse and fine filter Replace Mask Replace or recondition according to the manufacturer’s guidelines if possible Tube circuit Replace or recondition according to the manufacturer’s guide- lines if possible Humidifier Recondition according to the manufacturer’s guidelines...
- Page 104 Chapter 8: Cleaning and Disinfection...
-
Page 105: Chapter 9
Chapter 9 Annex Chapter 9: Annex... -
Page 106: Notes For Home Therapy
Notes for home therapy Before the patient begins using the respiratory therapy device on their own, please note the following: 1. Adjust all parameters and settings for home therapy. 2. Train the patient or caretaker in the use of this device. In addition, explain which accessory equipment may be used and how to maintain and care for the device. -
Page 107: Troubleshooting
Troubleshooting Problem Possible cause Correction Nose or sinus pain, earache Sinus infection, ear infec- Stop therapy, consult doctor tion Uncomfortable feeling due Discomfort at prescribed If you suspect an error, ask the doc- to high pressure high pressures tor for help Phase for adapting to Try to relax, use or vary soft start func- pressure still not com-... -
Page 108: Device Technical Specifications
Device technical specifications Performance characteristics TREND III performance characteristics: • Pressure-controlled, mechanical support with a pressure precision of ± (2% of the full scale + 4% of the effective measurement), • Warning in case of power failure • Warning in case of excessive pressure. Please note: The performance characteristics may be affected by electromagnetic inter- ference (see section „Manufacturer’s declaration on electromagnetic compatibility“... -
Page 109: Data Management
Pneumatic block The pneumatic block is the connector unit for the leakage tube circuit and consists of the following components: Device Pressure Switch Flow resis- Air inlet Blower Humidifier Tube Mask tance Pressure Control Air outlet sensor unit Figure 45: Pneumatic block diagram Data management The device has an internal memory to record data. -
Page 110: Error Messages
Error messages Error message Cause Solution Flash Not Working No access to the flash Device must be serviced Dafault Parameter Loaded No valid parameter set avail- The device uses the default able or faulty parameter set and can con- tinue to be utilised. Eventlog File Damaged Reading of event data failed Device must be serviced... -
Page 111: Technical Data
Technical data Supply voltage Mains operation FUHUA ELECTRONIC CO., LTD. -UES65-240270SPA1 Power supply unit: Power supply unit input 100 to 240 V AC (-20%, +10%), 50 to 60 Hz Power supply unit output 24 V/ 2.7 A External battery operation 20 to 26 V (nominal voltage) / 5 A (AKKUPACK uni BASE/PLUS) Max. - Page 112 Positive airway pressure with humidifier with two pressure levels Breathing frequency a) 10 / b) 15 / c) 20 (breaths/min) inspiratory (hPa or cmH expiratory (hPa or cmH a) -0.17 a) 0.25 a) -0.05 a) 0.37 a) 0.37 µ (hPa) b) 0.02 b) 0.45 b) 0.04...
- Page 113 Specifications and performance characteristics Declared dual-number noise emis- A-rated sound pressure level sion value with humidifier (as per ISO 4871) 28.0 dB Measuring uncertainty (K) 3.2 dB A-rated sound power level 38.0 dB Measuring uncertainty (K) 3.2 dB Air filter Dimensions (W x D x H) Approx.
- Page 114 Technical requirements for accessories Bacterial filter Connections 22/15 mm cone (according to EN1281-1) Resistance < 2.3 hPa at 60 l/min Compressible volume < 66 ml Internal volume < 200 ml The manufacturer reserves the right to make technical changes without notice. Chapter 9: Annex...
-
Page 115: Measured Values
Measured values Parameter Display area Display incre- Measurement Accuracy ments Pressure 0 – 60 hPa 0.1 hPa 0.0 – 60 hPa 1.0 hPa or 5% of the measured value Pressure 0 – 40 hPa 1 hPa 0 – 40 hPa 1.0 hPa or 5% of the measured value Volume... -
Page 116: Setting Ranges And Control Precision
Setting ranges and control precision Treatment parameters Parameter Setting range Setting Accuracy increments Pressure 4 – 20 hPa 0.5 hPa 1.0 hPa or 5 % of the measured value I-FLEX Off; Low, Medium, High Maximum Pressure Incre- 1 – 3 hPa 0.5 hPa 1.0 hPa or 5 % of the measured value... - Page 117 Parameter Setting range Setting Accuracy increments Soft Start Time Off; 1 – 60 min 1 min 1 min Fixed Pressure Difference On; Off Soft Start Init. Pressure 4 – 20 hPa 0.5 hPa 0.5 hPa Mask Test Off; 5 - 90 s Start Stop Automatic Off, Start/Stop, Start Autostart Flow...
- Page 118 System parameters Parameter Setting range Setting increments Notification Sound On, Off Brightness Display 1 – 3 Language German, English and others Pressure Unit hPa, mbar, cmH Volume Unit l, ml Display Time Insp. Seconds, I:E User Profile Clinic, Home 0 – 55 s Timer Screen Change 1 - 20 min 0 –...
-
Page 119: Factory Settings
Factory settings Treatment parameters TREND III TREND III TREND III TREND III TREND III TREND III CPAP BILEVEL S BILEVEL ST AutoBILEVEL S AutoBILEVEL ST APAP Parameter Mode CPAP APAP Pressure 6 hPa 6 hPa Upper Pressure 10 hPa 20 hPa 20 hPa Limit Low Pressure... - Page 120 TREND III TREND III TREND III TREND III TREND III TREND III CPAP BILEVEL S BILEVEL ST AutoBILEVEL S AutoBILEVEL ST APAP Parameter Additional Pres- sure Soft Start Init. Pres. 4 hPa 4 hPa 4 hPa 4 hPa 4 hPa 4 hPa Soft Start Time Fixed Pressure Dif-...
- Page 121 System parameters Parameter Factory setting System Standby Screen Clock Notification Sound Date Format yyyy mm dd Delimiter Time Format 24 h Timer Screen Change 2 min Standby 10 s Standby Screen Clock Brightness Display Language English Ratings Menu Pressure Unit Volume Unit Display Time Insp.
-
Page 122: Replacement Parts And Accessories
Replacement parts and accessories Please note: Make sure to follow all general safety guidelines when using replacement parts and accessories from see also page 22. For ordering of replacement parts and accessories, please contact a HOFFRICHTER service partner. Replacement parts... - Page 123 Name Figure Article number TREND III brief instructions TREND III Brief instruction for Patients CPAP - AutoCPAP - BILEVEL S - BILEVEL ST of device software 1.000 50000769 Operator controls Display Housing panel Connection leakage tube circuit/integrable humidifier Multifunction knob MFK (MFK) Escape key on/off-key Tuesday l 22.03.2017 l 20:36...
- Page 124 Name Figure Article number Bacterial filter 00004932 Adapter for O supply 00004943 safety valve 00004947 AKKUPACK basic set (AKKUPACK uni Base + + cable + power cord + switching power supply) 00011103 TREND III AKKUPACK cable 000011105 AKKUPACK uni BASE „Respiratory therapy“ 00011101 Mains Cable 31100023...
-
Page 125: Manufacturer's Declaration On Electromagnetic Compatibility
Manufacturer’s declaration on electromagnetic compatibility TREND III complies with standard DIN EN 60601-1-2:2016-05 and is intended for use in the electromagnetic environment described in the following. Any deviating ambient conditions can affect its performance characteristics (e.g. pressure accuracy) or cause the device to fail. - Page 126 Guidance and manufacturer’s declaration - electromagnetic immunity The TREND III respiratory therapy device is intended for operation in environments as described below. The user of the Trend III respiratory therapy device must ensure it is operated in such an environment. Immunity tests IEC 60601 test level Compliance level Electromagnetic envi-...
- Page 127 Guidance and manufacturer’s declaration - electromagnetic immunity Immunity tests IEC 60601 test level Compliance level Electromagnetic envi- ronment - guidance Rapid transient dis- ± 2 kV for power ± 2 kV for power The quality of the supply turbances/bursts as cables cables voltage should corre-...
- Page 128 Guidance and manufacturer’s declaration - electromagnetic immunity Immunity tests IEC 60601 test level Compliance level Electromagnetic envi- ronment - guidance Voltage dips, tem- > 95 % dip of U > 95 % dip of U The quality of the sup- porary interruptions 1/2 period 1/2 period...
-
Page 129: Disposal
Disposal Proper disposal saves natural resources and prevents harmful substances being released into the environment. Device The device must not be disposed of with the household waste. Please contact the relevant customer services department to find out how to dispose of the device, etc. -
Page 130: Disclaimer
Disclaimer HOFFRICHTER GmbH accepts no liability for consequences in terms of safety, reliability and performance of the product if: • Interventions, modifications, extensions, calibration, repairs and maintenance are carried out by persons not authorised by us, • Other manufacturers’ accessories and spare parts are used that have not been approved by us for use on the product, •...
Need help?
Do you have a question about the TREND III CPAP and is the answer not in the manual?
Questions and answers