Table of Contents
Advertisement
Quick Links
Advertisement
Table of Contents

Subscribe to Our Youtube Channel
Related Manuals for berlinger SmartSystem SHIP L


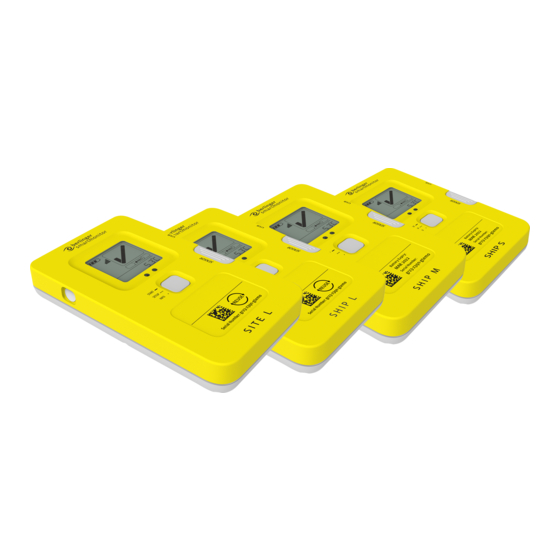
Summary of Contents for berlinger SmartSystem SHIP L
- Page 1 Operators Manual SmartSystem SHIP L Datalogger...
-
Page 2: Table Of Contents
Table of Contents Safety instructions ........................4 Quick Guide ..........................5 Quick Start if configuration is already loaded on the device ........... 5 Quick Start if configuration needs first loaded to the device ..........6 Device view and description ......................7 Display............................ - Page 3 13.5.2 Upload data manually of read out data to Berlinger SmartView ........19 13.5.3 Return device ......................... 19 Where to place SmartMonitor SHIP L ..................19 External Temperature Sensor ....................20 15.1 Connect an external sensor to SmartMonitor SHIP L device ..........21 Connect SmartMonitor SHIP L device to SHIP S devices ............
-
Page 4: Safety Instructions
1 Safety instructions Intended use Temperature • Temperatures outside the operating range may damage the battery. For the operating range, see the information in the technical data sheet. IP Protection • Limited protection against dust ingress and protection against splashing water from all directions. -
Page 5: Quick Guide
2 Quick Guide Quick Start if configuration is already loaded on the device Draft version 02 Operatots Manual / SmartMonitor SHIP L page 5 of 26... -
Page 6: Quick Start If Configuration Needs First Loaded To The Device
Quick Start if configuration needs first loaded to the device Draft version 02 Operatots Manual / SmartMonitor SHIP L page 6 of 26... -
Page 7: Device View And Description
3 Device view and description Name Description Display Multi-information display USB-connector To charge the battery or download the data manually Confirmation/Status LED LED (small lamp) indicates if use of multifunctional button was successful or not Cover for ext. sensor Protect plug for external sensor QR Code Contains the serial number for M2M (Machine to Machine) -
Page 8: Display
4 Display Icon Name Description Battery status Indicates the battery status Battery charging Indicates whether external power has been plugged in Alarm status Device indicates that there is no alarm violation evice indicates that there is one or more alarm violation OFF →... -
Page 9: 7-Digit Display
4.1 7-digit display The 7-digit display gives additional information about the status, shipment or other data. In normal logging operation it displays the temperature. 5 Multifunctional button SmartMonitor SHIP L device has one multifunctional button to operate. 1 x long press → Start / Stop the device 3 x short press →... -
Page 10: Confirmation Led
SmartMonitor SHIP L device has a built-in light sensor to monitor whether a transport box has been opened and the light ratio has changed. That sensor can be enabled or disabled in the Berlinger SmartView software (version 6.0 and higher). -
Page 11: Humidity And Pressure Sensor
SmartMonitor SHIP L has a built-in motion sensor to record tilt, shock and vibration. The sensor is positioned inside the device and is not visible from the outside. Tilt, shock and vibration can be enabled or disabled in the Berlinger SmartView software (version 6.0 and higher) configuration. -
Page 12: Configuration
SmartMonitor SHIP L can be ordered pre-configured with a customer desired configuration or with a standard configuration. If a new configuration is to be loaded, it is configured in the Berlinger SmartView software (version 6.0 and higher) and then assigned to the device. -
Page 13: Start/Stop
11 Start/Stop 11.1 Start To start the device, press the multifunctional button once >5 seconds or as long till display shows “SETUP” or the green LED lights for at least 2 sec. The following information will be displayed on the screen. While the information “***START***” will be displayed as a ticker, keep pressed the multifunctional button and hold the multifunctional button for at least 5 seconds. -
Page 14: Stop
11.2 Stop To stop the device, press the multifunctional button once >5 seconds or as long till display shows “STOP” or the green LED lights for at least 2 sec. As soon as the device has stopped, the 7-segment display shows “STOP”. Additionally, the Stop symbol will be shown . -
Page 15: Start Delay
12 Start delay For SmartMonitor SHIP L device you have the possibility to configure in Berlinger SmartView software (version 6.0 and higher) with a start delay or with a scheduled start. 12.1 Start SmartMonitor SHIP L with start delay If a start delay is configured a counter in minutes:seconds will start counting down to 00:00, after that, the device starts and goes to the Record modus. -
Page 16: Usage Process
13 Usage Process SmartMonitor SHIP L is mainly used for monitoring temperature sensitive products throughout the supply chain. The device has various configuration options. The device states are visualized below and described in more detail in the following chapters. The usage process may vary depending on the configuration. -
Page 17: Setup
3 times → The configuration will be loaded. See chapter 5 multifunctional button Configuration of device can be done with Berlinger SmartView software (version 6.0 and higher). 13.2.1 Review/Check configuration To confirm that the loaded configuration is correct, check the configuration on the display by pressing the multifunctional button once . -
Page 18: Scheduler Start
13.3.2 Scheduler Start Device has the possibility to configure it with a scheduled start via Berlinger SmartView software (version 6.0 and higher). 13.4 Transit/Recording As long as the device is in transit, it records the temperature (and other parameters if set) and transmits the data at a predefined interval via the cellular network to Berlinger SmartView software (version 6.0 and higher). -
Page 19: Upload Data Manually Of Read Out Data To Berlinger Smartview
Before the device will be used for the next shipment, follow the instruction at chapter Maintenance. If the unit was rented from Berlinger, return it to Berlinger in accordance with the RMA process. 14 Where to place SmartMonitor SHIP L Berlinger recommends to place SmartMonitor SHIP L as close as possible to the product to be monitored so that the temperature can be recorded as accurately as possible. -
Page 20: External Temperature Sensor
15 External Temperature Sensor Use only original Berlinger external sensors for SmartMonitor SHIP L. Make sure that the sensor is properly connected to the device and the connector is secured (tightened by hand). Do not tighten the connector with pliers or any other tool, otherwise the connector may be damaged. -
Page 21: Connect An External Sensor To Smartmonitor Ship L Device
15.1 Connect an external sensor to SmartMonitor SHIP L device To connect an external Berlinger probe to a SmartMonitor SHIP L remove the grey cover at the right site from device. Remove the grey cover from the SHIPL device Plug in the connector by checking the mark at the connector and the plug of the SHIP L device. -
Page 22: Connect Smartmonitor Ship L Device To Ship S Devices
SmartMonitor SHIP S devices. Therefore, several can be used in one shipment. Connection of SmartMonitor SHIP S devices must be configured in Berlinger SmartView software (version 6.0 and higher). Draft version 02 Operatots Manual / SmartMonitor SHIP L page 22 of 26... -
Page 23: Troubleshooting
17 Troubleshooting Problem Effect Solution Blank display No information visible Connect the device to USB charger to charge the battery. Device cannot be started Press the multifunctional Display shows LONG PRESS button at least 5 second. LOW BATTERY Connect the device to power LOW:BATT will be shown on to charge the battery. - Page 24 5 times short the display shows FLY:ON multifunctional button On the back of the device is a 3D-code which links to the Berlinger website where more information about this device is available. If more help is needed, contact Berlinger support at support@berlinger.com.
-
Page 25: Disposal
18 Disposal Electronic devices are recyclable and do not belong in household waste. At the end of its lifetime, dispose of the product in accordance with the law according to your country or return it to Berlinger according Berlinger RMA process. -
Page 26: Standards
• Reorient or relocate the receiving antenna. • Increase the separation between the equipment and receiver. • Connect the equipment into an outlet on a circuit different from that to which the receiver is connected. • Consult the dealer or an experienced radio/TV technician for help. Radiofrequency radiation exposure Information: This equipment complies with FCC and ISED radiation exposure limits set forth for an uncontrolled environment.
Need help?
Do you have a question about the SmartSystem SHIP L and is the answer not in the manual?
Questions and answers