Chapters
Table of Contents

Subscribe to Our Youtube Channel
Related Manuals for Laguna Tools REVO 1216


Summary of Contents for Laguna Tools REVO 1216
- Page 1 Laguna REVO 1216 Woodturning Lathe Owner’s Manual : 01/18/2022 SKU: MLAREVO 1216EVS Laguna Tools® All rights reserved. 2072 Alton Parkway Irvine, CA 92606 U.S.A. Service: +1 (949) 474-1200 or email customerservice@lagunatools.com lagunatools.com...
- Page 2 EN 61000-4-4: 2012 Electrical fast transient/burst requirements (EFT/Burst) EN 61000-4-6: 2014 Immunity to conducted disturbances, induced by radio-frequency fields (CS) Responsible for the documentation: Head Product Management, Laguna Tools Inc. Name : Torben Helshoj Responsibility Authorized Signature Date : Oct.
- Page 3 Name : Torben Helshoj Responsibility Authorized Signature Date : Oct. 15, 2021 Place : Laguna Tools Inc. 2072 Alton Parkway, Irvine, California 92606, USA Telephone: +1 800 234-1976 Fax: +1 949 474-0150...
-
Page 4: Table Of Contents
Revo 1216 Headstock Assembly ............................. 35 Revo 1216 Bed, Internals, Motor ............................. 37 Option: Laguna REVO 1216 Lathe Stand (ALAREVO1216-STAND) ..................39 Option: Laguna REVO 1216 Mobility Kit (MBA14/12 WHEEL SYSTEM) ................40 Option: Laguna REVO 1216 Expansion Set (ALAREVO1216 EXTENSION) ................ 41... -
Page 5: Location Of Warning Signs & Noise Emission
1~230V 50Hz 2.5A P2=0.75kw S1 Specification =0 3500 /min SCCR=6k A M33x3.5 / MT-2 / 10.5mm Article No. LAGUNA-L-0017 Weight 56.3kg Series No. Year LAGUNA TOOLS 2072 Alton Parkway. Irvine, CA 92606 www. lagunatools.com 1~311VDC TYPE PLAREVO1216-158-UK IEC 60034-1 50Hz IP54 2.5A I.CL. B COSφ... -
Page 6: Safety
Safety Safety Read and understand all warnings and operation instructions before using any tool or equipment. Always follow basic safety precautions to reduce the risk of personal injury. Improper operation, maintenance or modification of tools or equipment could result in serious injury and property damage. There are certain applications for which tools and equipment are designed. -
Page 7: Manufacture Lathe Safety Rules
Safety Manufacture Lathe Safety Rules WARNING! For Your Own Safety Read Instruction 12. SECURE WORK. Use clamps or a vise to hold the work when practical. It's safer than using your hand Manual before Operating Lathe (a) Wear eye protection. and it frees both hands to operate the tool. - Page 8 Safety (g) U liser la vitesse la plus lente au démarrage d'une ne résistent pas aux impacts et qu'elles ne sont pas nouvelle pièce. homologuées à re de lune es de sécurité. 12. IMMOBILISEZ VOTRE TRAVAIL. lisez des serres ou RÈGLES DE L'OPÉRATEUR un étau pour immobiliser votre travail lorsque c'est 1.
- Page 9 1~230V 50Hz 2.5A P2=0.75kw S1 Specification =0 3500 /min SCCR=6k A M33x3.5 / MT-2 / 10.5mm Article No. LAGUNA-L-0017 Weight 56.3kg Series No. Year LAGUNA TOOLS 2072 Alton Parkway. Irvine, CA 92606 www. lagunatools.com M30 x 3.5 Spindle Thread for Australia...
- Page 10 Safety LOCKING THE LATHE Fig L006 - Method of locking the Laguna Revo Lathe. (1) Constructed 3 side box with padlock holes. (2) Padlocks. It is strongly recommended that the lathe is never left unattended in the unlocked condition. To lock the machine it is recommended that a cover (not supplied) is constructed according to the supplied concept displayed in Fig L006.
-
Page 11: Speci Cations
Specifications Specifications NAME: ..............................Laguna REVO 1216 Woodturning Lathe SKU: ...................................... MLAREVO1216EVS MPN:...................................... MLAREVO1216EVS PID: .......................................... 07211-01 Package Dimensions (WxLxH): ............................L35.8" W14.6" H20.5" Product Assembled Dimensions (WxLxH): ......................... L29.4" W8.9" H17.4" Package Weight: ..................................125LB (56.7KG) Product Weight: ................................... 118LB (53.5KG) Product Category: .................................. -
Page 12: Dimensions
Specifications Dimensions Laguna Revo 1216 Woodturning Lathe Laguna Revo 1216 Expansion Set... - Page 13 Specifications Laguna Revo 1216 Stand Laguna Revo 1216 Mobility Kit (480)
-
Page 14: External Map
Specifications External Map 1 ......................................Headstock 2 ....................................Control Panel 3 ..................................Spindle Hand Brake 4 ....................................Indexing Lock 5 ..................................Indexing View Port 6 ....................................Spindle Lock 7 ....................................Upper Belt Door 8 ......................................Spindle 9 ........................................ Banjo 10 ..............................Hardened Steel Leading Edge 11 ...................................... -
Page 15: Internal Map
Specifications Internal Map 1 ................................. Front Bearing (Press Fit) 2 ..................................Spindle Lock Boring 3 .................................. Upper Belt Pulley Steps 4 ................................... Rear Bearing (Floating) 5 ....................................Indexing Lock 6 ..................................Spindle Hand Brake 7 ........................................Belt 8 .................................. Lower Belt Pulley Steps 9 .................................... -
Page 16: Setup
Functional Setup Section. All help topics pertaining to the proper setup of accessories are in the Accessories & Options Setup sub-section. Fig L008: Receiving and un-boxing the REVO 1216 Lathe. (1) Un-boxing Contents. (2) Lathe in box. (3) Components un-boxed. Receiving It is likely that your machine will be delivered by a third party. -
Page 17: Inventory
Setup 4. You should select a solid flat floor, preferably one made of concrete or something similar. 5. Locate it close to a power source and dust collection (If Applicable). Un-boxing Once in place, carefully un-box and remove all components. Un-boxing guidelines: 1. -
Page 18: Installing Rubber Leveling Pads
Setup Installing Rubber Leveling Pads You may want to install the included rubber pads on the lathe to reduce vibrations and protect the base from the floor. You should not install the rubber pads if you are planning to use the 1216 Lathe Stand. Tools Needed: 6mm Alan Wrench 1. -
Page 19: Installing/Removing Drive Center And Live Center
Setup 6. Turn counter clock-wise (CCW) to remove, turn clock-wise (CW) to install. When installing, reverse steps 6-1. The face plate wrench is not needed to install, if you over-tighten, the set screw flats (on spindle) may not line up and you could damage the threading. Hand tightening is usually enough. Installing/Removing Drive Center and Live Center Unplug machine from power prior to proceeding! Do not attempt to remove the tail stock center with tools, simple revers the quill until it pops out. -
Page 20: Changing Between Speed Groups (Pulley Steps)
Setup Changing Between Speed Groups (Pulley Steps) Unplug machine from power prior to proceeding! Pinching hazard. Do no rotate spindle with hands in the belt cabinet. Do not attempt any other pulley configurations than those described below. Fig L014 - Changing between speed groups. (1) Low Speed Configuration: 50-525 RPM. (2) Mid Speed Configuration: 325 - 1750 RPM. -
Page 21: First Use
Setup First Use Read the entire owners manual prior to using this machine. Never load or adjust the loading of a workpiece with the machine powered on. The workpiece must be balanced to limit vibrations! Fig L015 - 1216 lathe first use. Loading a workpiece 1. -
Page 22: Accessories & Options
Some of these accessories are designed to fit multiple machines offered by Laguna Tools, check the specification sheet for a fit guide of all REVO accessories. as well as a double threaded spindle that allows the... - Page 23 Accessories & Options Laguna REVO 1216 Expansion Set Up Inventory Unplug machine from power prior to proceeding! Do not over torque the threading, firm pressure is all that is required. The (2.2) Tool rest extension, and (2.4) Lock Handle, are only used when outboard turning.
- Page 24 5. Replace the tail-stock on the main bed for safe keeping, it will not be used for outboard turning. 6. The bolt holes on the REVO 1216 bed are pre- tapped to accept the extension. Using the three (Key 2.3) Allen screws, fasten the extension to the left of the lathe.
-
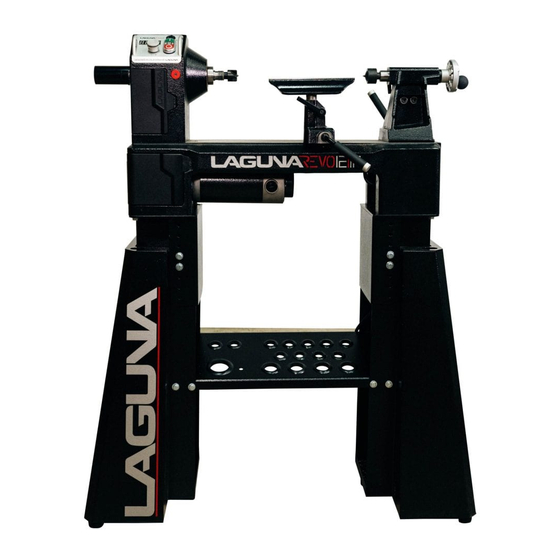
Page 25: Laguna Revo 1216 Lathe Stand
Accessories & Options Laguna REVO 1216 Lathe Stand Set-Up Laguna REVO 1216 Lathe Stand Unplug machine from power prior to SKU: ALAREVO1216-STAND proceeding! Fits: MLAREVO1216EVS Two persons are required in this set-up. Do not over torque the threading, firm pressure is all that is required. - Page 26 Accessories & Options Inventory Fig L017: ALREVO12 Stand inventory check. (1) Adjustable height pillars. (2) Stand Leg. (3) Tool Organization shelf. (4) Rubber pads, screws, and washers. (5) Lathe attachment bolts and washers. (6) Bolt/Washers for assembly. (7) Height constraint screws. Name Description Height Pillar...
- Page 27 (Key 6) assembly hardware. It is always best practice to wait A: The REVO 1216 Stand allows the spindle center line until the end of the set-up to tighten all screws. to be positioned at 7 different heights from 39" to 45".
-
Page 28: Laguna Revo 1216 Mobility Kit
2. Organize the hardware and setup tools needed (at beginning of each set-up section) prior to proceeding with setup. Fig L006: Premium Mobility kit for REVO 1216 10". (1) Base Wheels & mounting (2) Foot Lever and wheel.mount assembly. - Page 29 Accessories & Options Decide whether the foot pedal assembly will be best fit on the left or right side of the lathe. If on the left side, the operator must be behind the lathe to engage, because of this - it is often best to have the foot pedal caster on the right side, and the stationary wheels on the left side.
-
Page 30: Machine Lights
Accessories & Options the lever (2) is engaged the lathe will prop up on the 3 wheels and is mobile. Releasing the lever (2) and the Machine Lights machine is back on the floor as if there was not a You will have to order both the L-bracket and the light mobility kit installed from Laguna for attaching the light to rear of the... -
Page 31: Maintenance
Maintenance Maintenance Never perform and setup, maintenance or adjustments with the machine connected to the power source! If you have any doubt about the described procedure, seek professional assistance. Do not attempt any procedure that you feel is unsafe, or that you do not have the physical capability of achieving. When removing banding, extreme caution must be used as the banding will spring when cut. -
Page 32: Changing The Belt And Bearings
Maintenance Changing the Belt and Bearings Unplug machine from power prior to There is a wave washer in between the right proceeding! side of the upper pulley and the black magnetic ring on the spindle. The black magnetic ring is seating on the Do not over torque the threading, firm shoulder of the spindle and is for the spindle speed pressure is all that is required. - Page 33 Maintenance...
-
Page 34: Lathe Will Not Start
Maintenance 1. Machine not level on the floor. Re-level the machine Lathe will not start. ensuring that it has no movement. 1. Check that the start switch is in the correct position. 2. Damaged drive belt. Replace the belt. 2. Check that the electrical power cord is plugged into 3. -
Page 35: Wiring
ALWAYS use the supplied wiring diagram with the machine or motor (under the electrical covering) if present. Customer Support: (949)-474-1200 or customerservice@lagunatools.com Manufacturer: Product Name: Model: Version: Laguna Tools, Inc. Wood Lathe REVO 12|16 2022-01 Drawing Originator: Checker: Authorizes: File no.:... -
Page 36: Parts
Parts Parts Never perform and setup, maintenance or adjustments with the machine connected to the power source! Only use authentic Laguna Tools parts for replacements. Revo 1216 Banjo, Tool Rest, Tail Stock, Centers Part Number Description Specification PLAREVO1836-1119 Set Screw 1/4-20UNCx3/8"... -
Page 37: Revo 1216 Headstock Assembly
Knob PLAREVO1836-181 Knob PLAREVO1836-1136 Handle, Faceplate PLAREVO1216-1114 Nylon Insert Lock Nut 3/8-16UNC PLAREVO1216-1115 Plate 415241-1128 Socket Head Button Screw 3/16-24UNCx1/2" Revo 1216 Headstock Assembly Part Number Description Specification PLAREVO1836-1140 Thimble PLAREVO1836-124 Spur Center PLAREVO1836-1124 Set Screw M6x1.0x6mm PLAREVO1216-104-UK 3" Faceplate... -
Page 38: Handwheel
Parts PLAREVO1216-113 Spindle Pulley PLAREVO1836-184 Wave Washer 6205 PLAREVO1216-115 Ball Bearing 6005LLU PLAREVO1836-1119 Set Screw 1/4-20UNCx3/8" PLAREVO1216-117 Handwheel PLAREVO1216-118 INDEX-PIN PLAREVO1216-119 Spring PLAREVO1216-120 Window PLAREVO1216-121 Spring PLAREVO1216-122 Upper Door Shaft PLAREVO1216-123-UK Upper Door PLAREVO1836-1151 Magnet PLAREVO1836-103 Spring PLAREVO1216-126 Spindle Lock Plunger PLAREVO1836-132 Disc, Spindle Lock PLAREVO1836-1141... -
Page 39: Revo 1216 Bed, Internals, Motor
Parts Revo 1216 Bed, Internals, Motor Part Number Description Specification PLAREVO1836-1101 Set Screw 1/4-20UNCx1/4" PLAREVO1216-107 5x5x25mm PLAREVO1836-1119 Set Screw 1/4-20UNCx3/8" PLAREVO1836-1151 Magnet PLAREVO1216-140 Socket Head Cap Screw 3/8-16UNCx1" PLAREVO1836-1115 Lock Washer 3/8" PLAREVO1216-142 Lower Door Shaft PLAREVO1216-143 Nylon Insert Lock Nut... - Page 40 Parts PLAREVO1216-180 Screw M4x0.7x15mm PLAREVO1836-1153 Hex Nut M4x0.7 PLAREVO1216-183 Screw M4x0.7x20mm PLAREVO1216-184 Cord Holder 71632-1115 EMI Suppression Ferrite Cores PLAREVO1216-186 Screw M5x0.8x15mm PLAREVO1216-187-UK Control Box 480BS-194 Strain Relief PG-11 PLAREVO1216-189 Strain Relief SB5M-2 PLAREVO1216-190 Strain Relief 6P-4 PLAREVO1216-191-UK Control board PLAREVO1216-192 Hex Nut #10-32UNF...
-
Page 41: Option: Laguna Revo 1216 Lathe Stand (Alarevo1216-Stand)
Parts Option: Laguna REVO 1216 Lathe Stand (ALAREVO1216-STAND) Part Number Description Specification PLAREVO1216-201 Stand PLAREVO1216-202 Stand PLAREVO1216-203 Connect Plate PLAREVO1216-204 Adjust Set PLAREVO1216-205 Rubber Bushing PLAREVO1216-206 Rubber Bushing PLAREVO1216-207 Rubber Bushing PLAREVO1216-208 Hex Cap Screw 5/16-18UNCx1/2" PLAREVO1836-1113 Flat Washer D8xD18x2t... -
Page 42: Option: Laguna Revo 1216 Mobility Kit (Mba14/12 Wheel System)
Flat Washer 3/8"×D27×3t PLAREVO1216-213 Screw M5x0.8x10mm PLAREVO1216-214 Hex Cap Screw 3/8-16UNCx3/4" PLAREVO1216-215 Flat Washer 3/8"xD23x2t Option: Laguna REVO 1216 Mobility Kit (MBA14/12 WHEEL SYSTEM) Part Number Description Specification PBAND1412-175-6-1 PBAND1412-175-6-2 Flat Washer 1/4" PBAND1412-175-6-3 Socket Head Cap Screw 1/4-20UNCx1-3/4" PBAND1412-175-6-4 Socket Head Button Screw 5/16-18UNCx1/2"... -
Page 43: Option: Laguna Revo 1216 Expansion Set (Alarevo1216 Extension)
Bushing PBAND1412-175-6-27 Socket Head Button Screw 5/16-18UNCx3/4" PBAND1412-175-6-28 Knob PBAND1412-175-6-29 Support Plate PBAND1412-175-6-30 Hex Cap Screw M8x1.25x70mm Option: Laguna REVO 1216 Expansion Set (ALAREVO1216 EXTENSION) Part Number Description Specification PLAREVO1216-301 Extension Bed PLAREVO1216-302 Toolrest Extension PLAREVO1216-164 Lock Handle PLAREVO1836-303 Socket Head Button Screw 3/8-16UNCx1"... - Page 44 2072 Alton Parkway Irvine, CA 92606 U.S.A. Service: +1 (949) 474-1200 or email customerservice@lagunatools.com lagunatools.com...
Need help?
Do you have a question about the REVO 1216 and is the answer not in the manual?
Questions and answers