Table of Contents
Advertisement
Available languages
Available languages
WARRANTY CONDITION
This product is guaranteed for a period of 2 years from the date of purchase* against any failure resulting
EN
from a manufacturing or material defect. This warranty does not cover defects or damage resulting from
incorrect installation, improper use or abnormal wear of the product.
*as shown on the sales receipt.
CONDITION DE GARANTIE
Ce produit est garanti pour une période de 2 ans à partir de la date d'achat*, contre toute défaillance
résultant d'un vice de fabrication ou de matériau. Cette garantie ne couvre pas les vices ou les dommages
FR
résultant d'une mauvaise installation, d'une utilisation incorrecte ou de l'usure anormale du produit.
*sur présentation du ticket de caisse.
GARANTIEVOORWAARDEN
Dit product wordt gegarandeerd voor een periode van 2 jaar vanaf de aankoopdatum*, voor elke storing
NL
die het gevolg is van een fabricagefout of het materiaal. Gebreken of schade door slechte installatie, onjuist
gebruik of abnormale slijtage van het product worden niet gedekt door deze garantie.
*op vertoon van kassabon.
CONDICIONES DE GARANTÍA
El certificado de garantía de este producto tiene una duración de 2 años a partir de la fecha de compra*
que se limita a los defectos de fabricación y averías del material. Se excluyen de la garantía deficiencias o
ES
daños originados por una mala instalación, errores en la manipulación o por un uso inadecuado.
*previa presentación del comprobante de compra.
ELECTRO DEPOT
1 route de Vendeville
59155 FACHES-THUMESNIL - FRANCE
Advertisement
Table of Contents

Related Manuals for VALBERG WF 612 D DS701T


Summary of Contents for VALBERG WF 612 D DS701T
- Page 1 WARRANTY CONDITION This product is guaranteed for a period of 2 years from the date of purchase* against any failure resulting from a manufacturing or material defect. This warranty does not cover defects or damage resulting from incorrect installation, improper use or abnormal wear of the product. *as shown on the sales receipt.
- Page 2 08/2021-V1 Washing machine Machine à laver Wasmachine Lavadora 971314 - WF 612 D DS701T INSTRUCTIONS FOR USE ....02 CONSIGNES D'UTILISATION ....38 GEBRUIKSAANWIJZINGEN ....74 INSTRUCCIONES DE USO ....110...
- Page 5 Thanks! Th a n k yo u fo r c h o o s i n g t h i s VA L B E R G p ro d u c t . C h o s e n , te s te d a n d re c o m m e n d e d by E L E C T R O D E P OT, t h e p r o d u c t s o f t h e VA L B E R G b r a n d a r e e a s y t o u s e , re l i a b l e a n d o f a n i m p e cc a b l e s t a n d a rd.
- Page 6 Table of contents Description of the appliance Preview of the appliance Installation Using the appliance Cleaning and care Useful information Troubleshooting...
-
Page 7: Description Of The Appliance
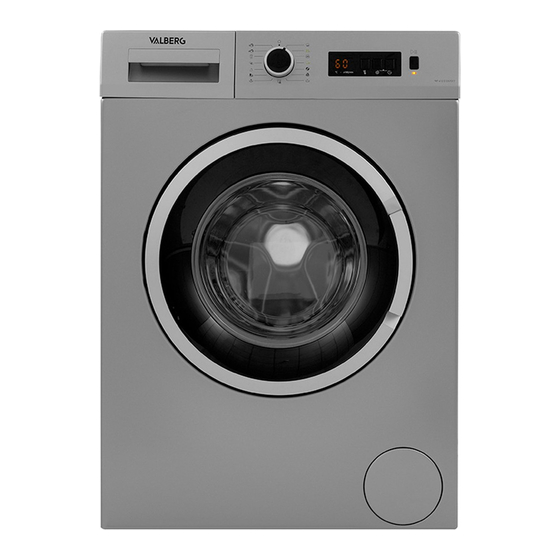
Preview of the appliance Description of the appliance Electronic display Program selector Work top Dispenser drawer Drum Access hatch to the drain pump filter Water inlet valve Power Cord Drain hose Transit bolt... -
Page 8: Using The Appliance
Using the appliance Installation Removing the transit bolts Œ Before using the washing machine, remove the 4 transit bolts and rubber washers located at the rear of the machine. Failure to comply with this instruction may cause strong vibrations, a high level of noise and damage to the machine, rendering the warranty null and void. - Page 9 Using the appliance Adjusting the feet/adjusting the adjustable housings Œ Do not install the machine on a surface that could prevent air from flowing underneath (e.g. a carpet). • For quiet and vibration-free operation, install the machine on a firm surface. •...
- Page 10 Using the appliance • Your washing machine requires a mains power supply of 220-240 V, 50 Hz. • The power cord of your washing machine is fitted with an earthed plug. This plug should always be inserted into a 10 amp earthed outlet. •...
- Page 11 Using the appliance Connect the new water inlet hoses to a ¾" threaded tap. • Connect the white end of the water inlet hose to the white water inlet valve located at the rear of the machine and the red end of the hose to the red water inlet valve (if available). •...
-
Page 12: Presentation Of The Control Panel
Using the appliance Connecting the drain hose • Connect the drain hose to a drain pipe or to the washing machine waste pipe of a sink using additional hardware. • Never attempt to lengthen the drain hose. • Do not place the end of the machine's drain hose in a container, bucket or bathtub. •... - Page 13 Using the appliance Dispenser drawer Accessories for washing liquids Washing product compartment, main wash cycle Fabric softener compartment Washing product compartment, pre-wash cycle Washing powder levels Washing powder scoop (*) (*) The technical specifications may vary depending on the model of machine.
- Page 14 Using the appliance Compartments • Laundry compartment, main wash cycle: This compartment is intended for washing powder or liquid, or anti-limescale products. The graduated rule (optional) for washing liquid is provided inside the machine.(*) • Softener, starch or washing product compartment: This compartment is for fabric softeners, conditioners or starch.
- Page 15 Using the appliance Only use this compartment when the Prewash function has been selected. Only select this function with heavily soiled laundry. (*) The technical specifications may vary depending on the model of machine. Program selector • To select a program, turn the program selector clockwise or anticlockwise until the indicator points towards the desired program.
-
Page 16: Using The Machine
Using the appliance Electronic display Digital display Water temperature adjustment button Spin speed adjustment button (rpm) Delay start Start/Pause button On/off indicator Using the machine Preparing the laundry... - Page 17 Using the appliance Follow the instructions on the garment care labels. • Sort the laundry according to the type of fabric (cotton, synthetic, delicate, wool, etc.), the washing temperature (cold, 30°C, 40°C, 60°C or 90°C) and how dirty it is (slightly dirty, dirty, very dirty).
- Page 18 Using the appliance Bleach when Do not bleach Machine wash, needed normal/moderate cycle Iron medium heat Iron high heat (200°C) Do not iron (150°C) Dry clean Do not dry clean Dry flat Line dry without Dry flat without Do not tumble dry spinning spinning Dry clean with...
- Page 19 Using the appliance NOTE Exceeding the maximum load of the drum can lead to poor washing results and creased clothing. Refer to the program table to find out the loading capacities for the different programs. The following table shows the approximate weight of the most common laundry items: Type of laundry Weight (g) Towel...
- Page 20 Using the appliance Adding the washing product to the machine The amount of washing product used in the machine will depend on the following factors: • Do not select a prewash if the laundry is only very lightly soiled. Pour a small quantity of washing product (according to the manufacturer's instructions) into compartment II of the dispenser drawer.
- Page 21 Using the appliance Using the machine Plug the machine into the mains supply. Turn on the water supply. • Open the machine door. • Spread the laundry evenly inside the machine. • Gently push the door until you hear a click. Selecting a program Use the program table to choose the program that is best suited to the laundry.
- Page 22 Using the appliance Additional functions • Temperature selection Use the wash water temperature adjustment button to modify the preset temperature of a program. When a program is selected, its maximum temperature is set automatically. To adjust the water temperature, press the water temperature adjustment button until the desired value is displayed on the digital display.
- Page 23 Using the appliance • Delay start You can use this auxiliary function to delay the start of the wash cycle by 1 to 23 hours. To use the delay start function: • Press the delay start button once. • "01h" is displayed. lights up on the electronic display.
- Page 24 Using the appliance NOTE If you want to select the auxiliary function, and if the auxiliary function LED is not on, it means that this function is not used in the washing program you have selected. • Start/Pause button To start the selected program, press the Start/Pause button. When the machine is in standby mode, the Start/Pause indicator light on the electronic display flashes.
- Page 25 Using the appliance • Cancelling a program Cancel a program at any time: 1. Set the program selector to "OFF". 2. The wash cycle will stop and the program will be cancelled. 3. Set the program selector to any other program to drain the machine. 4.
-
Page 26: Program Table
Using the appliance Program table Program Laundry type/descriptions Dirty textiles made of cotton or linen. (**)Eco 40°C (Underwear, sheets, tablecloths, towels 40-60°C [3.0 kg maximum], bedding, etc.) 60°C 90°C Very dirty textiles made of cotton or (*)Cotton 80°C linen. (Underwear, sheets, tablecloths, 70°C towels [3.0 kg maximum], bedding, etc.) 40°C... - Page 27 Using the appliance Program Laundry type/descriptions Use this program for any type of laundry to add an extra spin cycle after the wash cycle. Use the drain program to drain the water which has accumulated inside the Spin machine (adding or removing laundry). Drain To activate the drain program, turn the program selector knob to the spin/...
- Page 28 Using the appliance NOTE The duration of the programs may vary depending on the amount of laundry, the quality of the water, the ambient temperature and the additional functions selected. (*) The washing water temperature for the program is the factory default temperature. (**) 60°C - 40°C are energy label declaration programs (***) As this program is shorter, we recommend that you use less washing product.
- Page 29 Using the appliance Water Nominal Max. Residual moisture Program Energy consumption Programme duration consumption capacity Temperature content (%) name kWh/cycle (hours): Minutes Litres/ °C 1200 rpm cycle 0.92 0.53 0.29 03:13 02:34 02:32 53 % 53 % 2.22 02:59 53 % 0.81 03:20 53 %...
- Page 30 Using the appliance Important information • Only use washing products, fabric softeners and other additives that are suitable for automatic washing machines. If too much washing product is used, an excessive amount of foam will be detected and the automatic foam absorption system will be activated. •...
-
Page 31: Useful Information
Useful information Cleaning and care Warning Before any maintenance or cleaning operation, switch off the mains power supply and unplug the machine. Turn off the water supply before starting any maintenance or cleaning CAUTION Do not use solvents, abrasive cleaners, window cleaner or any other universal cleaner to clean the washing machine. - Page 32 Useful information • Unscrew the water inlet hose(s) at the washing machine. • To remove the filter mounted on the water inlet valve, use needle nose pliers to gently pull on the plastic bar inside the filter. • A second filter is mounted on the end of the water inlet hose to be connected to the tap. To remove the second filter, use needle nose pliers to gently pull on the plastic bar inside the filter.
- Page 33 Useful information Use the washing powder scoop (*) supplied with the machine or the measuring plate for washing liquid to open the pump access hatch. Insert the end of the washing powder scoop or the graduated ruler for washing liquid into the opening of the access hatch.
- Page 34 Useful information (*) The technical specifications may vary depending on the model of machine. Dispenser drawer Residual washing product can build up in the dispenser drawer over time. Remove the dispenser drawer every 2 months to eliminate the residues which have built up. To remove the dispenser drawer: •...
- Page 35 Useful information • If there are any residues on the housing of the dispenser drawer, remove them with a soft brush. Take care to prevent any residue from falling into the machine. • Carefully dry the dispenser drawer and slide it into the slot provided. CAUTION Do not wash the dispenser drawer in the dishwasher.
-
Page 36: Troubleshooting
Useful information Body/Drum Body Use a non-abrasive cleaning agent or soapy water to clean the outer shell of the machine. Dry with a soft cloth. Drum Do not leave metallic objects such as needles, paper clips, coins, etc. in the machine. These objects cause rust to form in the drum. - Page 37 Useful information Fault Possible cause Troubleshooting The tap is turned off. Open the tap. The water inlet hose may be Check the water inlet hose bent. and straighten it. The water inlet hose is Clean the filters of the water The machine does not draw blocked.
- Page 38 Useful information Fault Possible cause Troubleshooting Press the Start/Pause button. To stop foam from forming, dilute a tablespoon of fabric softener Too much washing product in ½ L of water. Then pour it into has been used. Too much foam has formed the dispenser drawer.
- Page 39 Useful information Fault Possible cause Troubleshooting There are signs of untreated Use the amount of detergent There are grey spots on the oil, cream and ointment on indicated on the packaging laundry. the laundry. for the next wash. The unbalance detection system will try to spread the laundry evenly.
- Page 40 Useful information Error messages and what to do The washing machine is equipped with a self-diagnostic system that provides the error code using the wash cycle indicator lights. The most common error codes are listed in the table below. Fault code Possible fault Action Close the door until you hear a click.
- Page 41 Merci ! M e rc i d ’avo i r c h o i s i ce p ro d u i t VA L B E R G . C h o i s i s, te s té s e t re co m m a n d é s p a r E L E C T R O D E P OT, l e s p ro d u i t s d e l a m a rq u e VA L B E R G vo u s a s s u re n t u n e utilisation simple, une per formance fiable et une qualité...
- Page 42 Table de matières Description de l’appareil Aperçu de l’appareil Installation Utilisation de l’appareil Utilisation Nettoyage et entretien Informations pratiques Dépannage Les notices sont aussi disponibles sur le site http://www.electrodepot.fr/sav/notices/ http://www.electrodepot.be/fr/sav/notices...
-
Page 43: Aperçu De L'appareil
Aperçu de l’appareil Description de l’appareil Affichage électronique Sélecteur de programme Plateau supérieur Tiroir à produits lessiviels Tambour Trappe d’accès au filtre de la pompe de vidange Vanne d’arrivée d’eau Cordon d’alimentation Tuyau de vidange Vis de bridage... -
Page 44: Utilisation De L'appareil
Utilisation de l’appareil Installation Retrait des vis de bridage Œ Avant d’utiliser le lave-linge, retirer les 4 vis de bridage et rondelles en caoutchouc situées à l’arrière de la machine. Le nonrespect de cette consigne peut causer de fortes vibrations, un niveau de bruit important et détériorer de la machine et rendre la garantie caduque. - Page 45 Utilisation de l’appareil Ajustement des pieds/ajustement des logements réglables Œ Ne pas installer la machine sur une surface (telle qu’un tapis) susceptible d’empêcher la ventilation à la base. • Pour un fonctionnement silencieux et sans vibrations, installer la machine sur une surface ferme.
- Page 46 Utilisation de l’appareil • Votre lave-linge nécessite une alimentation secteur de 220-240 V, 50 Hz. • Le cordon d’alimentation de votre lavelinge est équipé d’une fiche de terre. Cette fiche doit toujours être branchée sur une prise de 10 ampères reliée à la terre. •...
- Page 47 Utilisation de l’appareil Raccorder les nouveaux tuyaux d’arrivée d’eau sur un robinet fileté ¾“. • Raccorder l’extrémité blanche du tuyau d’arrivée d’eau à la vanne d’arrivée d’eau blanche située à l’arrière de la machine et l’extrémité rouge du tuyau à la vanne d’arrivée d’eau rouge (si disponible).
- Page 48 Utilisation de l’appareil Raccordement du tuyau de vidange • Raccorder le tuyau de vidange à une conduite d’évacuation ou au coude de sortie d’un évier au moyen de matériel supplémentaire. • Ne jamais tenter de rallonger le tuyau de vidange. •...
- Page 49 Utilisation de l’appareil Tiroir à produits lessiviels Accessoires destinés aux lessives liquides Compartiment à lessive, cycle de lavage principal Compartiment à assouplissant Compartiment à lessive, cycle de prélavage Niveaux de lessive en poudre Pelle à lessive en poudre (*) (*) Les caractéristiques techniques peuvent varier en fonction du modèle de machine.
- Page 50 Utilisation de l’appareil Compartiments • Compartiment à lessive, cycle de lavage principal : Ce compartiment est destiné aux lessives liquides ou en poudre ou aux produits anticalcaire. La réglette graduée (en option) pour lessive liquide est livrée à l’intérieur de tla machine.(*) •...
- Page 51 Utilisation de l’appareil Utiliser uniquement ce compartiment lorsque la fonction Prélavage a été sélectionnée. Il est conseillé de sélectionner cette fonction avec du linge très souillé uniquement. (*) Les caractéristiques techniques peuvent varier en fonction du modèle de machine. Sélecteur de programme •...
-
Page 52: Utilisation De La Machine
Utilisation de l’appareil Affichage électronique Écran numérique Touche de réglage de la température de l’eau Touche de réglage de la vitesse d’essorage (tr/min) Départ différé Touche Départ/Pause Voyant marche/arrêt Utilisation de la machine Préparation du linge... - Page 53 Utilisation de l’appareil Suivre les consignes figurant sur les étiquettes d’entretien des vêtements. • Trier le linge en fonction du tissu (coton, synthétique, délicat, laine, etc.), de la température de lavage (à froid, 30 °C, 40 °C, 60 °C ou 90 °C) et du degré de salissure (légèrement souillé, souillé, très souillé).
- Page 54 Utilisation de l’appareil Lavage en Blanchiment Pas de Machine, cycle possible Blanchiment normal/modéré Température Température Ne pas Repasser maximale de maximale de Repassage 150 °C Repassage 200 °C Nettoyage Pas de nettoyage Séchage à plat professionnel à sec professionnel à sec possible Séchage sur fil sans Séchage à...
- Page 55 Utilisation de l’appareil REMARQUE Tout dépassement de la charge maximale du tambour génère des résultats de lavage médiocres et entraîne le froissage des textiles. Se reporter au tableau des programmes pour connaître les capacités de charge des différents programmes. Le tableau suivant indique le poids approximatif des articles de linge les plus courants : Type de linge Poids(g) Serviette...
- Page 56 Utilisation de l’appareil Ajout de lessive dans la machine La quantité de lessive utilisée dans la machine dépendra des facteurs suivants : • Ne pas sélectionner de prélavage si le linge n’est que très légèrement souillé. Verser une faible quantité de lessive (selon les consignes du fabricant) dans le compartiment II du tiroir à produits lessiviels.
- Page 57 Utilisation de l’appareil Utilisation de la machine Brancher la machine sur l’alimentation secteur. Ouvrir l’alimentation en eau. Sélection d’un programme Utiliser le tableau des programmes pour choisir le programme le mieux adapté au linge. Système de détection De demi-charge* En cas d’insertion d’une quantité de linge inférieure à la moitié de la charge maximale dans le tambour, la machine active automatiquement la fonction demicharge, indépendamment du pro g ramme sélectionné.
- Page 58 Utilisation de l’appareil Fonctions supplémentaires • Sélection de la température Utiliser la touche de réglage de la température de l’eau de lavage pour modifier la température prédéfinie d’un programme. • Sélection de la vitesse d’essorage ce que la valeur souhaitée soit affichée. En cas de dépassement accidentel de la vitesse souhaitée, continuer à...
- Page 59 Utilisation de l’appareil • Départ différé Vous pouvez utiliser cette fonction auxiliaire pour retarder le début du cycle de lavage de 1 à 23 heures. Pour utiliser la fonction de départ différé : • Appuyez une fois sur la touche de départ différé. •...
- Page 60 Utilisation de l’appareil REMARQUE Si vous souhaitez sélectionner la fonction auxiliaire, si la LED de fonction auxiliaire n’est pas allumée, cela signifie que cette fonction n’est pas utilisée dans le programme de lavage que vous avez sélectionné. • Touche Départ/Pause Pour démarrer le programme sélectionné, appuyer sur la touche Départ/Pause.
- Page 61 Utilisation de l’appareil • Annulation d’un programme Annuler un programme à n’importe quel moment : 1. Positionner le sélecteur de programme sur « ARRÊT ». 2. Le cycle de lavage s’arrête et le programme sera annulé. 3. Positionner le sélecteur de programme sur tout autre programme pour vidanger la achine. 4.
- Page 62 Utilisation de l’appareil Tableau des programmes Programme Type de linge/descriptions Textiles sales en coton ou en lin. (Sous- (**)Éco 40°C vêtements, draps, nappes, serviettes [3,0 kg 40-60 °C maximum], literie, etc.) 60°C 90°C Textiles très sales en coton ou en lin. (Sous- (*)Coton 80°C vêtements, draps, nappes, serviettes [3,0 kg...
- Page 63 Utilisation de l’appareil Programme Type de linge/descriptions Utiliser ce programme pour n’importe quel type de linge pour ajouter un essorage supplémentaire après le cycle de lavage. Utiliser le programme de vidange pour vidanger l’eau accumulée à l’intérieur de Essorage la machine (ajout ou retrait de linge). Pour Vidange activer le programme de vidange, tourner la manette sélecteur de programme et placez-...
- Page 64 Utilisation de l’appareil REMARQUE La durée des programmes peut varier en fonction de la quantité de linge, de la qualité de l’eau, de la température ambiante et des fonctions supplémentaires sélectionnées. (*) La température de l’eau de lavage du programme est la température d’usine par défaut. (**) 60 °C - 40 °C sont des programmes de déclaration d’étiquette-énergie (***) Ce programme étant plus court, il est conseillé...
- Page 65 Utilisation de l’appareil Consommation Capacité Consommation Max. Teneur en humidité Nom du Durée du programme d’eau nominale d’énergie Température résiduelle % programme Heures : Minutes Litres/ kWh/cycle °C 1200 rpm cycle 0,92 0,53 0,29 03:13 02:34 02:32 53 % 53 % 53 % 2,22 02:59...
- Page 66 Utilisation de l’appareil Informations importantes • Utilisez uniquement des détergents, assouplissants et autres additifs adaptés aux machines à laver automatiques. Dans le cas d’une utilisation trop importante de détergent, une quantité excessive de mousse sera détectée et le système d’absorption automatique de mousse sera activé. •...
-
Page 67: Informations Pratiques
Informations pratiques Nettoyage et entretien Avertissement Avant toute opération d’entretien ou de nettoyage, il convient de couper l’alimentation secteur et de débrancher la prise de la machine. Couper l’alimentation en eau avantde démarrer l’entretien ou le nettoyage ATTENTION Ne pas utiliser de solvants, d’agents de nettoyage abrasifs, de liquide de lavage pour vitres ou tout autre produit de nettoyage universel pour nettoyer le lave- linge. - Page 68 Informations pratiques • Dévisser le(s) tuyau(x) d’arrivée d’eau au niveau du lave-linge. • Pour retirer le filtre monté sur la vanne d’arrivée d’eau, utiliser une pince à bec pour tirer délicatement sur la barre en plastique à l’intérieur du filtre. •...
- Page 69 Informations pratiques Utiliser la pelle à lessive en poudre (*) livrée avec la machine ou la plaque de mesure pour lessive liquide pour ouvrir la trappe d’accès à la pompe. Insérer l’extrémité de la pelle à lessive en poudre ou de la réglette graduée pour lessive liquide dans l’ouverture de la trappe d’accès, puis appuyer délicatement vers l’arrière.
- Page 70 Informations pratiques (*) Les caractéristiques techniques peuvent varier en fonction du modèle de machine. Tiroir à produits lessiviels L’utilisation de lessive est susceptible d’entraîner au fil du temps une accumulation résiduelle dans le tiroir à produits lessiviels. Il est conseillé de retirer le tiroir à produits lessiviels tous les 2 mois de manière à...
- Page 71 Informations pratiques • Si le logement du tiroir à produits lessiviels présente des résidus, éliminer à l’aide d’une brosse souple. Veiller à éviter toute chute éventuelle de résidus dans la machine. • Sécher soigneusement le tiroir à produits lessiviels, puis le glisser dans le logement prévu à cet effet.
-
Page 72: Dépannage
Informations pratiques Corps / Tambour Corps Utiliser un agent de nettoyage non abrasif ou de l’eau savonneuse pour nettoyer l’enveloppe externe de la machine. Sécher avec un chiffon doux. Tambour Ne pas laisser d’objets métalliques tels que des aiguilles, des trombones, des pièces de monnaie, etc. - Page 73 Informations pratiques Défaut Cause possible Dépannage Le robinet est fermé. Ouvrir le robinet. Le tuyau d’arrivé d’eau est Contrôler le tuyau d’arrivé peutêtre déformé. d’eau et redresser ce dernier. Le tuyau d’arrivée d’eau est Nettoyer les filtres du tyau La machine ne prélève pas bouché.
- Page 74 Informations pratiques Défaut Cause possible Dépannage Appuyer sur la touche Départ/ Pause. Pour arrêter la formation de mousse, diluer une cuillère à soupe d’assouplissant dans Une quantité excessive de 1/2 litre d’eau, puis verser dans Une quantité excessive de lessive a été utilisée. le tiroir à...
- Page 75 Informations pratiques Défaut Cause possible Dépannage Le linge présente des Utiliser la quantité de lessive Le linge présente des points traces d’huile, de crème ou indiquée sur l’emballage lors gris. d’onguent non traitées. du lavage suivant. Le système de détection antibalourd tentera de répartir le linge de manière Le cycle d’essorage ne...
- Page 76 Informations pratiques Messages d’erreur et mesures à prendre Le lave-linge est équipé d’un système d’autodiagnostic indiquant le code erreur par le biais des voyants de cycle de lavage. Les codes erreurs les plus courants sont listés dans le tableau ci- dessous.
- Page 77 Bedankt! Pro f i c i a t m e t u w k e u ze vo o r e e n p ro d u c t v a n VA L B E R G . D e s e l e c t i e e n d e te s te n va n d e to e s te l l e n va n VA L B E R G g e b e u r e n v o l l e d i g o n d e r c o n t r o l e e n s u p e r v i s i e v a n E L E C T R O D E P O T.
- Page 78 Inhoudstafel Beschrijving van het toestel Overzicht van het toestel Installatie Gebruik van het toestel Gebruik Reiniging en onderhoud Praktische informatie Probleemoplossing...
-
Page 79: Overzicht Van Het Toestel
Overzicht van het toestel Beschrijving van het toestel Elektronische display Programmaknop Bovenblad Wasmiddellade Trommel Deksel pompfilter Watertoevoerventiel Stroomkabel Afvoerslang Transportbouten... -
Page 80: Gebruik Van Het Toestel
Gebruik van het toestel Installatie Verwijderen van de transportbouten Œ Verwijder voordat u de wasmachine laat werken de 4 transportbouten en rubberen afstandhouders uit de achterkant van de machine. Indien de bouten niet worden verwijderd, kunnen ze zware trillingen, lawaai en storing van de machine veroorzaken en de garantie laten vervallen. - Page 81 Gebruik van het toestel Verstellen van de pootjes / verstellen van verstelbare poten Œ Installeer uw machine niet op een oppervlak (zoals een vloerkleed) dat de ventilatie vanaf de grond kan verhinderen. • Om een stille en trillingsvrije werking van uw machine te garanderen, plaatst u deze op een stevig oppervlak.
- Page 82 Gebruik van het toestel • Let er bij het reinigen van de grond waarop de machine zich bevindt op dat u het niveau van de machine niet verstoort. • Uw wasmachinevereisteen stroomtoevoer van 220-240V, 50. • Het netsnoer van uw wasmachine is uitgerust met een geaarde stekker. Deze stekker moet altijd worden aangesloten op een geaard stopcontact van 10 ampère.
- Page 83 Gebruik van het toestel Sluit nieuwe watertoevoerslangen aan op een waterkraan van ¾˝ met schroefdraad. • Sluit het witte uiteinde van de watertoevoerslang aan op het witte watertoevoerventiel aan de achterkant van de machine en het rode uiteinde van de slang op het rode watertoevoerventiel (indien van toepassing).
-
Page 84: Overzicht Bedieningspaneel
Gebruik van het toestel Aansluiting waterafvoer • Sluit de waterafvoerslang met behulp van extra apparatuur aan op een standpijp of op de afvoerbocht van een huishoudelijke gootsteen. • Probeer nooit de waterafvoerslang te verlengen. • Plaats de waterafvoerslang van uw machine niet in een reservoir, emmer of badkuip. •... - Page 85 Gebruik van het toestel Wasmiddellade Toebehoren voor vloeibaar wasmiddel Hoofdwasmiddelvak Wasverzachtervak Wasmiddelvak voor voorwas Niveaus van het waspoeder Schepje voor waspoeder (*) (*) Specificaties kunnen per aangekochte machine variëren.
- Page 86 Gebruik van het toestel Secties • Hoofdwasmiddelvak: Dit vak is bedoeld voor vloeibaar wasmiddel of waspoeder of ontkalker. De niveauplaat voor vloeibaar wasmiddel wordt in uw machine meegeleverd. (*) • Vak voor wasverzachter, stijfsel, wasmiddel: Dit vak is bedoeld voor wasverzachters of stijfsel. Volg de instructies op de verpakking. Als wasverzachters na gebruik resten achterlaten, probeer ze dan te verdunnen of gebruik een vloeibare wasverzachter.
- Page 87 Gebruik van het toestel Dit vak moet uitsluitend worden gebruikt als de voorwasfunctie is gekozen. We raden aan om de voorwasfunctie alleen te gebruiken voor zeer vuile was. (*) Specificaties kunnen per aangekochte machine variëren. Programmaknop • Om het gewenste programma te kiezen, draait u de programmaknop met de wijzers van de klok mee of tegen de wijzers van de klok in totdat de markering op de programmaknop wijst naar het gekozen programma.
- Page 88 Gebruik van het toestel Elektronische display Digitale display Regelknop watertemperatuur TPM regelknop snelheid Extra functie uitgestelde start Start/pauze-knop Lampje start/pauze-knop Gebruik van uw wasmachine Uw wasgoed voorbereiden...
- Page 89 Gebruik van het toestel Volg de instructies op de waslabels op de kleding. • Scheid uw wasgoed op soort (katoen, synthetisch, fijn, wol, enz.), wastemperatuur (koud, 30°, 40°, 60°, 90°) en vuilgraad (licht vervuild, vervuild, zwaar vervuild). Was bonte en witte was nooit samen. •...
- Page 90 Gebruik van het toestel Normaal wassen Mag worden Niet bleken gebleekt Maximale Maximale Niet strijken strijktemperatuur strijktemperatuur 150 °C 200 °C Mag chemisch Niet chemisch Plat drogen worden gereinigd reinigen Druipdroog Hangend drogen Niet in de droogkast drogen Chemisch reinigen Perchloorethyleen Perchloorethyleen met gasolie, zuivere...
- Page 91 Gebruik van het toestel OPMERKINGEN Overschrijd de maximale lading van de trommel niet, aangezien dit slechte wasresultaten geeft en kreuken veroorzaakt. Raadpleeg de wasprogrammata bellen voor informatie over laadvermogens. De volgende tabel geeft het geschatte gewicht van typisch wasgoed weer: SOORT WASGOED GEWICHT (gr) Handdoek...
- Page 92 Gebruik van het toestel Wasmiddel aan de machine toevoegen De hoeveelheid wasmiddel die u in uw machine moet plaatsen hangt af van de volgende criteria: • Gebruik geen voorwas als uw kleding slechts licht bevuild is. Doe een kleine hoeveelheid wasmiddel (zoals aangegeven door de fabrikant) in vak II van de wasmiddellade.
- Page 93 Gebruik van het toestel Bediening van uw machine Steek de stekker van uw machine in het stopcontact. Draai de watertoevoer open. • Open de machinedeur. • Verdeel het wasgoed gelijkmatig over de machine. • Duw voorzichtig tegen de deur totdat deze dicht klikt Een programma kiezen Gebruik de programmatabellen om het meest geschikte programma voor uw wasgoed te kiezen.
- Page 94 Gebruik van het toestel Extra functies • Temperatuurkeuze Gebruik de regelknop watertemperatuur om de automatisch geprogrammeerde watertemperatuur te wijzigen. Wanneer u een programma kiest, wordt automatisch de maximumtemperatuur voor dat programma geselecteerd. Om de temperatuur aan te passen, drukt u op de regelknop watertemperatuur totdat de gewenste temperatuur wordt weergegeven op het digitale display.
- Page 95 Gebruik van het toestel • Uitsteltimer U kunt deze hulpfunctie gebruiken om de starttijd van de wascyclus gedurende 1 tot 23 uur uit te stellen. Om de uitstelfunctie te gebruiken: • Druk eenmaal op de uitsteltoets. • “01” wordt weergegeven. gaat branden op het elektronische display.
- Page 96 Gebruik van het toestel OPMERKINGEN Indien u de hulpfunctie wilt kiezen, als het ledlampje van de hulpfunctie niet brandt, betekent dit dat deze functie niet wordt gebruikt in het wasprogramma dat u hebt gekozen. • Start/pauze-knop Door op de Start/pauze-knop te drukken kunt u het programma dat u hebt gekozen starten of een lopend programma onderbreken.
- Page 97 Gebruik van het toestel • Annuleren van het programma Om een lopend programma op elk moment te annuleren: 1. Draai de programmaknop naar de «STOP»-stand. 2. Uw machine stopt met wassen en het programma wordt geannuleerd. 3. Draai de programmaknop naar een ander programma om het water van de machine af te voeren. 4.
- Page 98 Gebruik van het toestel Tableau des programmes Programma Soort wasgoed / omschrijvingen Vuil katoen en vlastextiel. (Ondergoed, (**) Éco 40°C linnen, tafelkleden, handdoeken (maximaal 40-60 °C 3,0 kg), beddengoed, enz.) *60°C 90°C Zeer vuil katoen en vlastextiel. (Ondergoed, (*) Katoen 80°C linnen, tafelkleden, handdoeken (maximaal 70°C...
- Page 99 Gebruik van het toestel Programma Soort wasgoed / omschrijvingen U kunt dit programma voor elk type wasgoed gebruiken als u na de wascyclus een extra centrifugeren wilt uitvoeren./ U kunt het afvoerprogramma gebruiken om het water dat zich in de machine heeft opgehoopt af te voeren (toevoegen Centrifugeren of uitnemen van wasgoed).
- Page 100 Gebruik van het toestel OPMERKINGEN Programmaduur kan wijzigen naargelang de hoeveelheid wasgoed, leidingwater, omgevingstemperatuur en gekozen extra functies. (*) Wastemperatuur van het programma is de fabrieksinstelling. (**) 60 C° - 40 C° zijn programma’s energielabelverklaring. (***) Omwille van de korte wastijd van dit programma, raden we aan om minder wasmiddel te gebruiken. Het programma duurt mogelijk langer dan 15 minuten als uw machine een ongelijkmatige lading waarneemt.
- Page 101 Gebruik van het toestel Max. Restvochtigheid Energieverbruik Programmaduur Waterverbruik Temperatuur résiduelle % kWh/cyclus Uren: Minuten Liter/cyclus °C 1200 tpm 0,92 0,53 0,29 03:13 02:34 02:32 53 % 53 % 53 % 2,22 02:59 53 % 0,81 03:20 53 % 0,49 01:50 62 % 0,94...
- Page 102 Gebruik van het toestel Belangrijke informatie • Maak uitsluitend gebruik van wasmiddelen, wasverzachters en andere toevoegingen die bestemd zijn voor wasmachines. Wanneer er overmatig schuim wordt gedetecteerd bij het gebruik van te veel wasmiddel, wordt het automatisch schuimabsorptiesysteem geactiveerd. • We raden aan de wasmachine iedere 2 maanden te reinigen. Gebruik voor periodieke reiniging het Trommelreinigingsprogramma.
-
Page 103: Praktische Informatie
Praktische informatie Reiniging en onderhoud Waarschuwing Schakel uw netvoeding uit en trek de stekker uit het stopcontact alvorens onderhoud en reiniging van uw machine uit te voeren. Draai de watertoevoer dicht als uw machine onderhoud of reiniging ondergaat. OPGELET Gebruikgeenop losmiddele n , schuurmiddelen, glasreinigers of allesreinigers om uw wasmachine te reinigen. - Page 104 Praktische informatie • Schroef de watertoevoerslang(en) van de wasmachine los. • Om het watertoevoerfilter te verwijderen van het watertoevoerventiel, gebruikt u een punttang om voorzichtig aan de kunststof stang in het filter te trekken. • Een tweede watertoevoerfilter bevindt zich in het kraanuiteinde van de watertoevoerslang. Om het tweede watertoevoerfilter te verwijderen, gebruikt u een punttang om voorzichtig aan de kunststof stang in het filter te trekken.
- Page 105 Praktische informatie Om het deksel van de pomp te openen kunt u de waspoederschep (*) of de niveauplaat van het vloeibare wasmiddel dat met uw machine wordt geleverd gebruiken. Plaats het uiteinde van de poederschep of niveauplaat voor vloeibaar wasmiddel in de opening van het deksel en duw voorzichtig naar achteren.
- Page 106 Praktische informatie (*) Specificaties kunnen per aangekochte machine variëren. Wasmiddellade Het gebruik van wasmiddel kan na verloop van tijd zorgen voor de opeenhoping van resten in de wasmiddellade. We raden aan dat u de lade iedere 2 maanden verwijdert om de opgehoopte resten te reinigen.
- Page 107 Praktische informatie • Verzamel de resten in de uitsparing van de wasmiddellade, zodat ze niet in uw machine terechtkomen. • Droog de wasmiddellade met een handdoek of droge doek en plaats hem terug OPGELET Reinig uw wasmiddellade niet in de vaatwasmachine. Apparaat voor vloeibaar wasmiddel(*) Voor het reinigen en onderhoud van het apparaat voor vloeibaar wasmiddel verwijdert u het apparaat van zijn plek zoals in de onderstaande afbeelding is aangegeven en reinigt u grondig...
- Page 108 Praktische informatie Behuizing / trommel Behuizing Gebruik een mi ld, niet -schurend reinigingsmiddel, of zeep en water, om de externe behuizing te reinigen. Veeg droog met een zachte doek. Trommel Laat geen metalen voorwerpen, zoals naalden, paperclips, munten, enz. achter in uw machine. Deze voorwerpen leiden tot roestvorming in de trommel.
- Page 109 Praktische informatie Storing Mogelijke oorzaak Probleemoplossing De waterkraan is dicht. Draai de kraan open. Controleer de De watertoevoerslang kan watertoevoerslang en gedraaid zijn. verwijder knikken/draaien. Uw machine neemt geen Watertoevoerslang is Reinig de filters van de water. verstopt. watertoevoerslang. (*) Het toevoerfilter is verstopt.
- Page 110 Praktische informatie Défaut Cause possible Dépannage Druk op de start/pauzeknop. Om het schuim te stoppen, verdunt Er is een overmatige u een eetlepel wasverzachter in hoeveelheid wasmiddel 1/2 liter water en giet u het in Er is overmatige gebruikt. de wasmiddellade. Druk na 5-10 schuimvorming in de minuten op de start/ pauze- wasmiddellade.
- Page 111 Praktische informatie Storing Mogelijke oorzaak Probleemoplossing Gebruik bij de volgende Het wasgoed vertoont grijze Er is onbehandelde olie, wasbeurt de hoeveelheid vlekken. crème of zalf op uw wasgoed. wasmiddel zoals aangegeven op de verpakking. Het controlesysteem voor niet goed verdeelde was zal proberen uw Geen storing.
- Page 112 Praktische informatie Automatische foutmeldingen en wat te doen Uw wasmachine is uitgerust met een ingebouwd storingsdetectiesysteem, aangegeven door een combinatie van knipperende lampjes. De meestvoorkomende storingscodes worden hieronder weergegeven. Probleemcode Mogelijke storing Wat te doen Sluit de deur goed totdat u een klik hoort.
- Page 113 ¡Muchas gracias! M u c h a s g r a c i a s p o r h a b e r e l e g i d o n u e s t r o p r o d u c t o VA L B E R G .
- Page 114 Índice Descripción del aparato Descripción del aparato Instalación Utilización del aparato Utilización Limpieza y mantenimiento Información práctica Solución de problemas...
-
Page 115: Descripción Del Aparato
Descripción del aparato Descripción del aparato Pantalla electrónica Selector de programa Bandeja superior Compartimento para detergente Tambor Tapa de filtro de bomba Válvula de entrada de agua Cable de alimentación Manguera de descarga Pernos de transporte... -
Page 116: Utilización Del Aparato
Utilización del aparato Instalación Quitar los pernos de transporte Œ Antes de usar la lavadora, quite los cuatro pernos de transporte y los separadores de goma de la parte trasera de la máquina. Si no se quitan los pernos, la garantía podría quedar anulada y podrían producirse fuertes vibraciones, ruido y el funcionamiento defectuoso de la máquina. - Page 117 Utilización del aparato Regulación de las patas/ los soportes regulables Œ No instale la máquina sobre una superficie (como, por ejemplo, una alfombra) que impida la ventilación de la base. • Para asegurarse de que la máquina funcione de forma silenciosa y sin vibraciones, instálela sobre una superficie firme.
- Page 118 Utilización del aparato • La lavadora requiere un suministro eléctrico de 220-240 V y 50 Hz. • El cable de alimentación de la lavadora está equipado con un enchufe con conexión a tierra. Este enchufe debe conectarse siempre a una toma con conexión a tierra de 10 amperios. •...
- Page 119 Utilización del aparato Conecte las nuevas mangueras de entrada de agua a un grifo roscado de ¾˝ (1,9 cm). • Conecte el extremo de tapa blanca de la manguera de entrada de agua a la válvula de entrada de agua blanca que se encuentra en la parte trasera de la máquina y el extremo de tapa roja a la válvula de entrada de agua roja (si fuese aplicable).
- Page 120 Utilización del aparato Conexión de desagüe • Conecte la manguera de desagüe a un tubo vertical o al codo de salida de un fregadero doméstico utilizando equipamiento adicional. • No intente nunca estirar la manguera de desagüe. • No coloque la manguera de desagüe de su máquina dentro de un contenedor, cubo o bañera. •...
- Page 121 Utilización del aparato Compartimento para detergente Accesorios de detergente líquido Compartimento para detergente de lavado principal Compartimento para suavizante Compartimento para detergente de prelavado Niveles de detergente en polvo Pala para detergente en polvo (*) (*) Las especificaciones pueden variar en función de la máquina que se haya adquirido. Accesorios opcionales con extra coste..
- Page 122 Utilización del aparato Secciones • Compartimento para detergente de lavado principal: En este compartimento se colocan los detergentes líquidos o en polvo o los productos para quitar la cal. El dispensador de detergente líquido se suministra en el interior de la máquina. (*) •...
- Page 123 Utilización del aparato Este compartimento solo debe usarse si se ha seleccionado la función de prelavado. Solo recomendamos usar la función de prelavado para ropa muy sucia. (*) Las especificaciones pueden variar en función de la máquina que se haya adquirido. Selector de programa •...
-
Page 124: Uso De La Lavadora
Utilización del aparato Pantalla electrónica Pantalla digital Botón de ajuste de temperatura del agua Botón de ajuste de velocidad de centrifugado (RPM) Función adicional de inicio diferido Botón de Inicio/Pausa Botón de Inicio/Pausa lámpara Uso de la lavadora Preparación de la colada... - Page 125 Utilización del aparato Siga las instrucciones proporcionadas en las etiquetas de cuidado de las prendas. • Separe la ropa por tipo (algodón, sintético, delicado, lana, etc.), temperatura de lavado (frío, 30 °, 40 °, 60 °, 90 °) y nivel de suciedad (poco sucia, sucia, muy sucia). Nunca lave a la vez ropa de color y ropa blanca.
- Page 126 Utilización del aparato Lavado normal Admite lejía No usar lejía Temperatura máxima Temperatura máxima No planchar de planchado 150 °C de planchado 200 °C Se puede limpiar No lavar en seco Secar en plano en seco Tender sin escurrir Tender para secar No admite secadora Admite limpieza en Percloroetileno R11,...
- Page 127 Utilización del aparato OBSERVACIONES Evite superar la carga máxima del tambor, ya que esto da lugar a un lavado de mala calidad y a arrugas en la ropa. Para obtener información sobre las capacidades de carga, consulte las tablas de programas de lavado. En la siguiente tabla se indican los pesos aproximados de los artículos más comunes de la colada: Tipo de artículo de la colada Peso (gr)
- Page 128 Utilización del aparato Añadir detergente a la máquina La cantidad de detergente que se debe utilizar depende de los siguientes criterios: • Si la ropa solo está ligeramente sucia, no utilice el prelavado. Coloque una pequeña cantidad de detergente (la especificada por el fabricante) en el compartimento II del compartimento para detergente.
- Page 129 Utilización del aparato Uso de la máquina Enchufe la máquina a la red eléctrica. Abra el suministro de agua. • Abra la puerta de la máquina. • Distribuya la colada de forma homogénea en el interior de la máquina. • Empuje la puerta con suavidad hasta que se oiga el chasquido de cierre.
- Page 130 Utilización del aparato Funciones adicionales • Selección de temperatura Use the washing water temperature adjustment button to alter the automatically programmed washing water temperature. Use el botón de ajuste de temperatura del agua de lavado para modificar la temperatura del agua de lavado programada automáticamente.
- Page 131 Utilización del aparato • Inicio diferido Puede utilizar esta función auxiliar para retrasar la hora de inicio del ciclo de lavado de 1 a 23 horas. Para utilizar la función de retardo: • Presione la tecla de retardo una vez. •...
- Page 132 Utilización del aparato OBSERVACIONES En el caso de que desee seleccionar la función auxiliar, si el LED de función auxiliar no está encendido, esto significa que esta función no se está utilizando en el programa de lavado que ha seleccionado. •...
- Page 133 Utilización del aparato • Cancelar un programa Para cancelar en cualquier momento un programa que se esté realizando: 1. Coloque el selector de programa en la posición “PARADA”. 2. La máquina detendrá la operación de lavado y se cancelará el programa. 3.
- Page 134 Utilización del aparato Tabla de programas Programa Tipo de ropa/Descripciones Prendas sucias de algodón y lino. (Ropa (**) Éco 40°C interior, lino, mantel, toalla máximo 3,0 kg, 40-60 °C ropa de cama, etc.). *60°C 90°C Prendas muy sucias de algodón y lino. (Ropa (*) Algodón 80°C interior, lino, mantel, toalla máximo 3,0 kg,...
- Page 135 Utilización del aparato Programa Tipo de ropa/Descripciones Puede utilizar este programa para cualquier tipo de colada si desea un paso de centrifugado adicional después del ciclo de lavado. / Puede utilizar el programa de drenaje para drenar el agua acumulada en el interior de la máquina Centrifugado (añadir o retirar colada).
- Page 136 Utilización del aparato OBSERVACIONES La duración del programa puede variar en función del volumen de carga, el agua del suministro, la temperatura ambiental y las funciones adicionales seleccionadas. (*) La température de l’eau de lavage du programme est la température d’usine par défaut. (**) 60 °C - 40 °C sont des programmes de déclaration d’étiquette-énergie (***) Ce programme étant plus court, il est conseillé...
- Page 137 Utilización del aparato Nivel de numedad Capacidad Consumo de Temperatura Nombre del Consumo energético Duración del programa restante nominal programa Máx programa kWh/ciclo Horas: Minutos Litros/ciclo °C 1200 rpm 0,92 0,53 0,29 03:13 02:34 02:32 53 % 53 % 53 % 2,22 02:59 53 %...
- Page 138 Utilización del aparato Información importante • Utilice detergentes, suavizantes y otros aditivos adecuados únicamente para lavadoras automáticas. Se ha producido un exceso de espuma y el sistema automático de absorción de espuma se ha activado debido al uso excesivo de detergente. •...
-
Page 139: Limpieza Y Mantenimiento
Información práctica Limpieza y mantenimiento Advertencia Apague la lavadora y desconecte el enchufe de la toma eléctrica antes de llevar a cabo tareas de mantenimiento y limpieza en la máquina. Cierre el suministro de agua antes de comenzar las tareas de mantenimiento y limpieza en la máquina. ATENCIÓN No utilice disolventes , productos de limpieza abrasivos, limpiacristaleso productos de limpieza... - Page 140 Información práctica • Desenrosque la manguera o mangueras de entrada de agua de la lavadora. • Cuando vaya a quitar el filtro de entrada de agua de la válvula de entrada de agua, utilice un par de alicates de punta larga para extraer con cuidado la barra de plástico del filtro. •...
- Page 141 Información práctica Para abrir la tapa de la bomba, puede usar la pala para detergente en polvo (*) suministrada con la máquina o el dispensador de detergente líquido. Inserte el extremo de la pala para detergente en polvo o el dispensador de detergente líquido en la apertura de la tapa y ejerza una presión ligera hacia atrás.
- Page 142 Información práctica (*) Las especificaciones pueden variar en función de la máquina que se haya adquirido. Compartimento para detergente El uso de detergente puede hacer que con el paso del tiempo se acumulen residuos en el compartimento para detergente. Recomendamos extraer el compartimento cada dos meses para limpiar los residuos que se hayan acumulado.
- Page 143 Información práctica • Si quedan residuos en el receptáculo donde va el compartimento, quítelos con un cepillo suave. Procure evitar que caigan residuos dentro de la máquina. • Seque bien el compartimento y vuelva a introducirlo en el receptáculo. ATENCIÓN No lave el compartimento para detergente en el lavavajillas.
-
Page 144: Resolución De Problemas
Información práctica Cuerpo / Tambor Cuerpo Para limpiar la cubierta exterior, utilice un producto de limpieza suave y no abrasivo, o agua y jabón. Séquela con un trapo seco. Tambor No deje en el interior de la máquina objetos metálicos, como agujas, clips para papel, monedas, etc. - Page 145 Información práctica Avería Posible causa Resolución de problemas La puerta de la máquina no Cierre la puerta de la está totalmente cerrada. máquina. El grifo del agua está cerrado. Abra el grifo. Compruebe la manguera de Puede que la manguera de La máquina no recibe agua.
- Page 146 Información práctica Avería Posible causa Resolución de problemas Pulse el botón de Inicio/ Pausa. Para detener la formación de espuma, diluya una cucharada sopera de suavizante en 1/2 Se ha utilizado demasiado Se forma demasiada espuma litro de agua y viértalo en el detergente.
- Page 147 Información práctica Avería Posible causa Resolución de problemas En el próximo lavado utilice Hay puntos grises en la Hay aceite no tratado, crema la cantidad de detergente colada. o ungüento en la colada. indicada en el envase. El sistema de control de carga no homogénea intentará...
- Page 148 Información práctica Advertencias automáticas de fallos y medidas a tomar La lavadora está equipada con un sistema integrado de detección de fallos, que se indican mediante una combinación de luces de operación de lavado parpadeantes. A continuación se muestran los códigos de fallos más comunes. Código de error Error posible avería Qué...
- Page 149 Información práctica...
- Page 150 Información práctica...
Need help?
Do you have a question about the WF 612 D DS701T and is the answer not in the manual?
Questions and answers