Advertisement
Advertisement

Related Manuals for Abbott e i-STAT Alinity


Summary of Contents for Abbott e i-STAT Alinity
- Page 1 i-STAT Alinity Quick Reference Guide...
-
Page 2: Table Of Contents
Alinity instrument and i-STAT test cartridges, refer to individual cartridge Instructions for Use and Systems Operation Manual. ©2021 Abbott Point of Care Inc. All rights reserved. Printed in USA. Abbott Point of Care Inc. Emergo Europe 100 and 200 Abbott Park Road... -
Page 3: Instrument Setup (New Instruments)
SECTION 1 INSTRUMENT SETUP (New Instruments) ATTACH BATTERY AND POWER ON INSTRUMENT CHECK FOR SUFFICENT BATTERY CHARGE IF BATTERY SHOWS A YELLOW OR 12APR2015 11:01 RED BAR, CONTINUE TO STEP 3 Charge immediately Home 12APR2015 11:01 12APR2015 11:01 12APR2015 11:01 Perform Patient Test Home Home... - Page 4 SECTION 1 INSTRUMENT SETUP (New Instruments) If instrument displays Set Region Code screen, proceed to STEP . If not, proceed to STEP LOCATE REGION BAR CODE i-STAT Alinity — Quick Reference Guide Art: 731848-01 Rev K Rev. Date: 02-Apr-2021...
- Page 5 Proceed to STEP . If Alert screen displays again, repeat STEP . If the Alert screen displays again, contact your Abbott representative. i-STAT Alinity — Quick Reference Guide Art: 731848-01 Rev K Rev. Date: 02-Apr-2021...
- Page 6 SECTION 1 FINISH SETTING UP THE INSTRUMENT Power instrument on and follow sequence. i-STAT Alinity — Quick Reference Guide Art: 731848-01 Rev K Rev. Date: 02-Apr-2021...
- Page 7 SECTION 1 Set Language Set Clock i-STAT Alinity — Quick Reference Guide Art: 731848-01 Rev K Rev. Date: 02-Apr-2021...
- Page 8 SECTION 1 Set Units Set Date Format INSTRUMENT SETUP IS COMPLETE i-STAT Alinity — Quick Reference Guide Art: 731848-01 Rev K Rev. Date: 02-Apr-2021...
-
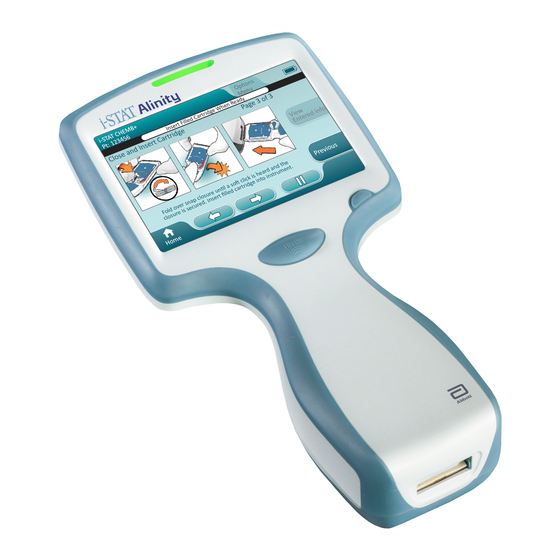
Page 9: System Components
SECTION 2 SYSTEM COMPONENTS i-STAT ALINITY INSTRUMENT: Used to perform cartridge testing, reviewing test results, and conducting quality control (QC) testing. i-STAT ALINITY BASE STATION: Used to recharge the battery installed in the i-STAT Alinity. i-STAT CARTRIDGES: Contains sensors and reagents for all patient and quality testing. -
Page 10: Anatomy Of The Instrument
SECTION 3 ANATOMY OF THE INSTRUMENT LED: Indicates status of the instrument. GREEN: Instrument is starting up or test results are complete. WHITE: Cartridge is processing. RED: Requires immediate attention. BLUE: Battery is charging. YELLOW: Instrument printing. DISPLAY SCREEN POWER BUTTON: Press and hold button for 2 seconds to power up or power down the instrument. -
Page 11: Screen Components And Their Meanings
SECTION 4 SCREEN COMPONENTS AND THEIR MEANINGS Home Screen After the power button is pushed and the instrument starts the power-up sequence, the LED light will turn green, and i-STAT Alinity will appear briefly on the display screen. During the power-up sequence, the i-STAT Alinity instrument performs a series of self-checks. - Page 12 SECTION 4 SCREEN COMPONENTS AND THEIR MEANINGS (CONT.) 16FEB2025 09:45 Home Perform Patient Test More Options Home Home Screen If all self-checks pass at start up, the instrument will display the Home screen. Anatomy of a Home Screen: HEADER Area Contains: ®...
- Page 13 SECTION 4 SCREEN COMPONENTS AND THEIR MEANINGS (CONT.) Alerts 1 of 1 Low Battery Cartridge testing will be disabled if battery is not recharged or replaced. Recharge or replace battery as soon as possible. Exit Alerts Alert Screen If one or more start up self-checks fail, the instrument will display the Alerts Screen as shown in the example above.
- Page 14 SECTION 4 SCREEN COMPONENTS AND THEIR MEANINGS (CONT.) Identification Tab Action Tab 1 Message Area Page Title Button 1 Button 2 Button 3 Alerts Button 4 Button 1 Button 2 Button 3 Home A generic pathway screen is shown in the example above. Anatomy of a Pathway Screen HEADER: ®...
- Page 15 SECTION 4 SCREEN COMPONENTS AND THEIR MEANINGS (CONT.) 16FEB2025 09:45 Home 16FEB2025 09:45 Home Wireless Status Battery Status Network Status Best Fully charged Connected Very Good Approx. 1/2 charged Disabled* Good Charge needed soon Alert Icons Fair Charge immediately** Pass Bolt indicates actively charging Poor Fail...
-
Page 16: Cleaning & Disinfecting
SECTION 5 CLEANING i-STAT Alinity Instrument, Base Station, Printer and Electronic Simulator It is recommended that the i-STAT Alinity, base station and electronic simulator be cleaned periodically or whenever visibly soiled. Standard precautions should be taken whenever working with blood or blood products. - Page 17 SECTION 5 DISINFECTING i-STAT Alinity Instrument Disinfection is recommended between each patient. When instrument is dedicated to a single patient, disinfect at least once a day. The disinfection process must begin IMMEDIATELY after the cleaning procedure is complete. Standard precautions should be taken whenever working with blood or blood products.
- Page 18 SECTION 5 DISINFECTING Base Station, Electronic Simulator and Printer WIPE Remove a wipe from the container and squeeze out any excess fluid before you begin to wipe the surface. WIPE 3X WIPE 3X LEFT & RIGHT UP & DOWN Allow all surfaces to Wipe the front as shown, flip products remain wet for 3 minutes.
- Page 19 SECTION 5 ® Due to the portability of the i-STAT Alinity Instrument, it may be subject to splatter or splash of bodily fluids when used in proximity of patients. Failure to wear clean gloves will result in contamination of the instrument. ®...
-
Page 20: Troubleshooting
SECTION 6 TROUBLESHOOTING The i-STAT Alinity is programmed to perform quality checks throughout the testing cycle. The instrument has several methods of notifying operators of failed quality checks. 1. Quality Check Failures - Are displayed when the instrument identifies a problem while running a cartridge or simulator - There are 4 types of quality check failures: 1. - Page 21 SECTION 7 SECTION 6 TROUBLESHOOTING (CONT.) 2. Startup Alerts - Displayed before the Home screen appears - Screen displays instructions for resolution 3. Alerts - Alert button provides access to Alerts description - Indicates a change in instrument status during testing For a full list of Quality Check Failure Codes and Alerts, see the i-STAT Alinity Instrument Section of the System Operations Manual.
- Page 22 i-STAT ALINITY INSTRUMENT - END USER LICENSE AGREEMENT The full text of the end user license agreement (“EULA”) for the Software (as defined in the EULA) can be found in the Systems Operations Manual. Please read the EULA prior to using this device. Any use of this device shall indicate your acceptance of the terms of the EULA.
Need help?
Do you have a question about the e i-STAT Alinity and is the answer not in the manual?
Questions and answers