Table of Contents
Advertisement
Quick Links
Advertisement
Table of Contents

Summary of Contents for Ryobi RPH361800
- Page 1 FRONT PAGE RPH361800...
-
Page 2: Intended Use
■ Keep the product cool. Do not place the product near IMPORTANT! heat vents or in direct sunlight. It is essential that you read the instructions in this manual ■ Do not use the product if it has been dropped or received before assembling, operating, and maintaining the a sharp blow. -
Page 3: Battery Safety Warnings
■ The product must not be connected to other power no batteries can come in contact with other batteries sources except with another power hub inverter with the or conductive materials while in transport by protecting same model using the parallel kit. exposed connectors with insulating, non-conductive caps or tape. -
Page 4: Lcd Screen Overview
LCD SCREEN OVERVIEW Regulatory Compliance Mark (RCM). This product meets applicable The LCD screen displays the status and condition of the regulatory requirements. product. Waste electrical products should not be disposed of with household waste. Please recycle where facilities exist. Check with your local authority or retailer for recycling advice. -
Page 5: Troubleshooting
BATTERY PORT LED FUNCTIONS LED indicator Battery pack Green Description status Power Without Solid Ready to charge the battery pack battery pack Testing Hot battery Flashing When the battery pack reaches cooled temperature, the pack charger begins charge mode. Cold battery Flashing When the battery pack reaches warmed temperature, the pack... - Page 6 ERROR MESSAGE NOTIFICATIONS Error Message Possible cause Solution High temperature The battery pack is outside Allow the battery pack to reach the the acceptable charging acceptable charging temperature Low temperature temperature range. range. The battery may need to be removed from the port and (when the battery reinstalled to begin charging.
- Page 7 Heat overload The inverter temperature is out Allow the product to cool down Allow unit to cool/ of the normal operating range. and reach the normal operating Press reset temperature. Press the reset button to reset the AC output. System fault There is an internal Call customer service through the communication error.
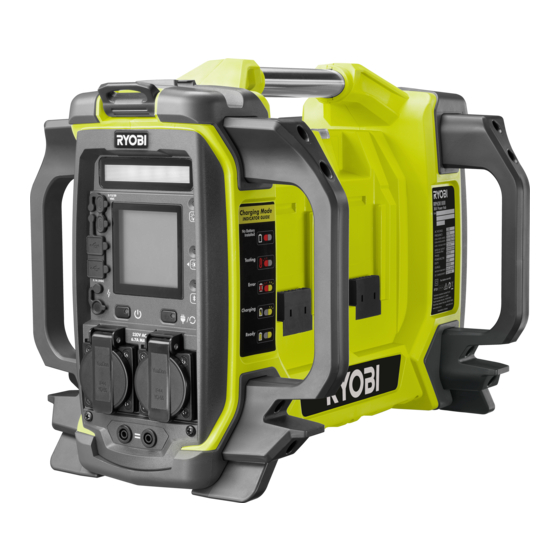
- Page 8 RPH361800 USB A charging ports USB C charging ports LCD panel Strap holder Area / warning light Carry handle Battery Port LED Battery port Task light control button LCD backlight control button Session runtime button AC output / reset button...
- Page 9 Insert the battery pack until it snaps Insert additional battery packs as Press and hold the power button for 2 into place. needed. The more battery packs seconds to turn on the product. installed, the greater the amount of NOTE: The product has 4 battery ports, NOTE: main power...
- Page 10 Using the AC Charging the Using the LED p.11 p.12 p.14 product outlets task light Cleaning and Connecting two Adjusting the LCD p.13 p.15 p.16 power inverters backlight storing the product...
- Page 11 USING THE AC OUTLETS 1. Insert the battery pack until it snaps into place. 2. Press and hold the main power button for 2 seconds. 3. Press and hold the AC output button for 2 seconds. 4. Open the AC outlet covers. 5.
-
Page 12: Charging The Product
CHARGING THE PRODUCT 1. Insert the battery pack until it snaps into place. 2. Connect the charger to the charger input jack. 3. Connect the charger to an AC outlet to charge the product. NOTE: The LCD screen displays the charging status. - Page 13 CONNECTING POWER INVERTERS WARNING: The product must not be connected to other power sources except with another power hub inverter with the same model using the parallel kit cable. 1. Turn off the product, and remove the battery pack. 2. Connect the one end of the parallel kit cable to parallel kit terminals of a power hub inverter.
- Page 14 USING THE LED TASK LIGHT NOTE: Make sure to install battery packs and to turn on the product. 1. Press the LED task light button to turn on the LED task light. NOTE: The task light illuminates on a high setting.
-
Page 15: Adjusting The Lcd Backlight
ADJUSTING the LCD BACKLIGHT NOTE: Make sure to install battery packs and to turn on the product. 1. Press the LCD backlight control button to adjust and set the brightness of the LCD. NOTE: Press the button again to go through other available settings. - Page 16 CLEANING STORING PRODUCT Press and hold the main power button for 2 seconds to turn off the product. 2. Remove the battery packs. Allow the product to cool down. 3. Use a clean, dry cloth to clean the product. Do not use water to clean the product.
-
Page 17: Product Specifications
COMPATIBLE BATTERY PACKS AND POWER OUTPUT Cordless power hub inverter The working AC power output depends on the battery capacity and the number of battery packs installed in the Model RPH361800 product. Rated input voltage 36 V d.c. DC output Compatible... - Page 19 RYOBI is a trade mark of Ryobi Limited, and is used under license. Android is a trademark of Google LLC. IOS is a trade mark or registred trade mark of Cisco in the U.Sand other countries and is used under license.
- Page 20 BACK PAGE Imported by: Techtronic Industries Australia Pty Ltd 31 Gilby Road, Mount Waverley, VIC 3149 Melbourne, Australia Techtronic Industries N.Z. Limited Unit C, 70 Business Parade South, Highbrook, Auckland 2013, New Zealand 961087307-01...


