Table of Contents
Advertisement
Available languages
Available languages
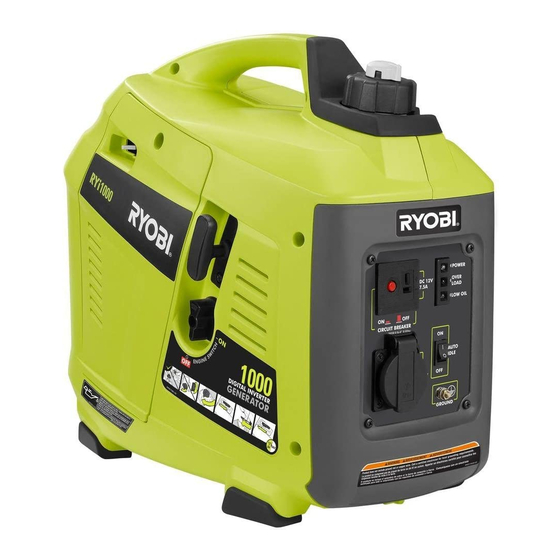
DIGITAL INVERTER GENERATOR
GÉNÉRATRICE NUMÉRIQUE D'INVERSEUR
GENERADOR DEL INVERSOR DE DIGITACES
RYi1000
NOTICE
Do not use E15 or E85 fuel in this
product. It is a violation of federal
law and will damage the unit and
void your warranty. Only use un-
leaded gasoline containing up to 10% ethanol.
Ne pas utiliser d'essence E15 ou E85 dans ce produit.
Une telle utilisation représente une violation de la loi
fédérale et endommagera l'appareil et annulera la
garantie. Utiliser seulement de l'essence sans plomb
ne contenant pas plus de 10 % d'éthanol.
No utilice combustibles E15 o E85 con este producto.
Esto constituye una violación a la ley federal, dañará la
unidad y anulará la garantía. Utilice únicamente gasolina
sin plomo que contiene hasta 10% de etanol.
TABLE OF CONTENTS
Important Safety Instructions ............3-4
Specific Safety Rules ........................... 4
Symbols ............................................5-7
Electrical ...........................................8-9
Features ........................................10-11
Assembly ...........................................11
Operation ......................................12-15
Maintenance .................................15-18
Troubleshooting ................................. 19
Warranty ........................................20-21
Parts Ordering / Service ....... Back Page
WARNING:
To reduce the
risk of injury, the user must read and
understand the operator's manual before
using this product.
SAVE THIS MANUAL FOR
FUTURE REFERENCE
AVIS
AVISO
TABLE DES MATIÈRES
concernant la sécurité ......................3-4
Règles de sécurité particulières ........... 4
Symboles ..........................................5-7
Caractéristiques électriques .............8-9
Caractéristiques ............................10-11
Assemblage .......................................11
Utilisation ......................................12-15
Entretien ........................................15-18
Dépannage .........................................19
Garantie ........................................20-21
Commande de pièces /
réparation ............................Páge arrière
AVERTISSEMENT :
réduire les risques de blessures,
l'utilisateur doit lire et veiller à bien
comprendre le manuel d'utilisation avant
d'employer ce produit.
CONSERVER CE MANUEL
POUR FUTURE RÉFÉRENCE
OPERATOR'S MANUAL
MANUEL D'UTILISATION
MANUAL DEL OPERADOR
NEUTRAL FLOATING
FLOTTANTE NEUTRE / NEUTRAL DE FLOTACIÓN
Reglas de seguridad específicas ......... 4
Símbolos ...........................................5-7
Aspectos eléctricos ..........................8-9
Características ..............................10-11
Armado ..............................................11
Funcionamiento ............................12-15
Mantenimiento ..............................15-18
Corrección de problemas .................. 19
Garantía ........................................20-21
Pedidos de piezas/
Pour
el riesgo de lesiones, el usuario debe leer
y comprender el manual del operador
antes de usar este producto.
PARA FUTURAS CONSULTAS
ÍNDICE DE CONTENIDO
importantes .......................................3-4
servicio ............................ Pág. posterior
GUARDE ESTE MANUAL
Para reducir
Advertisement
Table of Contents

Related Manuals for Ryobi RYI1000


Summary of Contents for Ryobi RYI1000
-
Page 1: Table Of Contents
OPERATOR’S MANUAL MANUEL D’UTILISATION MANUAL DEL OPERADOR DIGITAL INVERTER GENERATOR GÉNÉRATRICE NUMÉRIQUE D’INVERSEUR GENERADOR DEL INVERSOR DE DIGITACES RYi1000 NOTICE AVIS AVISO Do not use E15 or E85 fuel in this product. It is a violation of federal law and will damage the unit and void your warranty. - Page 2 See this fold-out section for all of the figures referenced in the operator’s manual. Consulter l’encart à volets afin d’examiner toutes les figures mentionnées dans le manuel d’utilisation. Consulte esta sección desplegable para ver todas las figuras a las que se hace referencia en el manual del operador.
- Page 3 Fig. 1 L - Overload indicator (indicateur de surcharge, E - Vented fuel cap (bouchon de carburant indicador de sobrecarga) exhalé, tapa del tanque ventilación) M- Power indicator (voyant d’alimentation, F - 120 volt AC 15 amp receptacle (prise 120 V indicador de potencia) A - On/off switch/fuel...
- Page 4 Fig. 5 Fig. 8 Fig. 11 A - Auto idle switch (commutateur de mode de marche au ralenti automatique, interruptor de ralentí automático) B - Off (arret, apagado) A - On/off switch/fuel valve (commutateur C - On (marche, encendido) marche/arrêt robinet carburant, A - Funnel (entonnoir, embudo)
- Page 5 Fig. 14 Fig. 16 Fig. 18 A - Oil cap/dipstick (bouchon/ jauge d’huile, A - Screws (vis, tornillos) tapa de relleno de aceite/varilla medidora de B - Muffler outlet (sortie silencieux, A - Carburetor drain screw (vis de vidange du aceite) recubrimiento del silenciador) carburateur, tornillo de drenaje del caburador)
-
Page 6: Grounding The Generator
To register your Ryobi product, please visit: www.ryobitools.com/ LOCATE GENERATOR AT LEAST 20 FT.* AWAY TO REDUCE THE RISK OF CARBON MONOXIDE GETTING INSIDE THE HOME * Minimum distance as recommended by U.S. Department of Health and Human Services Centers for Disease Control and Prevention (www.cdc.gov/co). Your specific home and/or wind conditions may require additional distance. -
Page 7: Important Safety Instructions
IMPORTANT SAFETY INSTRUCTIONS Do not start or operate the engine in a confined space, building, near open windows, or in other unventilated space DANGER: where dangerous carbon monoxide fumes can collect. Carbon Monoxide. Using a generator indoors CAN KILL Carbon monoxide, a colorless, odorless, and extremely YOU IN MINUTES. -
Page 8: Specific Safety Rules
IMPORTANT SAFETY INSTRUCTIONS or stressing the generator components, possibly leading to follow maintenance instructions may create a risk of to generator failure. shock or injury. Use only recommended or equivalent replacement parts Maintain the unit per maintenance instructions in this and accessories and follow instructions in the Maintenance Operator’s Manual. -
Page 9: Symbols
SYMBOLS The following signal words and meanings are intended to explain the levels of risk associated with this product. SYMBOL SIGNAL MEANING Indicates an imminently hazardous situation, which, if not avoided, will result DANGER: in death or serious injury. Indicates a potentially hazardous situation, which, if not avoided, could result WARNING: in death or serious injury. -
Page 10: Symbols
SYMBOLS Some of the following symbols may be used on this product. Please study them and learn their meaning. Proper interpretation of these symbols will allow you to operate the product better and safer. SYMBOL NAME DESIGNATION/EXPLANATION Volts Voltage Amperes Current Hertz Frequency (cycles per second) - Page 11 SYMBOLS DANGER PELIGRO FUEL CAP WARNING RISQUE D'INCENDIE ET DE BLESSURES GRAVES : Ne jamais retirer le capuchon du réservoir d'essence pendant que l'appareil fonctionne. Éteindre le moteur et laisser refroidir l'appareil pendant au moins Never remove fuel cap when unit is running. Shut cinq minutes.
-
Page 12: Electrical
ELECTRICAL EXTENSION CORD CABLE SIZE Refer to the table below to ensure the cable size of the extension cords you use are capable of carrying the required load. Inadequate size cables can cause a voltage drop, which can damage the appliance and overheat the cord. Load in Watts Maximum Allowable Cord Length Current in... -
Page 13: Electrical
ELECTRICAL GENERATOR CAPACITY 3. Permit the generator output to stabilize (engine runs smoothly and attached device operates properly). Make sure the generator can supply enough continuous (run- 4. Plug in and turn on the next load. ning) and surge (starting) watts for the items you will power at the same time. -
Page 14: Features
FEATURES PRODUCT SPECIFICATIONS GENERATOR ENGINE Rated Voltage .........120 V AC/12 V DC Engine Type ..Single Cylinder (OHV) Four Cycle, 54 cc Rated Amps ..........7.5 A AC/7.5 A DC Replacement Spark Plug ... NHSP LD A7RTC or equivalent Rated Running Watts ..........900 W Engine Lubricant Volume...........8.5 oz. -
Page 15: Assembly
FEATURES ON/OFF SWITCH/FUEL VALVE VENTED FUEL CAP The on/off switch/fuel valve is used in combination with the The generator has a fuel cap with a vent that can be opened starter grip and rope to start the generator. It is also used and closed. -
Page 16: Operation
OPERATION NOTICE: DANGER: The spark arrestor on this product has not been evaluated Carbon Monoxide. Using a generator indoors CAN KILL by the USDA Forest Service and cannot be used on U.S. YOU IN MINUTES. forest lands. In addition, product users must comply Generator exhaust contains high levels of carbon with Federal, State, and local fire prevention regulations. -
Page 17: Operation
OPERATION USING FUEL STABILIZER Overload: The overload indicator will blink when the generator’s Fuel gets old, oxidizes, and breaks down over time. Adding maximum wattage/amperage is reached. If the wattage/ a fuel stabilizer (not included) extends the usable life of fuel amperage capacity is exceeded, the LED will become solid and helps prevent deposits from forming that can clog the and the unit’s output will automatically shut down. - Page 18 OPERATION Allow the engine to run for 15 - 30 seconds, then move WARNING: the choke lever in to the RUN position. NOTE: For quieter more efficient operation, place the Always shut off engine before fueling. Never remove auto idle switch in the ON (I) position. fuel cap or add fuel to a machine with a running or hot engine.
-
Page 19: Maintenance
OPERATION sparks, damage to the battery or generator, or even burns Always abide by the safety warnings provided with the or explosions. battery. NOTE: To prevent short circuit, keep away from a metal NOTE: Most batteries will be completely charged after surface during clamp connection. -
Page 20: Spark Plug Maintenance
MAINTENANCE Replace the engine maintenance cover and reinstall the NOTICE: screw to secure. Be careful not to cross-thread the spark plug. Cross- CHANGING ENGINE LUBRICANT threading will seriously damage the product. See Figure 14. Loosen the screw at the top of the engine maintenance ... - Page 21 MAINTENANCE DRAINING FUEL TANK/CARBURETOR Allow fuel to drain completely into container. See Figures 17 - 18. Retighten drain screw securely. To help prevent gum deposits in the fuel system, drain the Replace the engine maintenance cover and reinstall the fuel from the tank and carburetor before storing.
- Page 22 MAINTENANCE MAINTENANCE SCHEDULE NOTE: If a separate engine manual is provided for this generator, please follow the maintenance schedule provided in the engine manual instead of the maintenance information listed below. After 1st month Every 3 months Every 6 months Every year or Before or 20 hours of...
-
Page 23: Troubleshooting
TROUBLESHOOTING PROBLEM POSSIBLE CAUSE SOLUTION On/Off switch is OFF (O). Turn On/Off switch to ON (I). Engine will not start. No fuel. Fill fuel tank. Stale gasoline or water in gasoline. Drain entire system and refill with fresh fuel. Lubricant level is low. Engine is equipped with Low Oil Shutoff. -
Page 24: Warranty
Techtronic Industries North America, Inc., reserves the This warranty extends to the original retail purchaser only right to change or improve the design of any RYOBI® and commences on the date of the original retail purchase. brand outdoor product without assuming any obligation to modify any product previously manufactured. -
Page 25: Warranty
3. Dirt or grit related wear caused by improper air cleaner ANY CONSEQUENTIAL OR INCIDENTAL DAMAGES. maintenance (most often resulting in worn piston, piston IF YOU HAVE ANY QUESTIONS REGARDING YOUR WARRANTY RIGHTS AND RESPONSIBILITIES, CONTACT YOUR NEAREST AUTHORIZED RYOBI SERVICE CENTER AT 1-800-860-4050. 21 — English... - Page 26 Pour enregistrer votre produit de Ryobi s’il vous plaît la visite : www.ryobitools.com/ INSTALLER ET ÉLOIGNER LA GÉNÉRATRICE D’AU MOINS 6 M (20 PI)* AFIN DE RÉDUIRE LE RISQUE D’INFILTRATION DE MONOXYDE DE CARBONE À L’INTÉRIEUR DE LA MAISON Distance minimale recommandée par le Service de santé et les Centres pour le contrôle et la prévention des maladies américains (www.cdc.gov/co).
-
Page 27: Instructions Importantes Concernant La Sécurité
INSTRUCTIONS IMPORTANTES CONCERNANT LA SÉCURITÉ de l’appareil et doit répondre à toutes les lois et codes de l’électricité applicables. DANGER : Ne pas laisser des enfants ou personnes n’ayant pas reçu une Monoxyde de Carbone. Utiliser une génératrice à l’intérieur formation adéquate utiliser cette unité. -
Page 28: Règles De Sécurité Particulières
INSTRUCTIONS IMPORTANTES CONCERNANT LA SÉCURITÉ Il est préférable d’utiliser une génératrice fixe comme source la section Entretien de ce manuel. L’usage de tout autre pièces d’énergie de secours pour alimenter la maison en cas de panne ou le non-respect des instructions peut présenter des risques d’électricité. -
Page 29: Symboles
SYMBOLES Les termes de mise en garde suivants et leur signification ont pour but d’expliquer le degré de risques associé à l’utilisation de ce produit. SYMBOLE SIGNAL SIGNIFICATION Indique une situation extrêmement dangereuse qui, si elle n’est pas évitée, DANGER : aura pour conséquences des blessures graves, voire mortelles. -
Page 30: Symboles
SYMBOLES Certains des symboles ci-dessous peuvent être utilisés sur le produit. Veiller à les étudier et à apprendre leur signification. Une interprétation correcte de ces symboles permettra d’utiliser le produit plus efficacement et de réduire les risques. SYMBOLE DÉSIGNATION / EXPLICATION Volts Tension Ampères... - Page 31 SYMBOLES AVERTISSEMENT AU SUJET DU CAPUCHON DU DANGER PELIGRO RÉSERVOIR D’ESSENCE RISQUE D'INCENDIE ET DE BLESSURES GRAVES : Ne jamais retirer le capuchon du réservoir d'essence pendant que l'appareil fonctionne. Ne jamais retirer le capuchon du réservoir d’essence Éteindre le moteur et laisser refroidir l'appareil pendant au moins cinq minutes.
-
Page 32: Caractéristiques Électriques
CARACTÉRISTIQUES ÉLECTRIQUES TAILLE DU CÂBLE DU CORDON PROLONGATEUR Voir le tableau ci-dessous pour vérifier que la taille de câble des cordons prolongateurs utilisés est capable de porter la charge requise. Des tailles de câbles inadéquates peuvent causer une chute de tension qui peut détériorations l’appareil et surchauffer le cordon. - Page 33 CARACTÉRISTIQUES ÉLECTRIQUES CAPACITÉ DU GÉNÉRATRICE 3. Laisser la sortie du génératrice se stabiliser (le moteur tourne régulièrement et l’appareil relié fonctionne S’assurer que le génératrice peut fournir les watts continus correctement). (de fonctionnement) et de surtension (démarrage) suffisants 4. Brancher et mettre la charge suivante en marche. pour tous les articles alimentés au même moment.
-
Page 34: Caractéristiques
CARACTÉRISTIQUES FICHE TECHNIQUE GÉNÉRATRICE MOTEUR Tension nominale ........120 V AC/12 V DC Type de moteur...Arbre à cames en tête simple, 54 cc Ampérage nominal .........7,5 A AC/7,5 A DC Bougie de rechange ..NHSP LD A7RTC ou équivalente Watts de fonctionnement .......... 900 W Volume de lubrifiant moteur ...... -
Page 35: Assemblage
CARACTÉRISTIQUES BOUCHON/JAUGE D’HUILE POIGNÉE DU LANCEUR ET CORDE Retirer le bouchon de remplissage d’huile pour vérifier le La poignée du lanceur et corde est utilisée (avec le niveau de lubrifiant et faire l’appoint selon le besoin. commutateur marche/arrêt / robinet de carburant) pour mettre le génératrice du moteur en marche. -
Page 36: Utilisation
UTILISATION AVIS : DANGER : Le pare-étincelles sur ce produit n’a pas été évalué par le Monoxyde de Carbone. Utiliser une génératrice à l’intérieur Service forestier des États-Unis et ne peut pas être utilisé sur d’un bâtiment CAUSERA LA MORT EN QUELQUES MINUTES. des terrains forestiers des États-Unis. -
Page 37: Utilisation
UTILISATION fixe et la puissance utile de la génératrice sera automatiquement Mélanger le stabilisateur de carburant et le carburant avant de interrompue. Pour réinitialisation à l’état initial le génératrice, enlever remplir le réservoir en utilisant un contenant à carburant ou tout tous les chargements du génératrice et éteindre le génératrice. - Page 38 UTILISATION NOTE : Ne pas laisser la poignée repartir brusquement en arrière après le démarrage. La ramener doucement à sa place AVERTISSEMENT : d’origine. Toujours arrêter le moteur avant de faire le plein de carburant. Laisser le moteur tourner pendant 15-30 secondes et puis Ne jamais retirer le bouchon du réservoir d’essence lorsque le pousser le volet de départ à...
-
Page 39: Entretien
UTILISATION (–) à l’aide des boulons, des écrous et des rondelles fournis. soin de ne pas court-circuiter les bornes. Respectez toujours S’assurer que toutes les connexions sont serrées. les avertissements en matière de sécurité fournis avec la pile. NOTE : Prendre soin de ne pas court-circuiter les bornes au NOTE : Le chargement complet de la plupart des piles prend moment de procéder à... - Page 40 ENTRETIEN Réinstaller le couvercle du filtre à air en alignant les languettes Serrer avec la clé (non compris) pour comprimer la rondelle. Si sur le couvercle avec les fentes sur la génératrice. la bougie est neuve, utiliser 1/2 tour pour comprimer la rondelle. Si elle est usée, utiliser 1/8 à...
- Page 41 ENTRETIEN TRANSPORT Retirer le bouchon du réservoir. Pencher la génératrice sur le côté afin de verser l’huile usée Régler le commutateur marche/arrêt en position Off (O) (arrêt). dans un contenant approuvé, en la drainant par l’orifice de ...
- Page 42 ENTRETIEN CALENDRIER D’ENTRETIEN NOTE : Si un autre manuel du moteur est fourni avec cette génératrice, veuillez respecter le calendrier d’entretien présenté dans le manuel du moteur au lieu de suivre les instructions d’entretien décrites ci-dessous. Chaque année Avant Après 1 mois Tous les 3 mois Tous les 6 mois ou toutes les...
-
Page 43: Dépannage
DÉPANNAGE PROBLÈME CAUSE POSSIBLE SOLUTION Le moteur ne démarre pas. Le commutateur marche/arrêt est sur OFF Mettre le commutateur marche/arrêt sur ON (O) (arrêt). (I) (marche). Pas de carburant. Remplir le réservoir de carburant. Carburant trop vieux ou présence d’eau Vidanger l’ensemble du système et remplir dans le carburant. -
Page 44: Garantie
Le produit, y compris toutes les pièces défectueuses devront OU QUATRE-VINGT-DIX JOURS. LES OBLIGATIONS DE être retournés à un centre de réparations Ryobi agréé, avant TECHTRONIC INDUSTRIES NORTH AMERICA, INC., DANS LE expiration de la période de garantie. Les frais d’expédition au CADRE DE CETTE GARANTIE SE LIMITENT EXCLUSIVEMENT centre de réparations pour les travaux sous garantie et de retour... - Page 45 (se traduisant le plus POUR TOUTE QUESTION CONCERNANT VOS DROITS ET VOS RESPONSABILITÉS AU TITRE DE LA GARANTIE, VEUILLEZ COMMUNIQUER AVEC LE CENTRE DE RÉPARATIONS RYOBI AGRÉÉ LE PLUS PROCHE AU 1-800-860-4050. 21 — Français...
- Page 46 Para registrar su producto de Ryobi, por favor visita: www.ryobitools.com/ UBIQUE EL GENERADOR A UNA DISTANCIA DE POR LO MENOS 6 M (20 PIES)* PARA REDUCIR EL RIESGO DE QUE EL MONÓXIDO DE CARBONO INGRESE EN LA CASA Distancia mínima recomendada por el Departamento de Salud y Servicios Humanos y por los Centros para el Control y la Prevención de Enfermedades de los Estados Unidos (www.cdc.gov/co).
-
Page 47: Instrucciones De Seguridad Importantes
INSTRUCCIONES DE SEGURIDAD IMPORTANTES No haga arrancar o funcionar el motor en un espacio confinado, de edificio, cerca de ventana abiertas, o en otro área sin PELIGRO: ventilación donde se puedan recolectar las emanaciones de monóxido de carbono. El monóxido de carbono, un gas incoloro, Monóxido de carbono. -
Page 48: Reglas De Seguridad Específicas
INSTRUCCIONES DE SEGURIDAD IMPORTANTES los cortes de energía. Incluso los generadores portátiles que el incumplimiento de las instrucciones de mantenimiento puede están conectados correctamente pueden sobrecargarse. De esta significar un riesgo de descarga eléctrica o de lesiones. manera, los componentes del generador pueden recalentarse Mantenga la unidad según las instrucciones de mantenimiento o exigirse demasiado, lo que podría producir una falla en el señaladas en este manual del operador. -
Page 49: Símbolos
SÍMBOLOS Las siguientes palabras de señalización y sus significados tienen el objeto de explicar los niveles de riesgo relacionados con este producto. SÍMBOLO SEÑAL SIGNIFICADO Indica una situación peligrosa inminente, la cual, si no se evita, causará la muerte PELIGRO: o lesiones serias. -
Page 50: Símbolos
SÍMBOLOS Es posible que se empleen en este producto algunos de los siguientes símbolos. Le suplicamos estudiarlos y aprender su significado. Una correcta interpretación de estos símbolos le permitirá utilizar mejor y de manera más segura el producto. SÍMBOLO NOMBRE DENOMINACIÓN / EXPLICACIÓN Voltios Voltaje... - Page 51 SÍMBOLOS ADVERTENCIA PARA LA TAPA DEL TANQUE DE DANGER PELIGRO COMBUSTIBLE RISQUE D'INCENDIE ET DE BLESSURES GRAVES : Ne jamais retirer le capuchon du réservoir d'essence pendant que l'appareil fonctionne. Nunca retire la tapa de combustible mientras esté Éteindre le moteur et laisser refroidir l'appareil pendant au moins cinq minutes.
-
Page 52: Aspectos Eléctricos
ASPECTOS ELÉCTRICOS CALIBRE DEL CORDÓN DE EXTENSIÓN Consulte el cuadro mostrado abajo para asegurarse de que el calibre de los cordones de extensión que utilice puedan con la carga eléctrica requerida. Los cordones de calibre insuficiente pueden causar una caída de voltaje, lo cual puede quemar el dispositivo y recalentar el cordón mismo. - Page 53 ASPECTOS ELÉCTRICOS CAPACIDAD DEL GENERADOR 3. Deje que se estabilice la salida del generador (el motor marcha uniformemente y el dispositivo acoplado funciona Cerciórese que el generador pueda suministrar suficientes correctamente). vatios de potencia continua (en marcha) y de sobrecorriente 4.
-
Page 54: Características
CARACTERÍSTICAS ESPECIFICACIONES DEL PRODUCTO GENERADOR MOTOR Voltaje nominal ........120 V AC/12 V DC Tipo de motor ....Leva única elevada (SOHC), 54 cc Amperaje nominal........7,5 A AC/7,5 A DC Bujía de repuesto ..... NHSP LD A7RTC o equivalente Potencia en marcha ..........900 W Volumen de aceite de motor ....... -
Page 55: Armado
CARACTERÍSTICAS TAPA DE ACEITE/VARILLA PARA MEDIR EL MANGO DEL ARRANCADOR Y CUERDA ACEITE El mango del arrancador y cuerda se usa (junto con el interruptor de encendido y apagado/ válvula de combustible) Retire la tapa de aceite/varilla para medir el aceite para para arrancar el motor del generador. -
Page 56: Funcionamiento
FUNCIONAMIENTO AVISO: PELIGRO: El parachispas que acompaña a este producto no ha sido Monóxido de carbono. Usar un generador en el interior LO evaluado por el Servicio Forestal del Departamento de MATARÁ EN POCOS MINUTOS. Agricultura de EE. UU. y no se puede usar en terrenos Los gases de escape del generador contienen niveles altos forestales de EE. -
Page 57: Funcionamiento
FUNCIONAMIENTO Sobrecarga: depósitos, los cuales pueden tapar el sistema del combustible. Siga las instrucciones del fabricante del estabilizador de combustible en El indicador de sobrecarga brillará intermitentemente cuando el cuanto a la debida proporción estabilizador-combustible. generador alcance el máximo vataje/amperaje. Si se excede la capacidad de vataje/amperaje, la luz LED quedará... - Page 58 FUNCIONAMIENTO NOTA: Si el motor está tibio, coloque la palanca del anegador en la posición de FUNCIONAMIENTO. ADVERTENCIA: Tire del mango del arrancador y cuerda hasta que comience a Apague siempre el motor antes de reabastecer combustible. funcionar el motor. Nunca retire la tapa de combustible ni agregue combustible NOTA: No permita que el mango se retraiga violentamente a una máquina mientras el motor esté...
-
Page 59: Mantenimiento
FUNCIONAMIENTO Lleve el interruptor de ralentí automático a la posición OFF (O) Después de la batería está completamente cargada, desconecte (apagado). el cable. Desconecte el borne negativo (negro), luego el borne positivo (rojo) con cuidado de no cortocircuitar las terminales. ... - Page 60 MANTENIMIENTO REVISIÓN Y LIMPIEZA DEL FILTRO DE AIRE Limpie toda la tierra presente alrededor de la base de la bujía. Vea la figura 13. Retire la bujía con la llave para bujía (no incluida). Para obtener un desempeño apropiado y una larga vida útil de la ...
- Page 61 MANTENIMIENTO Para limpiar el parachispas: Lleve el interruptor de encendido y apagado/ válvula de combustible en la posición de OFF (O) (apagado). Retire el tornillo largo situado arriba el panel posterior. Coloque un recipiente adecuado bajo el tornillo de drenaje del ...
- Page 62 MANTENIMIENTO PROGRAMA DE MANTENIMIENTO NOTA: Si recibe un manual del motor para este generador en particular, respete el cronograma de mantenimiento que se indique en el manual del motor y no la información de mantenimiento que figura a continuación. Al cabo del Cada año Cada 3 meses Cada 6 meses...
-
Page 63: Corrección De Problemas
CORRECCIÓN DE PROBLEMAS PROBLEMA POSSIBLE CAUSE SOLUCIÓN El motor no arranca. El interruptor de encendido y apagado está Ponga el interruptor de encendido y en OFF (O) (apagado) apagado está en ON (I) (encendido). No hay combustible. Llene el tanque. Gasolina pasada o agua pasada en la Drene todo el sistema y reabastézcalo con gasolina. -
Page 64: Garantía
Techtronic Industries North America, Inc. garantiza al compra- juntas tóricas, sellos de agua y aceite, y tanques de detergentes. dor original al menudeo que este producto de la marca RYOBI ® carece de defectos en los materiales y en la mano de obra, y IMPORTANTE: A los componentes que esta garantía no... - Page 65 SI TIENE ALGUNA PREGUNTA CON RESPECTO A LOS DERECHOS Y LAS RESPONSABILIDADES DE LA GARANTÍA, PÓNGASE EN CONTACTO CON SU CENTRO DE SERVICIO AUTORIZADO POR RYOBI MÁS CERCANO; PARA ELLO, LLAME AL 1-800-860-4050. 21 — Español...
- Page 66 NOTES / NOTAS...
- Page 67 NOTES / NOTAS...
-
Page 68: Advertencia
1-800-860-4050. par Ryobi Limited. CÓMO OBTENER SERVICIO O ASISTENCIA TÉCNICA AL CONSUMIDOR: Para RYOBI es una marca de Ryobi Limited y se obtener servicio o asistencia técnica al consumidor, sírvase comunicarse con nosotros utiliza conforme a una licencia otorgada por llamando al 1-800-860-4050.
Need help?
Do you have a question about the RYI1000 and is the answer not in the manual?
Questions and answers