Table of Contents
Advertisement
This manual should be considered a permanent
part of the motorcycle and should remain with the
motorcycle when resold or otherwise transferred to
a new owner or operator. The manual contains
important safety information and instructions which
should be read carefully before operating the
motorcycle.
— 1 —
Advertisement
Table of Contents

Related Manuals for HYOSUNG GV125S


Summary of Contents for HYOSUNG GV125S
- Page 1 This manual should be considered a permanent part of the motorcycle and should remain with the motorcycle when resold or otherwise transferred to a new owner or operator. The manual contains important safety information and instructions which should be read carefully before operating the motorcycle.
- Page 2 BATTERY INITIAL CHARGING 1. BATTERY INITIAL CHARGING Initial charging of the battery is required after filling electrolyte to improve the battery durability. 2. BATTERY INSTALLATION ① Fill the electrolyte to the battery. ② Leave the battery for 30 minutes. ③ Charge the battery by standard charging. This is necessary for reliability of the battery.
- Page 3 FOREWORD Thank you for choosing a Hyosung motorcycle. W e at Hyosung have designed, tested produced this motorcycle using the most modern technology avail - able to provide you with much happy, enjoyable, safe riding. Motorc ycling is one of the most exhilarating sports and to...
- Page 4 Hyosung reserves the right to make changes at any time, without notice and without incurring any obligation to make the same or similar changes to motorcycles previously built or sold.
- Page 5 Information following these during this time will help ensure signal words should be carefully maximum life and performance reviewed. from your new motorcycle. Hyosung parts manufactured of high quality The personal safety of the materials, and manufactured rider involved. parts are finished to close Disregarding this information tolerances.
- Page 6 Noise Control System (muffler assembly) TAMPERING WITH NOISE CONTROL SYSTEM PROHIBITED Owners are warned that the law may prohibit : The removal or rendering inoperative by any person other than for the purpose of maintenance, repair or replacement, of any device or element of design incorporated into any new vehicle for the purpose of noise control prior to its any sale or delivery to the ultimate purchaser or while it is in use.
- Page 7 CONSUMER INFORMATION SAFE RIDING RECOMMENDATION FOR MOTORCYCLE RIDERS Motorcycle riding is great fun and an exciting sport. Motorcycle ● Before first riding also requires he/she to motorcycle read this owner’s take some extra precautions to manual carefully to become ensure the safety of the rider and familiar with the motorcycle passenger.
- Page 8 ● Caution rider others near the motorcycle ● Before each use, perform not to get close to or touch daily inspections with the any moving parts or any rider. heated areas such as the ● Specific items to check are engine and exhaust sys- tem.
- Page 9 Keep both hands on the hand- grips at all times when The position lamp, meter riding. Removing your hands lamp, tail lamp and license from the handgrips reduces plate lamp this your ability to control the motorcycle alw ays comes motorcycle and could result in an accident.
- Page 10 ⊙ WEAR A HELMET ⊙ INSPECTION BEFORE RIDING Motorcycle safety equipment starts with a Review thoroughly quality safety helmet. One instruct ions most serious “INSPECTION BEFORE injuries that can happen is RIDING” section this head injury. ALWAYS manual. wear a properly approved Do not forget to perform an helmet.
- Page 11 WEATHER DAYS addition unsuitable accessories can lead to unsafe operating conditions. It is not possible for Hyosung to test Riding weather each accessory on the market or days, especially wet ones, combinations of all the available requires extra caution.
- Page 12 Weak mounts can allow the accessories shifting of the weight and modifications. create dangerous, genuine Hyosung unstable condition. accessories or equivalent 2. Inspect for proper ground designed tested clearance and bank angle. your motorcycle. Consult...
- Page 13 also cause oscillations in during the operation of the the front end and lead to motorcycle. instability problems. 7. When carrying a load on the Accessories added to the motorcycle, mount it as low machine should be as light as possible and as close as as possible and kept to a possible to the machine.
-
Page 14: Table Of Contents
TABLE OF CONTENTS 1.SERIAL NUMBER LOCATION ............... 13 2.NAMES OF EACH PARTS............... 14 CONTROLS ....................17 IGNITION SWITCH IGNITION KEY INSTRUMENT PANEL LEFT HANDLE SWITCHES RIGHT HANDLE SWITCHES REAR BRAKE PEDAL GEAR LEVER STAND REAR SHOCK ABSORBER 4. FUEL AND OIL AND ANTIFREEZE RECOMMENDATION ..FUEL ENGINE OIL ANTIFREEZE... - Page 15 9.INSPECTION AND MAINTENANCE ............ 58 TOOL ENGINE OIL FUEL HOSE FUEL ANTIFREEZE RUBBER CAP OF CABLES REAR-VIEW MIRROR REFLECTOR EXHAUST PIPE AND MUFFLER FRONT AND REAR SUSPENSIONS BATTERY AIR CLEANER SPARK PLUG IDLING ADJUSTMENT THROTTLE CABLE PLAY ADJUSTMENT CLUTCH CABLE ADJUSTMENT DRIVE CHAIN BRAKES TIRE...
-
Page 16: Serial Number Location
SERIAL NUMBER LOCATION The frame and/or engine serial numbers are used to register the motorcycle. They are also to assist your dealer in terms of ordering parts or referring to special service information. The frame number is also known as the VIN or Vehicle The engine serial number is Identification Number. -
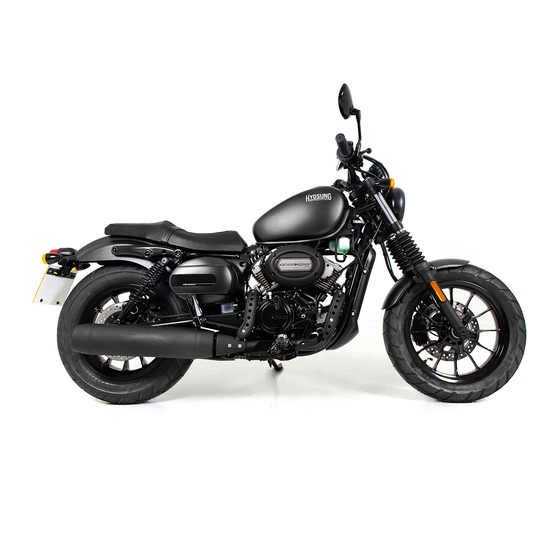
Page 17: Names Of Each Parts
NAMES OF EACH PARTS Handle bar instrument Left handle switches Front brake fluid reservoir Clutch lever Front brake lever Rear-view mirror Throttle grip Instrument panel Right handle switches Ignition switch Fuel tank cap — 14 —... - Page 18 Left side view Head lamp & Position lamp Rear turn signal lamp Front turn signal lamp Drive chain Exhaust bolt Passenger footrests Ignition coil (Front and rear) Side stand ECU fuse box Footrests Battery Gearshift lever Seat Spark plug (Front) Brake / Tail lamp Front brake disk —...
- Page 19 Right side view Rear brake disk Engine oil filter Spark plug (Rear) Engine oil level lens Air cleaner element Engine oil drain bolt Water tank Engine oil filler plug Antifreeze filler plug Rear brake fluid reservoir Draining bolt Muffler Rear brake pedal N O T E “...
-
Page 20: Controls
CONTROLS Turning the ignition switch IGNITION SWITCH ”position while the to the“ motorcycle is moving can be hazardous. ⊙ “ ”( POSITION In this position, the ignition circuit is closed and the engine can be started. The key cannot be removed from the ignition switch in this position. -
Page 21: Ignition Key
position. Operating correctly, place. the handlebar cannot move, engine electrical INSTRUMENT PANEL system does not work at this time. In this position, the key can be set aside. Do not press down when unlock, press and hold the key to turn the key from"... - Page 22 ① TACHOMETER It shows the engine rotational speed in number of revolutions Riding the motorcycle with per minute. the engine warning lamp lit after starting the engine can damage engine transmission. Do not increase the engine rotational speed to the red Whenever the engine range on the tachometer.
- Page 23 ⑦ FUEL METER right or to the left, the green indicator will flash at the same time. FUNCTION ⑥ SELECT SWITCH TYPE: Gradation type (LCD) Use this switch to adjust the following : Fuel gauge standard symbol FUNCTION ODO → TRIP A → TRIP B→ CLOCK →...
- Page 24 nearly so. W hen the rem aining fuel is approximately3.5L, Obey the speed limit and “E” indicator of the last column and traffic regulation at all times. ” blink. fuel warning lamp“ Fill the fuel tank before the indica tor “E” of the last column and ⑨...
- Page 25 ⑩ CLOCK (11) RESET SWITCH The clock indicates 24-hour Use this switch to adjust the mode. following : ■ In the Normal mode Push it FUNCTION Adjustment Adjust brightness of the instrument panel display (100% → 75% → seconds TEN MIN 50% →...
-
Page 26: Left Handle Switches
switch to operate the head LEFT HANDLE SWITCHES lamp high beam. This switch does not work when the dimmer switch is set to “ ” position. ③DIMMER SWITCH Change the direction of the head lamp light. ■ “ ”:The head lamp high ①... -
Page 27: Right Handle Switches
position. “ ”:The turn signal lamps and indicator lamp go Always use the turn signals off. when you intend to change Use the hazard warning lanes or make a turn. Always switch to warn other traffic be sure to turn the turn signal during emergency parking or switch to the “... - Page 28 “ ” ① STARTER SWITCH Use this switch to operate the starting motor. With the ignition switch in the Do not attempt to start the “ ” position, the engine stop engine until the needle of the switch in the “ ”...
- Page 29 Apply the brake lightly and The motorcycle is equipped with great care on slippery with the side stand ignition surfaces to avoid skidding. interlock sys- tem. If the transmission is in ③ THROTTLE GRIP neutral or the side stand up, Engine speed is controlled you can only start the engine by position of the throttle grip.
-
Page 30: Rear Brake Pedal
GEARSHIFT LEVER Do not operate the engine stop switch into the “ ” position while driving at one’s pleasure. REAR BRAKE PEDAL Depressing the rear brake The motorcycle is provided with pedal will apply the rear brake. a 5-speed gear transmission. brake lamp will... -
Page 31: Stand
and depress the lever to downshift. STAND Neutral is located between first and 2nd gear. When neutral desired, depress or lift the lever halfway between first and 2nd gear. It is not possible to upshift or downshift more than one gear at a time. -
Page 32: Rear Shock Absorber
To adjust the spring pre-load, turn the adjuster clockwise or N O T E count- er-clockwise On or Up desired position with the pin spanner. Off or Down Position 1 provides the softest spring pre-load and position 5 pro- vides the stiffest. The motorcycle is delivered from factory... -
Page 33: Fuel And Oil And Antifreeze Recommendation
FUEL AND OIL AND ANTIFREEZE RECOMMENDATION F U E L Use unleaded gasoline with an octane rating of 92 or higher. Unleaded gasoline can extend spark plug life and To open the fuel tank cap, exhaust components life. insert the ignition key into the cap lock and turn it clockwise. -
Page 34: Engine Oil
ENGINE OIL Gasoline is extremely flammable and toxic. Oil quality is a major your engine’s contributor to Always observe the following performance and life. Always precautions when refueling select good quality engine oil. your motorcycle. ● Never permit motorcycle ⊙ ENGINE OIL refueling anyone SPECIFICATION... - Page 35 ⊙ ENGINE OIL LEVEL N O T E CHECK In very cold weather [below -15℃ (5F) ], use SAE 5W/30 for good starting smooth Follow the procedure below to operation. inspect the engine oil level. 1. Start the engine and run it for Using a premium quality a few minutes.
- Page 36 on the right side on the engine. Never operate the motorcycle if the engine oil level is below N O T E the “Lower line mark (L)” in Engine oil expands and oil the engine oil level lens. level increases when the Never fill the engine oil above the “Upper line mark (F)”.
- Page 37 Change the engine oil and filter, after first running 1,000 2.Place a drain pan under the km and every running 4,000 engine. The engine oil should always 3.Remove the engine oil filler be changed when the engine is plug①. hot so that the engine oil will be drained thoroughly from the engine.
- Page 38 New and used oil can be ● The engine hazardous. temperature may be high Children and pets may be enough to burn you when harmed by swallowing new or drain plug used oil. loosened. Wait until the Continuous contact with used drain plug is cool enough engine oil has been found to to touch with bare hands...
- Page 39 At this time, insert the gasket necessarily. 7.Pour a fresh engine oil through the engine oil filler hole. Approximately 1,100 of the engine oil will be required. Approximately 1,100 engine must The oil fine filter is located required when changing the on the lower side of the front engine only...
-
Page 40: Antifreeze
Install the engine oil filler plug①. ANTIFREEZE Start the engine and allow it idle for a few minutes. Check to see that no the engine oil is leaking from the engine oil filter This motorcycle engine is ②. and engine oil drain plug water cooling system. - Page 41 WATER TANK Antifreeze replacement Carry out this work on about 10000 km running or when using the motorcycle for a year. The operation is following: 1. Please stand the motorcycle on a level ground with stand, take a container and put under the draining bolt③, then remove the bolt③, so antifreeze is outflow.
- Page 42 the engine in place until the fan of cooling system turned on (or the needle of water temperature antifreeze fully meter point to above the middle drained off from the system, of the scale), then turn off the remove the exhaust bolt ④, engine.
- Page 43 Antifreeze selection: 6. The fan does not work. It may 1. Antifreeze must not be mixed be that the fan is damaged or using. the line connection is not 2.The freezing point of antifreeze good. Please replace the is normally lower than the local damaged fan or troubleshoot minimum ambient temperature the line connection problem.
-
Page 44: Riding Tips
RIDING TIPS Running the engine too long without riding may cause the engine to overheat. STARTING THE ENGINE Overheating can result in dam- age to internal engine Before attempting to start components the engine make sure : discoloration exhaust pipes. 1. - Page 45 Push the starter switch to start the engine after the needle of ● Release the speedometer turn back to starter the rest position. switch immediately after The engine warning lamp “ ” motorcycle ① comes on when the ignition started. ●...
- Page 46 If the engine warning lamp ① does not come on when the Do not attempt to start the ignition switch is set to “ ” engine until the needle of the position with engine speedometer completes a full stopped or fail to go out after sweep and returns to the rest the engine start, contact an position otherwise the engine...
-
Page 47: Starting Off
STARTING OFF Squeeze the clutch lever and pause momentarily. Engage first gear by depressing the gearshift lever downward. Sudden side winds, which Turn the throttle grip toward you occur when being and at the same time release the passed by large vehicles, at clutch lever gently and smoothly. -
Page 48: Using The Transmission
Opening throttle Downshifting when engine suddenly can be hazardous. speed is too high can ; The front wheel can lift off the ground and cause loss of Cause the rear wheel to skid control of the motorcycle. and lose traction due to Always open the throttle increased engine braking, gradually... -
Page 49: Stopping And Parking
should shift to a lower gear so time. that the engine will again be Downshift through the gears operating in its normal power as road speed decreases. range. Shift gear rapidly to Select neutral with prevent the motorcycle from clutch lever squeezed losing momentum. - Page 50 A hot muffler can burn you. Hard braking on wet, loose, muffler will rough, other slippery enough to burn you for surfaces can cause wheel some time after stopping the skid and loss of control. engine. Brake lightly and carefully Park the motorcycle where slippery irregular...
-
Page 51: Break-In
accelerate freely through the gears, without exceeding the recommended maximum limits. BREAK-IN not, however, full throttle for the first 1,600 km (1,000 miles). This section explains import- ant proper break-in is to ★VARY THE ENGINE SPEED achieve maximum life performance from your new The engine speed should be motorcycle. - Page 52 engine components. ★BREAKING IN THE NEW ★OBSERVE YOUR FIRST, TIRES MOST IMPORTANT1,000 New tires need proper break-in SERVICE assure maximum performance, just as the engine The 1,000 km (600 miles) does. service is the most important Wear in the tread surface by service your motorcycle will...
-
Page 53: Inspection Before Riding
INSPECTION BEFORE The 1,000 km (600 miles) RIDING service should be performed outlined INSPECTION MAINTENANCE section of this Owner’s Manual. Pay particular attention to the 『 CAUTION 』 Failure inspect 『 WARNING 』 that motorcycle before operating it can be hazardous. section. - Page 54 Operating this motorcycle Operating this motorcycle with improper tires, or with with improper modifications improper uneven tire can be hazardous. pressure can be hazardous. Improper installation If you use improper tires or accessories or modification improper uneven tire of this motorcycle may cause pressure, lose changes in handling.
- Page 55 Check the condition of the motorcycle to help make sure ● The engine and muffler that have mechanical problems, or you are too hot right after might get stranded somewhere engine stopped, please when you ride. Before riding be careful not to be the motorcycle, be sure to burned.
- Page 56 ● Tank cap closed securely WHAT TO WHAT TO CHECK FOR : CHECK FOR : CHECK CHECK ● ● Smoothness No damage lever ● ● No restriction of Gerashift lever Smooth operation Steering movement ● Correct tension or slack ● No play or looseness ●...
-
Page 57: Periodic Maintenance
● No visible evidence of damage PERIODIC MAINTENANCE Improper maintenance failure perform chart indicates recommended maintenance intervals between periodic increases the chance of an service in kilometers. accident or motorcycle dam- At the end of each interval, be age. sure inspect, check, Always follow the inspection... - Page 58 consult your dealer or qualified mechanic. ★ LUBRICATION Running the engine indoors POINTS garage Proper lubrication is important hazardous. for smooth and long life of each Exhaust contains working part of your motorcycle carbon monoxide, a gas that and also for safe riding. is colorless and odorless It is a good practice to lubricate and can cause death or...
- Page 59 ① ⑥ Clutch lever holder & Clutch cable Front brake lever holder ② ⑦ Passenger footrests pivot Throttle cable ③ ⑧ Drive chain Speedo sensor ④ ⑨ Side stand pivot and spring hook Rear brake pedal pivot ⑤ Footrests pivot Motor oil, Grease —...
- Page 60 ★ENGINE Interval First Every Every Item 1,000 km 4,000 km 8,000 km Air cleaner element Clean every 3,000 km· Replace every 12,000 km ★ Tighten Tighten Exhaust pipe nuts and muffler mounting bolts ★ Inspect Inspect Valve clearance adjust ★ Tighten Tighten Cylinder head bolt...
-
Page 61: Inspection And Maintenance
INSPECTION AND NAME MAINTENANCE Tool bag 10 × 12 mm open end spanner TOOL Spark plug wrench Combination screw driver Screw driver handle assist performance periodic maintenance, tool ENGINE OIL supplied. The tool kit is located under the Check if there is leakage from front seat. -
Page 62: Antifreeze
ANTIFREEZE Check if there is leakage from the water tank, radiator cover, Inspection Rubber Inspection draining bolt, exhaust bolt and part part hose connection. RUBBER CAP OF CABLES REAR-VIEW MIRROR Wipe them up with a cloth or Check if the mirror shows the towel when washing. -
Page 63: Exhaust Pipe And Muffler
EXHAUST PIPE AND In the event of malfunction or MUFFLER if the suspension needs expert servicing, contact Inspect the exhaust pipe and authorized dealer. muffler joint for loosening. BATTERY FRONT AND REAR SUSPENSIONS ⊙ INSPECTION OF BATTERY SOLUTION LEVEL Periodically check The battery is located under the following:... - Page 64 When reinstalling battery, be sure to connect the positive ⊕ battery wire first, then connect Never invert battery negative ⊖ battery wire. cables. Ensure that the ignition switch is in position “ ” before connecting disconnecting battery, otherwise some components might damage.
- Page 65 into the battery case. ⊕ Connect positive ● Keep the battery away battery wire at the battery from fires. terminal. ● Put on the rubber cap at the When disconnecting ⊕ battery wire, sure positive terminal of the remove the ⊖ negative battery battery.
-
Page 66: Air Cleaner
AIR CLEANER Never operate the engine with- out the element in position. The air cleaner is located inside Operating engine the right engine. without cleaner element will increase engine wear. Always be sure that the air cleaner element is in excellent operational condition. - Page 67 When cleaner element installed correctly, dust can go inside and severely damage the engine. Be careful not to allow water to go into the element while washing. Clean the air cleaner element for the following : Before during ①...
-
Page 68: Spark Plug
SPARK PLUG More frequent servicing may performed Check the spark plug every motorcycle that used time a scheduled maintenance under severe conditions, also service is performed. clean the air cleaner element when replacing the oil to prevent damage engine. ⊙ AIR CLEANER CHAMBER’S OIL DRAIN PLUG Inspect cleaner... - Page 69 1. Disconnect spark plug caps. 2. Remove all the dirt from the 5. Check the electrode gap base of the spark plugs, then with a thickness gauge. The unscrew it and extract it from gap must be 0.7 ~ 0.8 mm its seat, taking care that (0.028 0.032...
-
Page 70: Idling Adjustment
THROTTLE CABLE PLAY The spark plug must be ADJUSTMENT tightened firmly, otherwise the engine may overheat and severe damage may occur. There should be 0.5 ~ 1.0 mm recommended spark (0.02 ~ 0.04 in) free play in the plug only. throttle cable. -
Page 71: Clutch Cable Adjustment
④ ③ Inadequate throttle cable play can cause engine speed to rise suddenly when you turn the throttle grip. This can 4 mm lead to loss of rider control. ① ② (0.16 in) Adjust the throttle cable play so that engine idle speed does not rise due to throttle ⑤... -
Page 72: Drive Chain
• ⊙ CLUTCH CABLE PLAY The clutch cable should cated with a light be lubri ADJUSTMENT weight oil when- ever it is adjusted. • A basis adjustment be allowed by the clutch lever Clutch adjuster ③. 4 mm cable play (0.16 in) ①... - Page 73 ⊙ INSPECTING THE DRIVE Excessive Good CHAIN When inspecting the chain, look for the following : ● Loose pins ● Damaged rollers ● Dry or rusted links ● Missing O-ring seals ● Kinked or binding links If you find any of these ●...
- Page 74 4. Adjust the slack in the drive chain by the chain adjuster ④, right and left, turning the drive chain ③ adjusting clockwise counter-clockwise. 5. For alignment of the front wheel and rear wheel, ence mark there are refer ⑤ on the same position, right and left.
- Page 75 Kerosene The drive chain should be hazardous. Kerosene inspected every time before flammable. Children riding. pets may be harmed from Excessive chain slack could contact with kerosene. cause the chain to come off Keep flames and smoking the sprockets and result in materials away from...
-
Page 76: Brakes
BRAKES Some drive chain lubricants contain solvents and additives which could the “O”-rings in da m a g e The motorcycle utilizes front your chain. and rear disk brakes. Properly operating the brake chain lube systems are vital to safe riding. Be equivalent that is specifically sure to perform the brake intended for u se with the... - Page 77 Front Brake Operating the motorcycle in harsh condition can be hazardous inspect brake wear often. Operating in mud, water, sand, other extreme conditions cause accelerated brake wear. This could lead to an accident. operate your Rear Brake motorcycle under these conditions, brakes must...
- Page 78 Brake fluid may be harmful if Be careful that water or dust swallowed or if it comes in does not enter the brake fluid con- tact with skin or eyes. reservoir when refilling. Contact your doctor immediately if brake fluid is swallowed induce ⊙...
- Page 79 The front and rear brake system requires brake hose or the brake fluid to be replaced according to periodic inspection chart your authorized dealer for safety as they operate at high pressure. Limit line Riding with worn brake pads will reduce braking performance will increase...
- Page 80 allow dust to get inside of it. Replacing only one of the 3. Loosen the screws and brake pads open the cap. hazardous. 4. Replenish with brake fluid Replacing only one brake to the upper line. pads can result in uneven braking action.
-
Page 81: Tire
1. Place the motorcycle on a Inspect the tire pressure and level surface and keep the the tire thread depth periodically. handlebars straight. Inspect frequently tire 2. Clean the rear brake fluid pressure for the safety and the reservoir around not to tire life. - Page 82 ⊙ TIRE PRESSURE Insufficient air pressure in the tires not only hasten tire wear but also seriously affects the stability of the motorcycle. Under-inflated tires make smooth cornering difficult and over-inflated tires decrease the amount of tire in contact with the ground which can lead to skids and loss of control.
- Page 83 ⊙ TIRE TREAD CONDITION ⊙ CRACKS AND CUTS Tire wear Check if Tire wear indicator mark indicator 1) There are visible cracks and cuts. 2) There are abnormal wears. SCREW, Operating motorcycle FOREIGN with excessively worn tire will MATERIAL decrease riding stability and can lead to loss of control.
- Page 84 Loosen the front axle shaft ③. Inspect the rear axle shaft and jointing nut for loosening. Place carefully a jack or under the engine block and raise until the front ⊙TIRE REPLACEMENT wheel is slightly off the ground. ◆ FRONT TIRE REPLACEMENT Place the motorcycle on the center stand.
- Page 85 center stand. Remove the chain case ② by loosening the two bolts ①. Place a jack or block under the swing arm to lift the rear wheel slightly off the ground. A hot muffler can burn you. Improper jacking may cause muffler will damage to the frame or engine.
-
Page 86: Bulbs
BULBS Keep fuel other flammable substances away from electric components. Pull out the rear wheel assembly rearward. replace rear Before changing a bulb, set wheel assembly, reverse ignition switch complete sequence position “ ” and allow a listed. few minutes for the bulb to cool down. - Page 87 ⊙ INSPECTION OF LAMPS The position lamp, meter ● Check position lamp, tail lamp and license lamp, meter lamp, tail plate lamp this lamp and license plate motorcycle alw ays comes lamp work well when the on when the ignition switch is turned to the “...
- Page 88 ⊙ CHANGING THE TURN SIGNAL LAMP BULB Remove the lens by pushing Using a lamp bulb with the groove ① of the turn the wrong wattage rating can signal lamp housing using a cause electrical system small flat screw driver. damage or shorten bulb life.
- Page 89 ⊙ FUSE BOX protects rectifier regulator and ignition switch ◆ ECU FUSE BOX circuits. ● 20A ECU / M.RELAY fuse protects all electrical circuits including the ECU. ● 10A HEAD L. / METER fuse protects the head lamp low beam and instrument panel circuits.
-
Page 90: Troubleshooting
TROUBLESHOOTING This troubleshooting guide is provided to help you find the cause some common complaints. Put the engine stop switch in Failure to troubleshoot a problem correctly the “ ” position and the damage your motorcycle. ignition switch in the “ ”... - Page 91 ⊙INSPECTION needle speedometer turn back to the SYSTEM rest position. 1. Place the engine flameout If there is no spark, clean switch in “ ”position and the spark plug. ignition switch Replace it if necessary. ”position. There is the Retry a bo v e in“...
- Page 92 ★ENGINE STALLING Check the fuel supply in the fuel tank. Check the ignition system for intermittent spark. Check the idle speed. When occur any trouble, the best way is to consult your dealer for repairs. — 89 —...
-
Page 93: Transport
● Place the motorcycle on the TRANSPORT stand on firm and level ground. ● Stop the engine and wait until it has cooled down. ● Prepare a container large enough to hold the fuel in the Before transporting tank and place it on the floor motorcycle, it is necessary to on the left side of the empty... -
Page 94: Cleaning Procedure
CLEANING PROCEDURE A thorough cleaning of your motor- cycle is a necessary part High pressure washers can of maintenance and will help dam- age your motorcycle keep your motorcycle looking (especially the oil cooler pin). and performing its best. Proper High pressure washers such cleaning can also extend the life those... - Page 95 with brushes they scratch plastic painted N O T E surfaces. Rinse motorcycle Avoid spraying or allowing thoroughly with clean water. water flow over Dry all areas using a chamois following places : ● Ignition switch or soft absorbent cloth. ●...
- Page 96 Operating motorcycle with brakes hazardous. Wet brakes may not provide as much stopping power as dry brakes. This could lead accident. Test your brakes after washing motorcycle, riding at slow speed. If necessary, apply brakes sever- al times to let friction dry out the pads.
-
Page 97: Storage Procedure
★BATTERY STORAGE Remove the battery from PROCEDURE the motorcycle. N O T E If you don’t plan on using your ⊖ Be sure to remove the motorcycle for a long time, it will negative terminal first, then need special servicing ⊕... - Page 98 the engine. Reinstall the spark plugs. ★MAINTENANCE Lubricate places DURING STORAGE instructed in this manual. Once a month, recharge the P er f or m battery. I N S P E C T I O N BEFORE RIDING as listed in this The motorcycle battery manual.
-
Page 99: Parameter List
Parameter List Model GV125S Dimensional parameters Overall dimension (L ×W ×H) mm 2021×753×1070 Wheelbase mm 1410 Minimum ground clearance mm Turning clearance circle diameter mm 3060 Castor angle(°) ≤38 Steering handlebar turning angle (°) (left / right) Mass/volume Overall mass kg Max. - Page 100 gear 1.09 gear 0.91 Vehicle type Wheel rim type Light alloy Tire size Front 120/80-16 Rear 150/80-15 Tire pressure kPa (front/ rear) 200/200 Brake type Front Disk Rear Disk Brake control mode (front/ rear) Hand brake/foot brake Shock absorber type Front Spring oil damping Rear...
-
Page 101: Circuit Diagram
Circuit Diagram — 98 —...
Need help?
Do you have a question about the GV125S and is the answer not in the manual?
Questions and answers