Advertisement
Quick Links
Advertisement

Related Manuals for Anywave ATSC 60W


Summary of Contents for Anywave ATSC 60W
- Page 1 ANYWAVE ATSC 60W DTV Transmitter Quick Start Guide Version 1.1 – June 26, 2018...
- Page 2 ATSC 60W Quick Start Guide Copyright Notice Copyright © Anywave Communication Technologies, Inc. 2018, All rights reserved. No part of this publication may be reproduced, translated, transcribed, stored in a retrieval system, or transmitted into any form or by any means, without the express written permission of Anywave Communication Technologies, Inc.
- Page 3 Returns and Exchanges Written approval and a Return Authorization Number (RAN) are required from Anywave for all equipment returns. Please direct all return inquiries to the Anywave Service Department at support_us@anywavecom.com, providing the Sales Order number and Serial Number(s) of the equipment.
- Page 4 The installation, operation, maintenance and service of this equipment involves risks both to personnel and equipment, and must ONLY be performed by qualified personnel exercising due care. Anywave Communication Technologies, Inc. shall not be responsible for injury or damage resulting from improper handling or from the use of improperly trained or inexperienced personnel performing such tasks.
-
Page 5: Table Of Contents
ATSC 60W Quick Start Guide Contents Introduction ..................6 Organization of Manual ..............6 TX System Overview ............... 7 TX System Interconnect ..............8 Initial Turn On .................. 9 ACT-PAU01-QSG-DOC-V1.1, 06/26/2018 Page 5 of 17... -
Page 6: Introduction
1 Introduction This Quick Start Guide contains instructions to safely setup and turn on the Anywave 60W DTV Transmitter. Please note that trained and qualified personnel are required to install, maintain, and service this transmission equipment. 2 Organization of Manual This Manual is broken up into several sections. -
Page 7: Tx System Overview
ATSC 60W Quick Start Guide 3 TX System Overview Final assembly and test of each transmitter is performed at the Anywave factory. The Exciter is setup on the desired channel frequency and the TX is tested with the complete RF system (if purchased) at full power into a load. All TX operating parameters are optimized and the Transmitter Forward and Reflected power meters are properly calibrated. -
Page 8: Tx System Interconnect
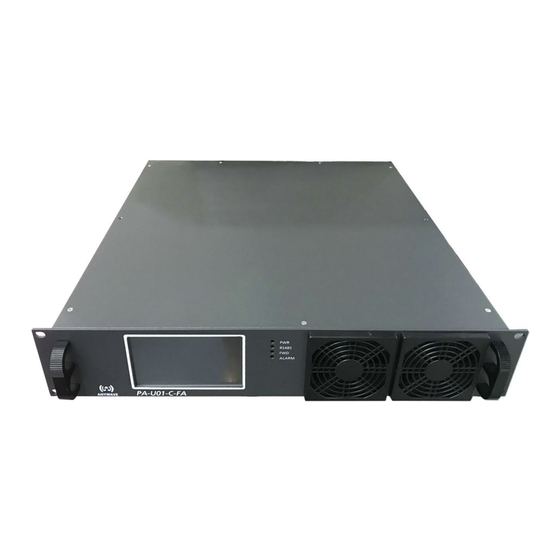
ATSC 60W Quick Start Guide 4 TX System Interconnect The Anywave ATSC 60W DTV Transmitter consists of an Exciter, PA-U01-C-FA PA, and a BPF (optional) with two additional single port couplers for Exciter feedback samples (optional). The diagram below shows the overall system interconnect between the system components. -
Page 9: Initial Turn On
ATSC 60W Quick Start Guide 5 Initial Turn On Please locate and have handy for reference a copy of your 60W TX Factory Test Report as well as the 60W TX Quick Start Guide, and PA-U01-C-FA PA and Exciter User Manuals. - Page 10 ATSC 60W Quick Start Guide PAC menu on the Exciter LCD (under Advanced submenu) or the PA’s touchscreen, or its Web interface and verify that the current (Cur1_50) are showing real values and not all 0s. 6. You are now ready to bring the TX up to power. To accomplish this, slowly...
- Page 11 ATSC 60W Quick Start Guide Begin to slowly raise the FWD System power by using the UP button on the Exciter, while monitoring the PA_Fwd system power meter on the Controller HOME screen as shown below. Slowly increase to raise FWD...
- Page 12 ATSC 60W Quick Start Guide 7. Continue to slowly raise the FWD power until you reach the full 60W, or your desired TPO. Be careful to make small increases in the value of POWER as you approach the desired output level.
- Page 13 ATSC 60W Quick Start Guide 10. (Optional Step) Navigate to the Exciter “DPD” submenu in the Advanced User menu (simultaneously press Left and Right buttons, then simultaneously press UP and Down buttons). Be sure the value of Feedback Sample Signal Input...
- Page 14 ATSC 60W Quick Start Guide 13. Navigate to the CAL setting under the AD3 Advanced submenu and select CAL then press OK to calibrate the FWD PWR meter on the Exciter front panel to 100%. 14. To turn the TX On/Off, please use the RF On/OFF control in the RF submenu of the exciter LCD or the exciter web interface.
- Page 15 ATSC 60W Quick Start Guide 16. If using the Exciter Built-in remote web interface for remote control, please be sure to set the Exciter to REMOTE mode (set CTL to RMT) before leaving the transmitter site. The Remote/Local setting is located under the SYSTEM submenu.
- Page 16 ATSC 60W Quick Start Guide ACT-PAU01-QSG-DOC-V1.1, 06/26/2018 Page 16 of 17...
- Page 17 ATSC 60W Quick Start Guide Anywave Communication Technologies Inc. 300 Knightsbridge Parkway, Suite 150, Lincolnshire, IL 60069 Tel: (847) 415-2258 Fax: (847) 415-2112 Email: sales_us@anywavecom.com http://www.anywavecom.com/en/ ACT-PAU01-QSG-DOC-V1.1, 06/26/2018 Page 17 of 17...
Need help?
Do you have a question about the ATSC 60W and is the answer not in the manual?
Questions and answers