
Related Manuals for Genie WIP2PTZ25P


Summary of Contents for Genie WIP2PTZ25P
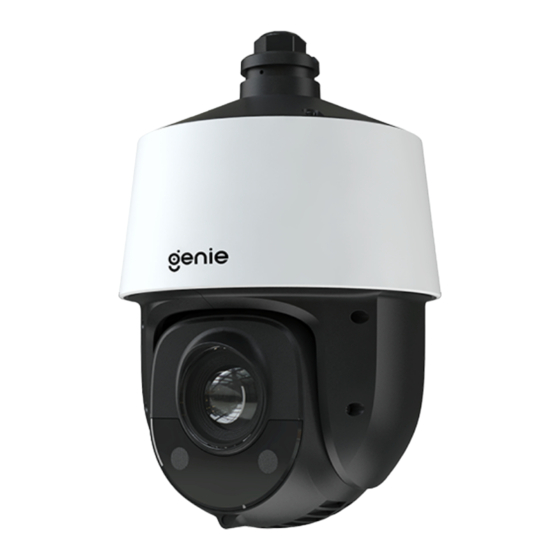
- Page 1 2MP H.265 IP IR 4” 25x Optical Zoom PTZ Camera with Starlight and PoE WIP2PTZ25P Quick Start Guide Please read these instructions carefully before operating the unit and keep for further reference.
- Page 2 Intro Section Please read this instruction carefully before operating the product and keep it for further reference. All examples and pictures used here are for reference only. The contents of this manual are subject to change without notice. CAUTION: • If the product does not work properly, please contact your dealer or the nearest service centre.
-
Page 3: Table Of Contents
Contents 1.0 Introduction ......................4 1.1 Product Features ...................4 1.2 Product Dimensions ..................4 1.3 Specification....................5 2.0 Overview ......................7 3.0 Installation ......................8 3.1 Micro SD Card Installation ................8 3.2 Wall Mount Installation ................9 3.3 Ceiling Mount Installation ................10 4.0 Network Connection ...................11 5.0 Preset Description ....................12... -
Page 4: Introduction
1.0 Introduction The Genie WIP2PTZ25P is a powerful PTZ camera with accurate pan, tilt and zoom performance. The camera provides a wide monitoring range as well as a full 2MP high definition resolution at 25/30fps. The camera is rated IP66 which means it works well outdoors with effective protection against lightning. -
Page 5: Specification
Quick Start Guide 2MP H.265 IP IR 4” 25x Optical Zoom PTZ Camera with Starlight and PoE 1.3 Specification Image Sensor 1/2.8″progressive scan CMOS Colour: 0.005 Lux @ (F1.65, AGC ON), Minimum Illumination B&W: 0.001Lux @(F1.65, AGC ON) 0 Lux with IR Flip, Mirror, Saturation, Brightness, Sharpness, AGC, and AWB Image Setting adjusted by client software/browser... - Page 6 Quick Start Guide 2MP H.265 IP IR 4” 25x Optical Zoom PTZ Camera with Starlight and PoE Maximum Resolution 1920×1080 Main Stream 1920×1080, 1280×720 25/30fps 25fps (720p, 704×576, 352×288) Sub Stream 30fps (720p, 704×480, 352×240) 25fps (704×576, 640×480, 352×288) Third Stream 30fps (704×480, 640×480, 352×240) Video Compression H.265/H.264/MJPEG...
-
Page 7: Overview
2.0 Overview Ethernet Connector 2. Power Connector 3. Safety Wire Cable Connection Network Cable DC12V Connecting Network Cable Loosen the nut from the main element. 2. Run the network cable (without RJ 45 connector) through both elements. Then crimp the cable with RJ 45 connector. 3. -
Page 8: Installation
3.0 Installation 3.1 Micro SD Card Installation This PTZ camera supports wall or ceiling mounting. Please select a way to install as needed. Also, please make sure the wall is strong enough to bear the dome camera’s weigh and the camera is powered off during installation. -
Page 9: Wall Mount Installation
Quick Start Guide 2MP H.265 IP IR 4” 25x Optical Zoom PTZ Camera with Starlight and PoE 3.2 Wall Mount Installation Pull the cables through the bracket. 2. Secure the PTZ camera to the bracket with screws. 3. Drill the screw holes on the wall 4. -
Page 10: Ceiling Mount Installation
Quick Start Guide 2MP H.265 IP IR 4” 25x Optical Zoom PTZ Camera with Starlight and PoE 3.3 Ceiling Mount Installation Install the ceiling mounting bracket according to the following diagram. 2. Mount the adapter tube to the 3. Secure the ceiling mounting bracket to bracket and secure it with a screw. -
Page 11: Network Connection
4.0 Network Connection Access the Camera through the IP Tool Make sure that the camera and the PC are well connected via LAN. 2. Find the IP-Tool from the CD and then install it in the computer. After that, run the IP Tool as shown below. -
Page 12: Preset Description
5.0 Preset Description Call No. 90 Preset Run track 1 Call No. 91 Preset Run cruise 1 Call No. 92 Preset Run cruise 2 Call No. 93 Preset Run cruise 3 Call Preset Call No. 94 Preset Run cruise 4 Call No. - Page 13 Sales +44(0)1707 330541 Enquiries sales@genieproducts.co.uk Website www.genieproducts.co.uk...
Need help?
Do you have a question about the WIP2PTZ25P and is the answer not in the manual?
Questions and answers