BWI Eagle AIR-EAGLE XLT PLUS Manual
Hide thumbs
Also See for AIR-EAGLE XLT PLUS:
- Manual (9 pages) ,
- Product information bulletin (4 pages) ,
- Product information bulletin (4 pages)

Related Manuals for BWI Eagle AIR-EAGLE XLT PLUS


Summary of Contents for BWI Eagle AIR-EAGLE XLT PLUS
- Page 1 AIR-EAGLE XLT PLUS 465U-HHEBD-4 900 MHz RF Transmitter Document Date: 03/29/2022 Product Rev: 4...
-
Page 2: Warranty Statement
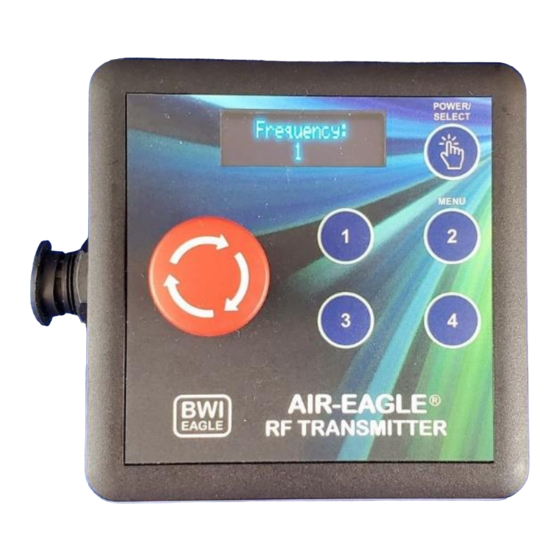
465U-HHEBD-4 WARRANTY STATEMENT BWI Eagle Inc. warrants the Air-Eagle Remote Control System, if properly used and installed, will be free from defects in material and workmanship for a period of 1 year after date of purchase. Said warranty to include the repair or replacement of defective equipment. This warranty does not cover damage due to external causes, including accident, problems with electrical power, usage not in accordance with product instructions, misuse, neglect, alteration, repair, improper installation, or improper testing. - Page 3 Photo on right shows unit with optional mounting plate INTRODUCTION The Air-Eagle XLT PLUS TX is a handheld R.F. transmitter capable of operating the relays of an Air- Eagle XLT PLUS Receiver located up to 5000 feet away. Eight user-programmable frequencies allow multiple systems to operate simultaneously in the same area without interference.
-
Page 4: Controls And Indicators
465U-HHEBD-4 CONTROLS & INDICATORS While transmitting a beacon the display will rotate a character around the outside of the screen to show that it’s transmitting. The character will be as follows: Battery is discharging TX Display Battery is charging Battery is discharging, Level is below 10% (LOW BATTERY) POWERED ON Battery is charging, Level is 100%... -
Page 5: Menu Settings
465U-HHEBD-4 MENU SETTINGS Prior to initial use, the transmitter must be programmed. The MENU button allows you to enter programming mode. It is important to follow the steps in the order shown below. Please read thru this section thoroughly before starting programming. Press the “MENU”... -
Page 6: System On/Off
465U-HHEBD-4 SYSTEM ON/OFF SYSTEM ON Depress and hold the POWER/SELECT button. The display will show “XLT Power Up” and 3….2….1… then displays “Power On” followed by “Logged In”. Release the POWER/SELECT button. The transmitter is now sending a failsafe beacon signal to the receiver approximately every 0.5 seconds NOTE 1: If you press the POWER/SELECT button and the display shows “XLT Not Paired”, the transmitter will NOT power on. -
Page 7: Low Battery
465U-HHEBD-4 CHARGING Use only the micro-USB cable to connect to USB supply rated at 5V and at least 1 amp of current. When the charger is plugged into the jack the display will show “Charging” and the current battery level in %. When pressing the power/select button normally it shows the battery level with BAT: over top of it. - Page 8 465U-HHEBD-4 DIMENSIONS Standard Model Model with Optional Mounting Plate...
-
Page 9: Specifications
465U-HHEBD-4 SPECIFICATIONS Durable Sealed Microswitch Keypad – Eliminates Dust, Dirt and Keypad Moisture Failures Enclosure ABS Plastic Enclosure with ring is rated IP40 *Not Frame Aluminum Waterproof Internal non-replaceable 3.7V 2000mAh Rechargeable Lithium Battery Type Ion Battery Battery Life(Active Usage) 8 to 9 Hours of Continuous Operation Battery Life(Sleep Mode) Approx 45 days...