Table of Contents
Advertisement
Quick Links
Wireless Rear Camera System TX-170
Suitable for most of cars (& vans, SUVs, minibuses, caravans, etc.)
This system should be an aid and should NOT replace the need to drive
Do not point the high pressure cleaner directly to the plate holder
camera, or drive through a car wash - the device can be damaged.
Under no circumstances will the manufacturer or supplier accept any
responsibility or can held liable for any direct or indirect, incidental or
consequential damage, or for injuries resulting from installing or use of
The manufacturer Technaxx Deutschland GmbH & Co.KG hereby declares
that this device, to which this user manual belongs, complies with the
essential requirements of the standards referred to the Directive RED
2014/53/EU. The Declaration of Conformity you find here:
www.technaxx.de/ (in bar at the bottom "Konformitätserklärung"). Before
using the device the first time, read the user manual carefully.
Service phone No. for technical support: 01805 012643 (14 cent/minute from
German fixed-line and 42 cent/minute from mobile networks). Free Email:
The support hotline is available Mon-Fri from 9 am to 1 pm & 2 pm to 5 pm
Keep this user manual for future reference or product sharing carefully. Do
the same with the original accessories for this product. In case of warranty,
please contact the dealer or the store where you bought this product.
Enjoy your product. Share your experience and opinion on one of the
®
Technaxx
as assistance for reverse parking.
carefully.
this system.
support@technaxx.de
well-known internet portals.
* User Manual
1
Warranty 2 years
Advertisement
Table of Contents

Related Manuals for Technaxx TX-170


Summary of Contents for Technaxx TX-170
- Page 1 The manufacturer Technaxx Deutschland GmbH & Co.KG hereby declares that this device, to which this user manual belongs, complies with the essential requirements of the standards referred to the Directive RED 2014/53/EU.
-
Page 2: Table Of Contents
Contents Features ......................2 Technical specifications ................. 3 Safety regulations ..................4 Product overview ................... 4 License plate holder with camera ............... 4 Monitor ....................... 5 Commissioning ....................5 Installing the license plate holder and lay power wire ........5 Insert the license plate in the holder .............. -
Page 3: Technical Specifications
-10°C up to +50°C 107g / (L) 11.7 x (W) 3.5 x (H) Weight / Dimensions 8.8cm Wireless Rear Camera System TX-170: 1x License plate holder with camera and wireless Packing module, 1x Monitor, 1x Suction cup holder, 1x stand... -
Page 4: Safety Regulations
Safety regulations The reversing system is an aid and does not relieve the driver of his duty of care in road traffic according to STVO. Read these instructions carefully before first use. Product overview The rear view camera sends a video signal from the camera 2.4GHz frequency range (specified for such video transmissions) to the monitor. -
Page 5: Monitor
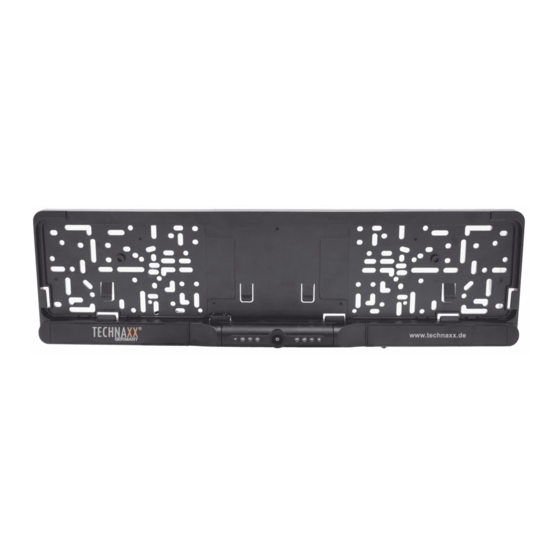
Monitor 1 Add (+) 5 Power connection (DC9V) 2 Menu/OK 6 Holder 7 Display 4.3” (10.9cm) 3 Dec (-) 4 Screw for holder Commissioning Check the functionality of the components before installation (a installed product is excluded from the return). Preparing and installing the license plate holder. - Page 6 CAUTION! If you have no experience in installing electrical devices on vehicles, you are not allowed to carry out the following work yourself. Have the assembly and connection carried out by qualified specialists. 1. Remove your rear license plate including any holder that may be present.
- Page 7 License plate holder installed to License plate holder installed to the trunk lid. the bumper. 6. Remove the cover of the reverse light. 7. The thin two-core cable is used for power supply and as a switching signal when reverse gear is engaged. Connect the two wires with the two contacts of your reversing light.
-
Page 8: Insert The License Plate In The Holder
Insert the license plate in the holder 1. Remove the cover strip from the license plate holder Note: First remove the middle part of the cover strip, then remove the two sides of the cover strip 2. Insert license plate into the holder, frame the license plate through the small bezels basically. -
Page 9: Installing The Monitor
Installing the monitor 1. Monitor pedestal could be attached to stand or windshield as your requirements. There are 2 kinds of mounting brackets accordingly. Stand mount Suction cup mount 2. Mounting the brackets 1) If using the factory default stand mount, stick on the dash board: Choose and clean a... - Page 10 Note: Look at the back of the monitor. Check if the roller cam is facing inward and the roller cam is in close contact with the groove of the bottom case monitor. The installation direction is correct. As shown in the figure, the monitor is viewed from the back side.
-
Page 11: Camera Angle Adjustment
Camera angle adjustment Put the car in reverse gear to automatically trigger the display of the image behind the car. Then adjust the camera angle to the most suitable position. Adjustable angle for flexibility: 114° When rotating the camera hold the license plate holder with one hand and rotate up or down the outer frame of the camera with the other hand to set the best angle. -
Page 12: Monitor Button & Setting
Monitor button & setting 1 The Up button (Add/+) - Short press to change/add parameter value at the menu setting interface. 2 The Middle button (Menu/OK) - Short press to enter monitor menu setting. - Long press (press and hold for 3 seconds) to confirm the chosen item in the menu setting interface. -
Page 13: Image Parameter
Image Parameter While the monitor is showing the rear image, short press the middle button (Menu/OK) to enter the main menu interface. From the 5 options select “Image Parameter”, long press the (Menu/OK) button again, 3 Images (Brightness/ Contrast/ Colour) setting interface are shown below: Brightness Select Brightness icon, press (Add/+) or (Dec/-) button... -
Page 14: Parking Guidelines
Parking guidelines Display or no display: While the monitor is showing the rear image short press Down button (Dec/-) to switch the Parking guide Lines display modes (Display or No display)! Position Adjustment: The parking guideline position can be adjusted up or down, to mark the image area more realistic. -
Page 15: Environmental Conditions
monitored responsibly by trained personnel. ⚫ The seller assumes no responsibility for damage that occurs during the use of the device, as well as for complaints by third parties. Environmental conditions ⚫ Avoid heavy mechanical stress on the device. Protect it from vibration, hard knocks, do not drop it or shake it. -
Page 16: Disposal
Products marked with this symbol meet all applicable community regulations of the European Economic Area. Technaxx Deutschland GmbH & Co KG has issued a "declaration of conformity" in accordance with the applicable directives and relevant standards. has been created. This can be viewed at any time upon request.
Need help?
Do you have a question about the TX-170 and is the answer not in the manual?
Questions and answers