Table of Contents
Advertisement
Quick Links
Advertisement
Table of Contents

Related Manuals for Pyronix HomeControl+


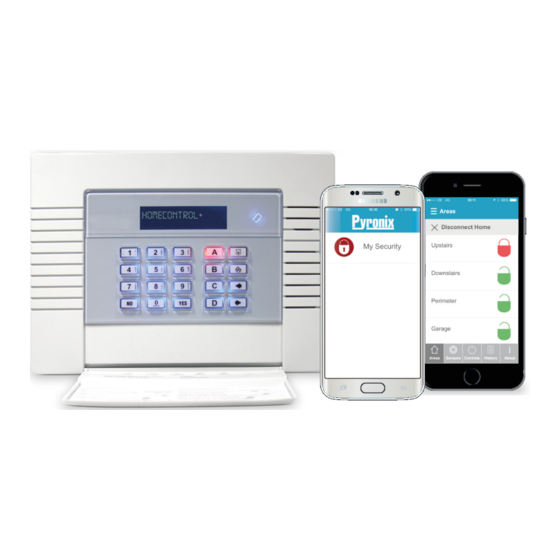
Summary of Contents for Pyronix HomeControl+
-
Page 2: Table Of Contents
1. Contents 1. Contents ....................................2 2. Introduction ..................................2 3. Initial Power Up ................................... 3 3.1 Mains and Earth Wiring ..............................3 3.2 Inside of the HomeControl+ Panel: Rear ........................4 3.3 Inside of the HomeControl+ Panel: Front ........................4 3.4 Connecting / Replacing the Control Panel Battery...................... -
Page 3: Initial Power Up
3. Initial Power Up NOTE 1: It is recommended that the Engineer menu is accessed prior to opening a powered HomeControl+ Panel, as being in the Engineer menu will prevent the tamper alarm from triggering. NOTE 2: If any new peripheral is installed (such as: Modem, I/O board or Expander) it is recommended that the HomeControl+ Panel is powered down (mains and battery). -
Page 4: Inside Of The Homecontrol+ Panel: Rear
3.2 Inside of the HomeControl+ Panel: Rear 1. Terminals for Earth and Mains Supply. See page: 3. 2. If a modem is required (DIGI-GPRS, DIGI-LAN), this is where it must be mounted. See page: 16 3. The transformer is situated in a housing. There should be no need to remove this housing. -
Page 5: Connecting / Replacing The Control Panel Battery
3.4 Connecting / Replacing the Control Panel Battery 1. Unscrew the battery 2. Connect the battery module. 3. Close the battery compartment, compartment. making sure no battery cable is trapped underneath. NOTE: The HomeControl+ Panel’s back up battery must be replaced by the manufacturer’s recommendation. -
Page 6: Technical Specification
4. Technical Specification HomeControl+ Panel Mains Inputs Environment: All Devices European rated voltage 230V AC -15/+10% Nominal operating -10 ° C to +50 ° C temperature: European rated current 63mA Certified operating -10 ° C to +40 ° C Capable operating 90 - 264V AC temperature: voltage... -
Page 7: Installation Guide
5. Installation Guide EURO ZEM32-WE (EURO-ZEM32-WE) All HomeControl+ Panel peripherals; LCD keypads, readers, expanders etc. are connected via the D1-, D2+, D3 and D4 terminals. This is an example of what a typical Enforcer bus may look like. General Principles: NOTE 1: No alarm system cable should be run with other cables carrying AC or digital signals. -
Page 8: Wiring Peripherals To The Rs485 Bus
5.1 Wiring Peripherals to the RS485 Bus 5.1.1 Input / Output Board The Input/output (I/O) board contains the RS485 terminals that are used to connect additional wired keypads, readers, input expanders and output expanders. Terminals: D1-: RS485 0V D2+: RS485 +12V RS485 'A' Bus RS485 'B' Bus F500mA 250V... - Page 9 5.1.3 Wiring Internal Readers Up to three readers can be connected to the HomeControl+ Panel. Each reader needs to be addressed as described below. These will also need assigning in the Engineer function ‘Assign Keypads/Readers’. Addressing at the Reader Address 1 = SWITCH 1 ON. Address 2 = SWITCH 2 ON.
- Page 10 NOTE: The input must be programmed as ‘tamper’. The resistor value is 2K2 as shown in the diagram above. IMPORTANT NOTE: THE BELL BOX CONNECTED WILL NEED TO BE IN SCB (self-contained bell) MODE. Unless the bell box is a Pyronix Deltabell or Invincibell. 5.1.6 Wiring Wired Inputs The resistor values are 4K7 for Alarm and 2k2 for tamper.
- Page 11 5.1.7 Connecting Wireless Input Expander ZEM32-WE EURO ZEM32-WE LEDs: Power, Data Antenna Data LED Enable/Disable Front and Rear Tamper Addressing: IMPORTANT - THIS MUST BE SET TO ‘DEVICE B’ (Addresses 4 - 7) DEVICE C =ADDRESS 8 , 9, 10,11 DEVICE B =ADDRESS 4 , 5, 6, 7 DEVICE A = ADDRESS 0 , 1, 2, 3 + D3 D4...
- Page 12 5.1.8 Connecting an Input Expander Up to 4 x Remote Input Expanders can be connected to the HomeControl+ Panel. NOTE: The above shows the I/O board connected to a EURO ZEM8+ However -if using a EURO ZEM8+PSU, the D2+ terminal MUST NOT be connected. ZEM Address 0 (Inputs 35-42), ZEM Address 1 (Inputs 43-50), ZEM Address 2 (Inputs 51-58), ZEM Address 3 (Inputs 59-66).
-
Page 13: Entry Control With The Internal Tag Reader
5.2 Entry Control with the Internal Tag Reader 5.2.1 Connecting the Push to Exit Button (Entry Control) 5.2.2 Connecting the Mag Lock Control (Entry Control) 5.2.3 Setting with Entry Control Action Visual Sequence Present a valid tag to the reader The door lock will open and then remove it. -
Page 14: Entry Control With The External Tag Reader
5.2.4 Unsetting with Entry Control Action Visual Sequence The bell symbol will be illuminated if Present a valid tag to the reader the system is set, or the unset and then remove it. symbol will be illuminated if the system is unset. Present the same tag to the reader within 10 seconds of The doors will unlock and the system... - Page 15 5.3.3 Setting with Entry Control Action Visual Sequence Present a valid tag to the The GREEN LED will illuminate reader and then remove it. and if programmed, the door will unlock. Present the same tag to the The RED LED will illuminate reader within 10 seconds of when the system has set, and presenting it initially, and then...
-
Page 16: Digi-Gprs (Gprs Modem)
5.4 DIGI-GPRS (GPRS Module) IMPORTANT NOTE: TURN OFF THE MAINS AND BATTERY BEFORE DISCONNECTING GPRS MODEM The GPRS modem card is used to enable the HomeControl+ Panel to communicate either via Contact ID or SMS texts via a SIM card (SMS WITH THIRD PARTY SIM CARDS ONLY). It will also enable remote uploading/downloading. 5.4.1 Antenna The supplied antenna will need to be connected to the HomeControl+ Panel’s GPRS and placed in a suitable area where the signal strength is at its maximum. -
Page 17: Digi-Lan (Lan Module)
5.5 DIGI-LAN (LAN Module) The DIGI-LAN Module is used to communicate over a Local Area Network to either InSite, the PyronixCloud, or to an ARC. NOTE: The product has been approved as supplied. If the communications module is replaced with a different model (besides one of our approved modules), then the certification will be void. -
Page 18: Digi-Wifi (Wi-Fi Module) Install / Setup
5.6 DIGI-WiFi (Wi-Fi Module) Install / Setup Manual Setup DIGI-WiFi AMBER LED (On control panel): -On at startup. RED LED Enter the Engineers Also pulses rapidly menu on the control panel during network setup Single pulse: No procedure (steps 1 - 4) Cloud connection. -
Page 19: Replacing The Battery Of The Enforcer Homecontrol+ Panel
5.7 Replacing The Battery of the Enforcer HomeControl+ Panel To ensure meeting the specification of the HomeControl+ Panel, the backup battery should be replaced with the correct Pyronix battery. The part code for this battery is BATT9V6/2.1Ah-WE. Open the battery holder cover. Install the battery... - Page 20 Pyronix Ltd. Secure House Braithwell Way Hellaby Rotherham S66 8QY Customer Support line (UK Only): +44(0)845 6434 999 (local rate) or +44(0)1709 535225 Hours: 8:00am - 6:30pm, Monday to Friday Email: customer.support@pyronix.com Website: www.pyronix.com...
Need help?
Do you have a question about the HomeControl+ and is the answer not in the manual?
Questions and answers