Table of Contents
Advertisement
Quick Links
Advertisement
Table of Contents

Related Manuals for Garmin etrex


Summary of Contents for Garmin etrex
- Page 1 ® quick start manual for use with models 20 and 30...
-
Page 2: Getting Started
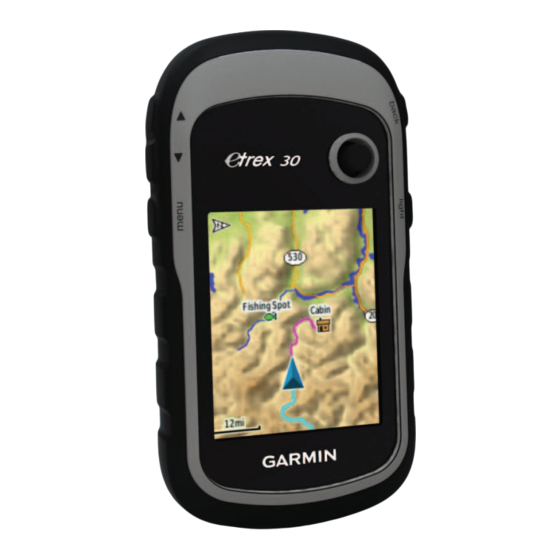
Getting Started Device Overview warninG ‹ See the Important Safety and Product ➋ ➊ Information guide in the product box for product warnings and other ➌ important information. ➍ ➎ When using your device the first time, you should complete these tasks to set up the device and get to know the basic features. -
Page 3: Battery Information
Battery information warninG ‹ The temperature rating for the device ➏ (-4°F to 158°F, or -20°C to 70°C) ➐ may exceed the usable range of some ➑ batteries. Alkaline batteries can rupture at high temperatures. ➒ notice Alkaline batteries lose a significant amount of their capacity as temperature decreases. -
Page 4: Registering Your Device
2. Insert the batteries, observing registering Your Device polarity. • Keep the original sales receipt, or a photocopy, in a safe place. Satellite Signals After the device is turned on, it begins acquiring satellite signals. The device may need a clear view of the sky to acquire satellite signals. -
Page 5: Calibrating The Compass
2. Select a profile. buildings, or overhead power lines. waypoints The eTrex 30 has a 3-axis, electronic compass. Waypoints are locations you record and store in the device. You should calibrate the compass after... -
Page 6: Where To? Menu
2. Select a waypoint. Creating a waypoint You can save your current location as 3. Move to the location. a waypoint. 4. Select Start. 1. Select Mark Waypoint. 5. When the Sample Confidence status bar reaches 100%, select Save. 2. Select an option: For best results, collect four to •... -
Page 7: Creating A Route
1. Select Where To?. for each point. 2. Select All PoIs. recording Track Logs 3. Enter the name or part of the name. 1. Select Setup > Tracks > Track 4. Select Done. Log. 2. Select Record, Do Not Show or Creating a route Record, Show on Map. -
Page 8: Navigating To A Destination
1. Select Where To?. navigating with the Bearing Pointer 2. Select a category. The eTrex 30 has a 3-axis, electronic 3. Select a destination. compass. 4. Select Go. The map page opens with your route marked with a magenta line. -
Page 9: Downloading Geocaches
When navigating to a destination, computers and as mounted volumes on the bearing pointer points to your Mac computers. destination, regardless of the direction you are moving. Downloading Geocaches Connect your device to a computer 1. Begin navigation to a destination If necessary, create an account. - Page 10 2. Pull up the weather cap from the mini-USB port. 3. Plug the small end of the USB cable into the mini-USB port. 4. Open the “Garmin” drive or volume. 5. Open the Garmin\Documents folder or volume. 6. Double-click START HeRe.html...
Need help?
Do you have a question about the etrex and is the answer not in the manual?
Questions and answers