
Subscribe to Our Youtube Channel
Related Manuals for Quantum TRINITY F90+

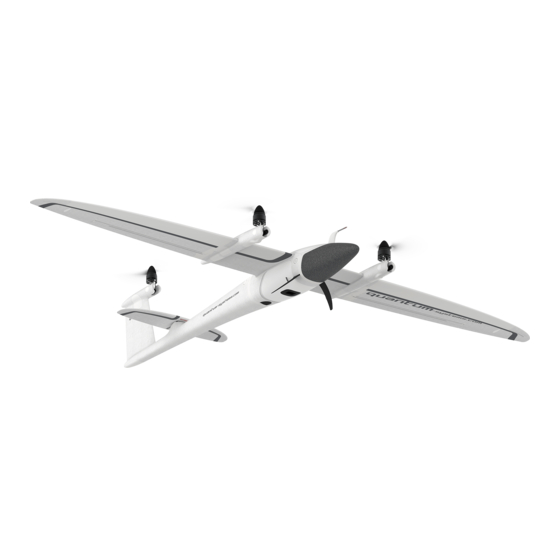
Summary of Contents for Quantum TRINITY F90+
- Page 1 TRINITY F90+ USER MANUAL V2.3.0.49 FOR TRINITY F90+ LOCKED <60 MIN. AND TRINITY F90+ UNLOCKED 90+ MIN. Trinity F90+ user manual...
-
Page 2: Table Of Contents
01 GENERAL INFORMATION 6.6.4 RC transmitter settings ..............33 1.1 Abbreviations ....................8 6.6.5 RC transmitter display during the flight ..........34 02 SAFETY INSTRUCTIONS 6.6.6 Charging the RC transmitter .............35 2.1 operation ....................... 10 6.6.7 RC transmitter firmware update ............35 2.2 Battery safety ....................10 6.7 Cooling Station ..................... - Page 3 8.5 Step 5 – Set up QBase modem ............87 11 PAYLOAD COMPARTMENT 8.6 Step 6 – Set up ADS-B receiver ............88 11.1 Payload compartment attachment ............112 8.7 Step 7 – Set up iBase ................88 11.2 Sony UMC-R10C camera ................ 113 8.8 Step 8 –...
- Page 4 13.5.3 Check the UAV for damages ............146 13.5.4 Check all connections ..............146 13.5.5 Clean the Airspeed Sensor ............146 13.5.5 Check the tilt mechanism ............147 13.5.6 Check the connections between the UAV, QBase & the RC ...147 13.5.7 QBase final check .................148 13.5.8 Upload the mission ...............148 13.5.9 Preflight check ................148 13.5.10 Check the control surfaces ............149...
- Page 5 General information GENERAL INFORMATION...
-
Page 6: General Information
For technical support please contact your reseller. With the purchase of a Quantum-Systems product you agree with the terms and conditions. The applicable terms and conditions can be found at Quantum-Systems GmbH declares that the products: UAV Battery pack, UAV www.quantum-systems.com. - Page 7 General information The UAV is a UAV which combines hover capabilities with fixed wing flight. To ensure vertical take-off and landing (VTOL) the three motors are directed upwards, for cruise flight the motors are tilted forward. The thrust for forward flight is generated by the rear motor while the two front motors are turned off.
-
Page 8: Abbreviations
Light-Emitting Diode ADS-B Magnetometer Automatic Dependent Surveillance–Broadcast Altitude Above Ground Level Manual Focus Altitude Altitude Above Mean Sea Level Altitude Above Take-Off Quantum-Systems Battery Identification Info Post Processing Kinematik BVLOS Remote Control Beyond Visual Line Of Sight Elevation (Ground) REEST Reestablishing... - Page 9 Safety instructions SAFETY INSTRUCTIONS...
-
Page 10: Safety Instructions
Systems or an authorized reseller. Always keep a safe distance to spinning rotors of at least 10 m (33 ft) to Due to the risk of an electric shock, do not open any Quantum- avoid risk of injury and damage of property. -
Page 11: Battery Charging
To charge the battery follow the guideline as described in chapter 6. Always use the Quantum-Systems battery charger to charge the battery pack. Quantum-Systems is not responsible or liable for damages cau- sed by charging the battery with a third party charger. -
Page 12: Disposal
Before disposal apply the protection caps to the contacts. Never put the bat- tery pack into fire due to the risk of an explosion. The battery can also be sent back to an official reseller or to Quantum-Systems. Dispose all Quan- tum-Systems products according to the local regulations for the recycling of electronic or electrical devices. - Page 13 Technical specifications TECHNICAL SPECIFICATIONS...
-
Page 14: Technical Specifications
03 TECHNICAL SPECIFICATIONS TECHNICAL DATA LOCKED <60 MINUTES UNLOCKED 90+ MINUTES 1 Subject to export regu- lation, may require export permission. Max. Take-off Weight 5.0 kg (11.0 lbs) 5.0 kg (11.0 lbs) Max. Flight Time <60 min 90+ min 2 Please be aware that the flight time and max. -
Page 15: Maximum Flight Altitude & Wind Tolerance
Technical specifications 3.1 MAXIMUM FLIGHT ALTITUDE & WIND TOLERANCE Be aware that the wind tolerance (ground) is by default set to max. 9 m/s. There is no automatic adjustment for take-offs between 1500 m – 4000 m regarding the wind tolerance (ground) and maximum flight time. -
Page 16: Maximum Flight Altitude & Wind Tolerance With Lidar Qube 240
3.2 MAXIMUM FLIGHT ALTITUDE & WIND TOLERANCE WITH LIDAR QUBE 240 Be aware that the wind tolerance (ground) is by default set to max. 6 m/s. There is no automatic adjustment for take-offs between 1500 m – 3000 m regarding the wind tolerance (ground). The maximum flight time is restricted to 60 minutes. - Page 17 Process overview PROCESS OVERVIEW...
-
Page 18: Process Overview
04 PROCESS OVERVIEW Flight setup Planning a mission Charging your Trinity battery pack & transmitter Trinity F90+ user manual... - Page 19 Process overview Trinity F90+ user manual...
- Page 20 Trinity F90+ user manual...
- Page 21 Communication links COMMUNICATION LINKS...
-
Page 22: Communication Links
05 COMMUNICATION LINKS The communication with the UAV is ensured by two links. The UAV is connected to QBase via a 2.4 GHz flight data link, a downlink sending telemetry data from the Trinity to QBase and an uplink sending commands from QBase to the UAV. - Page 23 Battery & RC Transmitter BATTERY & RC TRANSMITTER...
-
Page 24: Battery & Rc Transmitter
06 BATTERY & RC TRANSMITTER The Trinity is powered by 6S 4P Li-Ion batteries with an overall nominal voltage of 21.6 V delivering 12 Ah. The four batteries are completely physically separated and located in the nose of the Trinity. Each battery provides an energy of 65 Wh. The battery is enclosed by fire resistant ARPRO material. -
Page 25: Menu Overview
Battery & RC Transmitter 6.1.1 Menu overview Change the menu of QS Charger by pressing on the user panel. STOP/ESC Scroll through the menu or the submenu by selecting on the user panel. Select a menu item by pressing on the user panel. To go back select STOP/ESC START/ENT [Settings]... - Page 26 [User Setup] Language = Set the language (English, German, Italian, French) Key Beep = Mute / unmute the key beep. Buzzer = Mute / unmute the audio signal. The signal notifies you when the charging process is finished or in case of an error. Input Low = Set minimal input voltage (range 10.3 V –...
-
Page 27: Error Messages
Battery & RC Transmitter 6.1.2 Error messages ERROR MESSAGES EXPLANATION [BID Insert / Break] If the battery is disconnected during the charging process, reconnect the battery and press START/ENT on the user panel. Restart the charging process. [BID is not Connected] Please do a cross check with another battery to find out if it is the battery or the charger that is causing the issue. - Page 28 Note: To prevent draining the car battery the minimal input voltage of the QS charger can be set (see chapter 6.1.1). Please follow your car manual for connecting the charger to the battery. 2. Turn on the charger. 3. Remove the covers from the contacts of the battery.
-
Page 29: Charging Process
Battery & RC Transmitter 6.2.2 Charging process 1. Connect the battery pack to the battery charger according to chapter 6.2.1. 2. Press and hold the button for five seconds. Make sure the [Settings] menu is selected while pressing the button. START/ENT 3. -
Page 30: Battery Storage
6.3 BATTERY STORAGE Please see chapter 2.2.3 for all battery storage safety warnings. Due to safety reasons, it is recommended not to leave the batte- ry connected to the UAV when stored in the transportation box: • Charge / discharge the battery to 75 % capacity for long time storage (> 1 week) (see chapter 6.2). •... -
Page 31: Travel Notice
Battery & RC Transmitter • If you fly at an ambient temperature of below 15 °C (59 °F), ensure that you leave the battery pack at a heated place, 20 °C to 25 °C (68 °F to 77 °F), for as long as possible (e.g. inside a heat box or inside a car). If you wish to fly at an ambient temperature below 0 °C (32 °F), make sure the battery is heated to 25 °C (68 °F) before the flight. -
Page 32: Binding The Rc Transmitter To The Uav
1: Power button Turn on / off the transmitter. 2 & 3: Left stick and right stick The sticks are used to control the UAV. Some stick control inputs are not relevant depen- ding on the flight mode. 4: Touch display For the use of the touch display use the supplied stylus pen or your fingers. -
Page 33: Rc Transmitter Settings
Battery & RC Transmitter Battery & RC Transmitter 6.6.4 RC transmitter settings Open the Setup menu The transmitter is switched off. Then press and hold the right transition button of the RC trans- mitter and the power button simultaneously for about 5 seconds until the display turns on automatically. Setup Choose between the following settings. -
Page 34: Rc Transmitter Display During The Flight
System settings Calibrate the touch display. Set the time. Speech volume Set the speech volume. 6.6.5 RC transmitter display during the flight Battery state of your RC Transmitter T.BAT SATs: 15 Number of satellites MIS: 06:04 Remaining mission time Pics: 112 Battery state of the UAV BAT: 24.8 V... -
Page 35: Charging The Rc Transmitter
Battery & RC Transmitter 6.6.6 Charging the RC transmitter The QS RC Transmitter is charged via the Mini USB on the back of the transmitter. 6.6.7 RC transmitter firmware update If an update for the QS RC transmitter becomes available, you will be informed by your reseller. Connect the USB cable to the Mini USB port on the back of the transmitter and connect the transmitter to your computer, laptop or tablet. - Page 36 Trinity F90+ user manual...
- Page 37 QBase – Ground Control Station QBASE – GROUND CONTROL STATION...
-
Page 38: Qbase - Ground Control Station
07 QBASE – GROUND CONTROL STATION QBase is a Microsoft Windows based desktop software. QBase assists the user in planning a mission. The planning process is always accomplished in the following order: 17 m/s For example: (33 kn) Wind 120 m MicaSense Sony UMC Sony RX1R II... - Page 39 QBase – Ground Control Station After planning a mission, QBase assists the user in monitoring and controlling the UAV during the flight but also in debriefing the mission. T.BAT SATs: 15 MIS: 06:04 Pics: 112 BAT: 18.5 V ALT: 120m HDG: 224 °...
-
Page 40: Install / Uninstall Qbase
If you have problems starting QBase, make sure your installation of Microsoft Windows is up to date. 7.1.2 Uninstall QBase Open Settings. Open Apps & features. 3. Search for QBase. Select Uninstall. Alternative: Uninstall QBase by using the uninstaller shortcut found under C:\Programs\Quantum Systems\QBase 3D\Uninstall QBase 3D Trinity F90+ user manual... -
Page 41: Drivers
For the connection between QBase and the UAV via the QBase modem a driver is required. If you have problems connecting the UAV to your computer via the QBase modem, make sure the driver is installed. The required driver can be found in the Windows directory: Programs Quantum Systems QBase 3D Drivers QBase Modem Open CDM21228_Setup.exe and follow the instructions of the installation guide. -
Page 42: User Interface
7.2 USER INTERFACE The graphical user interface of QBase is divided into several sections. 7.2.1 Main menu Trinity F90+ user manual... - Page 43 QBase – Ground Control Station Create Map Create Map FlyLog debrief Post-Processing Offline maps are generated based on the informa- Offline maps are generated based on the informa- FlyLogs are generated during the flight and saved Geotagging the pictures with the accurate PPK tion of the online maps.
- Page 44 Weather ADS-B This menu gives you an overview of the weather To change the ADS-B settings a connection via forecast for the specific location. the QBase modem must be established. Call-Sign: Elevation Individual name or number. Call-Sign should be Download the SRTM elevation data for offline use of suitable for identification.
- Page 45 Remote Control Search updates In this menu you can bind the RC to the Trinity. If new updates are available you can download them. Account Firmwares QBase offers the possibility to create a user account. In this menu you can install new PMB and UAV This allows to share missions between different com- firmwares.
- Page 46 General Flight Data Link In the menu general you can adjust the The network ID and password for the connection directories. between the QBase modem and the Trinity can be changed. ADS-B Settings Weather To change the ADS-B settings a connection via the This menu gives you an overview of the weather QBase modem must be established.
-
Page 47: Header
QBase – Ground Control Station 7.2.2 Header Header Icon colorcodes: Battery Status Unknown Status 1. UAV battery status Operational 2. State of charge in % Warning 3. Cell voltage Error (Either flight or mission critical) 4. Used capacity 5. Number of batteries UAV Status lock Display widgets permanently by activating the... -
Page 48: Planning Screen
7.2.3 Planning screen The map can be moved by using left mouse button. Zooming is possible with the mouse wheel. MAP NAVIGATION Touch screen devices: Move the map with one finger. Use two fingers to zoom in and to zoom out. Trinity F90+ user manual... - Page 49 QBase – Ground Control Station Message Dialog Calculate Bearing Info, Warning, Error Get a bearing and range of the aircraft to your selected reference position. This helps communica- ting with ATC or other airspace users. Lock Map To UAV Choose Map The list includes online and offline maps.
- Page 50 Furthermore, it also allows you to automatically plan a mission element based on the imported kml file. Therefore please select the kml element (highlight- ed blue), choose the corresponding shape from the drop-down and select Create. The kml shapes area and path are supported to either create a flight area or a flight corridor.
- Page 51 Trinity F90+ user manual...
- Page 52 Mission elements Deactivate element Delete element Show/Hide Payload Triggers Move element up/Move element down (This will not deactivate the trigger- (in order to change the order of the elements) points) Pan to Element Element Summary: All Settings are displayed in the right corner. If the selected camera cannot manage the required trigger speed, the trigger speed is...
-
Page 53: Monitoring Screen
QBase – Ground Control Station 7.2.4 Monitoring screen Live Elevation Plot (Plots) UAV Type Plot • Current altitude above ground (AGL) • Displays wind speed, direction, groundspeed & • Current altitude above mean sea level (MSL) airspeed • Altitude of the last 10 seconds •... -
Page 54: Planning A Photogrammetry Or Lidar Mission
7.3 PLANNING A PHOTOGRAMMETRY OR LIDAR MISSION In order to display the planning view, choose New Mission Load Mission in the Mission Menu. Wind Settings Auto Settings Manual Settings • Auto: Get the wind data online. ° The wind is automatically updated as soon as the first waypoint is defined •... - Page 55 QBase – Ground Control Station Add new element Add a new element by clicking one of the following buttons: Set Take-Off/Landing: Location and settings of Take-Off/Landing and retransition can be individually adjusted afterwards. Draw New Area: The flight area is created by defining the corners of an area. Each click on the map defines a corner of the area.
- Page 56 Planning a new area Draw a new area according to chapter 7.3. Undo the last change Redo the last change Delete selected point Finish editing the geometry Start/Stop adding points By selecting a new point between two existing points can be added.
- Page 57 QBase – Ground Control Station option Flip Legs for optimal PPK quality. This option is necessary so that the first waypoint is as far away as possible from the Home Waypoint. Invert Legs: Change the entry and exit direction on a leg. Optimize Leg Sequence: Optimize the leg order based on turn radius of the UAV and the current leg distance.
- Page 58 Corridor planning features In addition to the area settings the corridor provides the following settings. Corridor Width: This defines the width of the corridor. Initial Offset: This value shifts the legs relative to the center of the corridor. Max. Turn Angle: This value determines if the UAV makes a turn before the new corridor segment or continues with the next one.
- Page 59 QBase – Ground Control Station Path Simple path: Specifying waypoints in order to fly around obstacles or delay the flight by loitering. Delete selected waypoint Delete all waypoints Finish editing the geometry 1. Select on the map: add new waypoint between two existing waypoints 2.
- Page 60 Aligned Direction • The flight track is automatically determined in order to match the waypoint and the direction of the next leg. • Subtypes can manually be selected in the waypoint pro- perty menu. For photogrammetry missions it is recom- mended to set the subtype to Auto.
- Page 61 QBase – Ground Control Station • Transition cone: ° Green = Transition cone (allowed transition direction) ° If there is an obstacle: transition altitude must be 20 meters (65.6 ft) higher than the obstacle. • Select the take-off or the retransition location on the map or select Take-Off/Landing in the left section in order to set the way- point settings.
- Page 62 Take-Off /Landing – Retransition Retransition Waypoint During the retransition the UAV will switch from aero fixed wing mode to hover mode. The retransition waypoint is the location at which the UAV finishes the retransition. At this location the UAV is in hover mode. The retransition track is indicated by the dotted path and is by default 150 m (492 ft).
- Page 63 QBase – Ground Control Station Descent Direction • Before the retransition, the UAV enters the descent circle automatically in order to descend to the required retransition altitude. • The radius of the circle is by default set to 60 m (197 ft) and cannot be changed. •...
- Page 64 Checks Open the Plots in the footer section. Please check in the MSL plot that the flight altitude is sufficient during the complete mission. Yellow: Flight altitude 20 meters to 50 meters above ground. Red: Flight altitude below 20 meters above ground. Please also check the GSD plot for a consistend GSD of the recorded data.
- Page 65 7. Make sure that there are no obstacles between the flight area and the take-off and landing position. If a coming home is initiated the Trinity F90+ will return on the direct path. Trinity F90+ user manual...
- Page 66 Trinity F90+ user manual...
-
Page 67: After The Flight
QBase – Ground Control Station 7.4 AFTER THE FLIGHT 7.4.1 Resume/Repeat You can plan missions longer than the maximum flight time of the Trinity. To use the resume mission feature, make sure there are no obstacles in the return way throughout the whole mission! The mission will then be split into multiple parts depending on the following conditions: •... -
Page 68: Download The Flylog And The Logfile From The Trinity F90
Resume Mission: 1. Continue Mission: Continue with the remaining part of the mission. You will be redirected to the planning view and the flight plan is automatically adjusted to the remaining part. Please check the adjusted flight plan and solve the conflicts, if any, before uploading it to the aircraft. 2. - Page 69 QBase – Ground Control Station LogFile: Includes all the sensor data of the flight and might be needed by your reseller for troubleshooting. For troubleshooting the FlyLog and the corresponding LogFile is required. In order to download the FlyLog and LogFile please follow the these steps: the battery.
-
Page 70: Geotag (Ppk)
1. Insert the Micro SD card of the iBase into your computer. 2. Copy the iBase Log file corresponding to your flight on your computer Day 341 Quantum- (the latest file on the SD card e.g. QS341B00.21R) 01. Jan. = 001 Systems QS341B00.21R... - Page 71 QBase – Ground Control Station The view is split into four sections: Data input (A): Exporters (B): Please select the FlyLog from the Windows directory. Please select the type of exporters depending on the requi- Please select the corresponding pictures from the Windows red files for the post processing in a 3rd party software (e.g.
- Page 72 Job Summary (C): Below is an example of a successfully completed job: The Job Summary contains an overview of the selected exporters, the job status and warnings or hints in case of conflicts. Please select Start to start geotagging of the pictures with the corresponding coordinate tags from the FlyLog.
- Page 73 QBase – Ground Control Station Job Management (D): Please check the PPK Fix/Float value after successful processing. The fix value should at least be 90 % for PPK accuracy. Multiple jobs can be run in parallel . This section allows you to add or remove jobs and get an overview of their status.
- Page 74 Exporters in detail (B): Precise Positioning (PPK) For PPK, a reference file for a defined position is required. This can either be obtained via the Quantum-Systems iBase or by external providers. Select Remote Reference Station Local Reference Files. Remote Reference Station Choose a reference station in the list to download reference data or click Get Closest to automatically download data from clo- sest available reference station.
- Page 75 QBase – Ground Control Station 3rd party Rinex file Reference file from another receiver or from geodetic corrections service (e.g. SAPOS in Germany, Trimble VBS Now in USA, KOREC in United Kingdom). 3rd party reference receiver or a geodetic corrections service file format: - a Rinex2 or Rinex3 observations file (possible extensions *.obs,* .o, *.yyo,* .yyO) - a compressed Rinex file (possible extensions *.yyd and* .yyD) (yy in file extensions above are the 2 last digits of the year number.
- Page 76 Geotagging: The geotags are written into a copy of the images using the exif tags. CSV file: This exporter creates a .csv file with the relevant metadata for each image. It is possible to choose between yaw, pitch roll for AgiSoft or omega, phi, kappa for Pix4D as additional information. Propeller Aero file: This exporter creates a .ubx and a .prop file required by the Propeller online service.
- Page 77 QBase – Ground Control Station Mismatches Solving Tool: In case there are mismatches between exposures and pictures please access “Solve Mismatches” in the “Job Summary (C)”. Flight Path (A) The complete flight path and the corresponding geotags and images are directly displayed in the map. Flight Summary (B) A summary of total active exposures detected in FlyLog and the total amount of images found in the directory are displayed...
- Page 78 current selected flight leg is displayed with information about the number, the time scope and the count of active triggers and exposures. Active: Non-skipped entries Map Interactions (D) Pan to mission, selection of base map and export of debugging file can be done here. Time scope (E) This section provides a direct filter to define the current time scope.
- Page 79 QBase – Ground Control Station After the mismatches are solved indicated by the green selected payload, the changes can be applied by clicking the “Apply Changes” button. You will be redirected to the post-processing window to start processing the job. All skipped images and exposures are ignored for all tasks defined in the job.
-
Page 80: Updates & Settings
7.5 UPDATES & SETTINGS 7.5.1 DataLink settings The frequency band and the transmission power of the ground and air modems can not be changed. In order to guarantee a connection between the UAV and the QBase modem the settable network ID and password need to match. User defined IDs and passwords are only neccessary if you wish to fly with two UAV (see chapter 15). -
Page 81: Updating Qbase
It is important to always update QBase as well as the UAV firmware as soon as updates become available. The highest level of flight safety can only be achieved with the latest software release. Therefore, Quantum-Systems can only offer warranty if the UAV and QBase are up to date as soon as an update becomes available. -
Page 82: Updating The Payload Management Board (Pmb)
7.5.4 Updating the Payload Management Board (PMB) When a new Payload firmware becomes available the user is informed via QBase. Start QBase. Select Updates and select Search Updates. Download Select to start downloading the Firmware. Select Update and confirm with Yes. -
Page 83: Updating The Esc
QBase – Ground Control Station 7.5.5 Updating the ESC When a new ESC firmware becomes available the user is informed via QBase. Start QBase. Select Updates and select Search Updates. Download Select to start downloading the Firmware. Select Update and confirm with Yes. - Page 84 Trinity F90+ user manual...
- Page 85 Flight setup – step by step FLIGHT SETUP – STEP BY STEP...
-
Page 86: Flight Setup - Step By Step
08 FLIGHT SETUP – STEP BY STEP After planning the mission in QBase follow the steps below for the flight setup. The steps 8.1 – 8.12 must be completed in the following order. 8.1 Step 1 – Ensure that the weather conditions are suitable for flying It is possible to fly the UAV under the following conditions: Wind up to 9 m / s (17.5 kn) (See chapter 3.1.) In addition to wind data provided by QBase or meteorological service check the... -
Page 87: Step 2 - Ensure That The Battery Is Sufficiently Charged
Flight setup – step by step 8.2 Step 2 – Ensure that the battery is sufficiently charged Before the flight, the battery of the UAV must be sufficiently charged. The required state of charge depends on the duration of your mission. It is not possible to take off if the battery is less than 62.5 % charged. We recommend to use fully charged batteries for each flight. -
Page 88: Step 6 - Set Up Ads-B Receiver
8.6 Step 6 – Set up ADS-B receiver Insert a suction cup into the gimbaled mount. Insert a microUSB cable into the pingUSB. Connect the other end of the USB cable to your laptop or computer. Please always hang up the pingUSB vertically. 8.7 Step 7 –... -
Page 89: Step 8 - Turn On The Qs Rc Transmitter
Flight setup – step by step 8.8 Step 8 – Turn on the QS RC transmitter 1. Turn on the main switch of the QS RC Transmitter. 2. Check the battery status of the transmitter. Do not fly if the battery capacity of the trans- mitter is below 50 %. -
Page 90: Step 11 - Assemble The Uav
8.11 Step 11 – Assemble the UAV Trinity F90+ user manual... - Page 91 Flight setup – step by step Remove the payload transport lock. If not already attached, attach the payload compartment. Ensure that the SD card for the camera is inserted in the payload compartment. The payload compartment must be attached for the flight operation. Attach the rear fuselage to the main body.
-
Page 92: Step 12 - Choose The Take-Off Position
8.12 Step 12 – Choose the take-off position • It is always recommended to take-off from the UAV transportation box as it provides a flat surface. • If your take-off / landing position is in a dusty area, please cover the ground with a canvas cover. -
Page 93: Step 13 - Place The Uav
Flight setup – step by step 8.13 Step 13 – Place the UAV Place the UAV on the transportation box on the take-off posi- tion facing the desired transition direction. It is always recommended to do the transition facing the wind direction. - Page 94 Trinity F90+ user manual...
- Page 95 Flight operation FLIGHT OPERATION...
-
Page 96: Flight Operation
09 FLIGHT OPERATION 9.1 FLIGHT OPERATION – STEP BY STEP Normally the flight is carried out in automatic mode. The UAV is not controlled by the pilot but flies automatically based on the flight plan that was generated in QBase and transferred to the UAV. Waypoints must be set and transferred to the UAV in order to fly in automatic mode. -
Page 97: Step 4 - Qbase Final Check
Flight operation Step 4 – QBase final check Obstacle clearance in reality • No obstacle within a radius of 20 m around Home Waypoint • Re-/transition, descent circle, flight paths: altitude 20 m higher than obstacles UAV heading • Ensure the heading of the displayed UAV corresponds to the direction of the UAV on the ground •... -
Page 98: Step 7 - Check The Control Surfaces
Please stand behind the UAV and keep a safety distance to the UAV of at least 10 m (33 ft) during the complete flight operation. Make sure the UAV is not moving during the Preflight check. Select PREFLIGHT (CHECK) on the display of the transmitter or in QBase3D. If the preflight check is not successful a message will be displayed on the transmitter. -
Page 99: Step 8 - Arm
Flight operation Step 8 – Arm !!NEVER ARM AN AIRCRAFT WITH A DAMAGED PROPELLER!! The arming process starts the motors. Select on the display of the transmitter. Confirm the arming process by selecting Yes!. Abort the process by selecting The motors start running at idle. If you wish to turn off the motors, select OFF. -
Page 100: General Flight Operation
9.2 GENERAL FLIGHT OPERATION This chapter describes the general flight operation of the UAV incl. the take-off, transition, mission, retransition and landing. During every flight phase the operator has the possibility to intervene or to abort the flight. Furthermore, the UAV is equipped with safety features that initiate an automatic coming home in case of an emergency. 3. -
Page 101: Take-Off & Transition
Flight operation 9.2.1 Take-off & Transition Automatic transition Transition altitude Correction commands Automatic turn into transition cone Right Stick Forward translate translate left right 10 m Automatic climb Backward Take-off Location to transition altitude No obstacles around the Home Waypoint (20 m radius) Mission Emergency Transition altitude: 20 m (65 ft) -
Page 102: Manual & Automatic Take-Off Abort Scenarios
9.2.2 Manual & automatic take-off abort scenarios down Manual take-off abort options by the pilot WIND TOO STRONG Automatic take-off abort options by the UAV WRONG DIRECTION AIRSPEED ERROR Take-off abort Hover to Base Air speed sensor fails Automatic landing ... -
Page 103: Manual & Emergency & Mission Commands
Flight operation 9.2.3 Manual & emergency & mission commands +++ ONLY USE IN CASE OF AN EMERGENCY +++ IN CASE OF OBSTACLES IN THE FLIGHT-PATH DUE TO MISSION MISPLANNING. Emergency Commands Mission Commands Manual Commands Min. flight altitude is 40 meters Abort: (ATO = above take-off) Left stick... -
Page 104: Automatic Mission Coming Home
9.2.4 Automatic mission coming home See chapter 14.6 for detailed explanation of the Error Messages AIRSPEED FAILURE Possible reason is a blocked airspeed sensor. Coming home is performed on current altitude and on direct path. BATTERY CRITICAL The remaining capacity is needed to return and to land. EXCEEDED MISSION TIME AIRSPEED Coming Home due to a 60 minutes flight time restriction... -
Page 105: Retransition & Landing
Flight operation 9.2.5 Retransition & landing Transit: Altitude (MSL) of last waypoint or automatic climb to 40 m above retransition altitude if last waypoint is below the 4:06:50 55 seconds: HOVER TIME altitude of the retransition waypoint Notification after 55 seconds. Transit HOVER TIME Descent circle... -
Page 106: Hover Commands
9.2.6 Hover commands ansit Manual hover commands Manual landing commands after manual take-off abort Right Stick Right Stick Left Stick Left Stick Neutral (N): automatic Full throttle: Forward Forward descent climbing Turn Turn translate translate translate translate Turn Turn left right left right... - Page 107 After the flight AFTER THE FLIGHT...
-
Page 108: After The Flight
10 AFTER THE FLIGHT 10.1 DISASSEMBLE THE UAV IMPORTANT: Before disconnecting the battery, please wait until the OK button on the transmitter is disabled. This ensures the best PPK accuracy. 1. Disconnect the battery from the UAV and cover the connections of the battery with the protection caps. -
Page 109: Download The Flylog
After the flight 10.2 DOWNLOAD THE FLYLOG FlyLogs are generated during the flight and saved on board of the UAV. KML and tagging files can be generated from the FlyLog. See chapter 7.4.2 to download the FlyLog from the UAV with the help of QBase. Please note that only the last twenty fly logs are saved on the autopilot. -
Page 110: Post Processing
10.4 POST PROCESSING In order to post process the geotagged pictures please use a third party software like Agisoft, Pix4D, Propeller Aero or Trimble business Center. For optimal accuracy results the recommandation is to adjust the accuracy settings in the software. Therefore, please see the following screenshots: Agisoft Accuracy Adjust camera accuray to 0.02 m... - Page 111 Payload compartment PAYLOAD COMPARTMENT...
-
Page 112: Payload Compartment
11 PAYLOAD COMPARTMENT The UAV payload compartment is available in five different standard payload configurations. 11.1 PAYLOAD COMPARTMENT ATTACHMENT Attach the payload compartment. Disconnect the payload compartment. Trinity F90+ user manual... -
Page 113: Sony Umc-R10C Camera
Payload compartment In order to attach the payload compartment to the main To remove the payload compartment from the UAV press body, connect the four mounting hooks on the upper side of the payload compartment to the main compartment of on the right side. -
Page 114: Sony Umc-R10C Standard Settings
Change settings: It is not recommended to change the settings of the Sony UMC-R10C camera. By default the shutter speed is set to 1/1000s, the aperture is set to F8 and the ISO is set to Auto. Due to a better trigger speed, the focus is set to Manual Focus (infinity). -
Page 115: Sony Umc-R10C Troubleshooting
Payload compartment 11.2.3 Sony UMC-R10C troubleshooting Camera is not recognized on Trinity start up Loose connection between the main and payload compartment • Connect the payload compartment to the UAV main body. • Connect the batteryto the main and establish the modem connection to QBase. •... - Page 116 YES: No connection issue between the camera and the SD card. Please try to setup the UAV incl. payload again. NO: Are all connections on the SD card PCB in place? YES:Please contact the Quantum-Systems Support Trinity F90+ user manual...
-
Page 117: Micasense Rededge-M/Mx/Altum Camera
Payload compartment 11.3 MICASENSE REDEDGE-M/MX/ALTUM CAMERA General note: When the SD card of the MicaSense Red-Edge-M/MX/Altum is removed and attached again, it is important to always turn off and power on the UAV afterwards. Important: If you don‘t do this, it is possible the camera might not save the pictures on the SD card. 11.3.1 Taking a calibration picture For a correct post processing of the pictures, it is important to calibrate the Red-Edge-M/MX/Altum camera. - Page 118 - The panel is placed on the ground, far from any obstructions - The panel fills about half the picture - Camera is pointed as perpendicular to the panel as possible - No shadows on the panel - Direct sunlight illumination on the panel (no reflected lighting) In order to take the picture, please select one of the following options Instant Trigger Delay Trigger (15s) –...
-
Page 119: Geotagging
Payload compartment After the flight After the flight, it is necessary to take the calibration picture immediately after landing. 11.3.2 Geotagging The pictures of the RedEdge-MX/Altum are automatically geotagged. It is not necessary to geotag them in QBase. In case PPK accurracy is required please follow the normal PPK geotagging according to chapter 7.7.2. 11.3.3 Notes Depending on the amount of pictures, the RedEdge-M pictures are saved in multiple folders (1000 pictures per folder). -
Page 120: Micasense Rededge-M/Mx Configuration
Verify the software was updated by checking the “Settings” page on the Mica Sense web interface. The firmware version number is shown at the bottom of the page. 11.3.5 MicaSense RedEdge-M/MX configuration Connect the payload compartment to the Trinity. Please make sure the SD card is connected to the Mica Sense camera. - Page 121 Payload compartment Advanced configuration section Click Save button on the bottom of this section to save the advanced configuration. Trinity F90+ user manual...
-
Page 122: Micasense Rededge-M/Mx/Altum Double Configuration
11.3.6 MicaSense RedEdge-M/MX Double configuration General Setup for both cameras Connect the payload compartment to the Trinity. Please make sure the SD card is connected to the Mica Sense camera. Connect the battery to the Trinity. Establish the WiFi connection between the camera and your computer. - Page 123 Payload compartment Advanced configuration section Click Save button on the bottom of this section to save the advanced configuration. Trinity F90+ user manual...
- Page 124 Configure the blue Camera (RedEdgeBX-SN) Please connect the blue camera (RedEdgeBX-SN) via Wifi according to steps 1. – 4. in order to configure it. Basic configuration section Click Save button on the bottom of this section to save the basic configuration. Trinity F90+ user manual...
- Page 125 Advanced configuration section Click Save button on the bottom of this section to save the advanced. Trinity F90+ user manual...
-
Page 126: Micasense Rededge Altum Configuration
11.3.7 MicaSense RedEdge Altum configuration Connect the payload compartment to the Trinity. Please make sure the SD card is connected to the Mica Sense camera. Connect the battery to the Trinity and power it. Establish the WiFi connection between the camera and your computer. - Page 127 Advanced configuration section Click Save button on the bottom of this section to save the advanced. Trinity F90+ user manual...
-
Page 128: Sony Rx1R Ii Camera
11.4 SONY RX1R II CAMERA 11.4.1 RX1RII settings Disconnect the payload compartment according to chapter 11.1. Remove the battery dummy. Insert the original camera battery. Make sure it is charged. Charging is possible via the supplied charger. Turn on the camera using the on/off switch on top of the camera. The screen of the camera will power up. - Page 129 RX1RII Menu default settings Trinity F90+ user manual...
- Page 130 Trinity F90+ user manual...
-
Page 131: Trigger Speed
11.4.2 Trigger speed JPEG (~32 MB/picture) 1.5 sec/capture for an indefinite picture row 1.4 sec/capture for a 500 pic flight leg 1.3 sec/capture for a 160 pic flight leg 1.2 sec/capture for a 95 pic flight leg 1.1 sec/capture for a 70 pic flight leg 1.0 sec/capture for a 55 pic flight leg 1.3 sec/capture is a reasonably safe trigger limit. -
Page 132: Storage Capacity
11.4.3 Storage capacity An RX1 picture with best resolution is in average 32 MB. For an 82 minutes flight and 1 sec/picture it results in ~153.8 GB requi- red storage space, so a 256 GB SD card is recommended. If the trigger speed is reduced to the relatively safe 1.3 sec/picture, 118.3 GB are required (which can be provided by a 128 GB SD card). -
Page 133: Tx-Thermal Camera
11.5 TX-THERMAL CAMERA The TX Thermal is only available as a combined payload compartment with the Sony UMC R10C camera. The camera is recording a thermal video for every flight leg. In between the flight legs the camera is automatically calibrating. With the help of the free 3 party software ThermoViewer the recorded videos can be converted into .tif or .rjpg files for the further post-processing in e.g. - Page 134 Merge the individual *TMC files to create one *.TMC file for the entire flight Please select Edit -> Merge Files in the top left corner of the software Please select Add file(s) and choose the correct *.TMC files from the windows directory Please make sure the parameters are set as shown below Please select Merge and select the output directory.
- Page 135 Convert the *.TMC file into *.rjpg or *.tif files Please selct Settings in the header section and make sure all options except Parse Mavlink data are unticked. Please select Frame export Please apply the following settings for the export: Please adjust the altitude to your actual flying altitude. *.rjpg needs to be selcted when afterwards processing in Pix4D *.tif needs to be selected when afterwards processing in AgiSoft.
- Page 136 Convert the *.TMC file into *.rjpg or *.tif files Please selct Settings in the header section and make sure all options except Parse Mavlink data are unticked. Please select Frame export Please apply the following settings for the export: Please adjust the altitude to your actual flying altitude. *.rjpg needs to be selcted when afterwards processing in Pix4D *.tif needs to be selected when afterwards processing in AgiSoft.
- Page 137 Storage STORAGE...
-
Page 138: Storage
12 STORAGE For storage, please keep the UAV as well as the QS modem, the transmitter and the battery charger in the transportation box and store the box inside a building at a normal room temperature. Battery pack Always store the battery disconnected from the UAV. For battery storage instructions see chapter 2.2.3 & 6.3. Trinity F90+ user manual... - Page 139 Inspection & repairs INSPECTION & REPAIRS...
-
Page 140: Inspection & Repairs
13 INSPECTION & REPAIRS Do not do any other repair or maintenance work than the one listed. Contact your reseller for further repair assistance. 13.1 REPAIRING AND CLEANING THE AIRFRAME Small cracks can be repaired by using polystyrene/styrofoam glue. In case of doubt, contact your reseller for further assistance. - Page 141 Inspection & repairs Turn on the transmitter. Connect the battery pack to the main body of the UAV and power the UAV. The payload compartment must be attached to the main body of the UAV. Ensure that the link between the UAV and the transmitter is established. Simultaneously move the sticks to the following position.
- Page 142 MOVE THE MAIN BODY LIKE THIS Hold the main body of the UAV on both nacelles. Turn 360° around yourself while moving the UAV from +30° to -30° around the roll axis and simultaneously +30° to -30° around the pitch axis. III.
-
Page 143: Calibrating The Accelerometer
Inspection & repairs 13.3 CALIBRATING THE ACCELEROMETER Turn on the transmitter. Left Stick Right Stick Connect the battery pack to the main body of the UAV and power the UAV. Up right Up left Simultaneously move the sticks to the following position Now you are in calibration mode. - Page 144 There will be three different voice outputs: = Measured value was OK Aircraft is moving = The UAV is not stable enough Success = Appears after step 9 was completed successfully Trinity F90+ user manual...
-
Page 145: Exchange A Degraded Battery Pack
Inspection & repairs 13.4 EXCHANGE A DEGRADED BATTERY PACK After 150 charging cycles it is recommended to exchange the UAV Battery pack. In order to check the amount of charging cycles please check the BID Info menu on the charger – therefore, the battery must be connected to the charger. The battery will age over time. -
Page 146: Keep Your Uav And The Equipment Clean
13.5.2 Keep your UAV and the equipment clean • Please clean the parts of the UAV and all additional equipment with a slighty moist cleaning tissue. • Clean the transportation box with the help of a vacuum cleaner. It is recommended to perform the following steps outside. Furthermore, a short mission must be planned. 13.5.3 Check the UAV for damages •... -
Page 147: Check The Tilt Mechanism
Inspection & repairs 13.5.5 Check the tilt mechanism • Please check the two front tilt mechanisms by carefully moving the motors up and down. • Can the motor be moved smoothly? Is there any irregular friction or noise? • Please check if the motor wires are aligned as shown in the picture. 13.5.6 Check the connections between the UAV, QBase &... -
Page 148: Qbase Final Check
13.5.7 QBase final check Obstacle clearance in reality • No obstacle within a radius of 20 m around Home Waypoint • Re-/transition, Descent circle, Flight paths: altitude 20 m higher than obstacles UAV heading • Ensure the direction of the displayed UAV corresponds to the direction of the UAV on the ground •... -
Page 149: Check The Control Surfaces
Inspection and repairs 13.5.10 Check the control surfaces Move the right stick to the sides to check the ailerons. Move the same stick up and down to check the elevator. If the stick confi- guration was changed, use the left stick to check the ailerons and the elevator. Make sure the control surfaces are moving while moving the stick. -
Page 150: Clean The Airspeed Sensor
13.6 CLEAN THE AIRSPEED SENSOR Only relevant for UAV‘s delivered as of Q2 2021 starting with serialnumber 00686. The new airspeed sensor provides the user with the possibility to easily clean and exchange the pitot tube. Please clean or exchange the pitot tube in case AIRSPEED SENSOR MALFUNCTION is triggered. - Page 151 Troubleshooting TROUBLESHOOTING...
-
Page 152: Troubleshooting
14 TROUBLESHOOTING 14.1 LED STATUS MAIN BODY Color: green Sequence: fast blinking Color: green Sequence: breathing • USB connection • All sensor states are nominal and payload is connected • System is ready for PFC/flight Color: blue Sequence: normal blinking Color: purple Sequence: fast blinking... -
Page 153: Additional Led Status Main Body
Troubleshooting 14.2 ADDITIONAL LED STATUS MAIN BODY BATTERY Color: blue Color: blue These additional LEDs are only relevant for Battery connected PMB connected UAVs delivered as of Q2 2021 starting with serialnumber 00686: STATUS See chapter = Color: blue LED STATUS MAIN BODY GPS 7 Sats connected 14.3 CONNECTION BETWEEN QBASE AND THE UAV CANNOT BE ESTABLISHED To guarantee a stable connection between QBase and UAV via the QBase modem, ensure that both devices have the same... -
Page 154: The Weather Conditions Change During The Flight
4. If the problem persists, contact your reseller. ACTUATOR A malfunction of an actuator has been detected. Remove the battery immediately to prevent further damage. Contact your MALFUNCTION! Quantum-Systems reseller. The actuator has to be replaced. REMOVE BATTERY IMMEDIATELY! AILERON Reduced roll control effectiveness was detected COME HOME is automatically initiated. - Page 155 Troubleshooting AIRSPEED ERROR During preflight check: An airspeed sensor error occurred during the preflight check or during the transition. 1. Disconnect the battery from the UAV and connect it again. 2. Turn on the UAV again. Possible reasons are a transition with tail wind or a blocked airspeed sensor tube.
- Page 156 CAL ERROR One of the sensors is not calibrated Please check QBase for detailed information. correctly. CAL ERROR ACC The accelerometer has not been The last accelerometer calibration failed. Please calibrate the accelerometer calibrated correctly. and try again (see chapter 13.3). CHECK LINK REEST.
- Page 157 Troubleshooting ERROR LOADING Error loading the mission from the SD card. 1. Repeat write mission to UAV. MISSION 2. Repeat the preflight check. EXCEEDED The warning comes up at an automatic COME – MISSION TIME HOME due to a 60 minutes flight time restric- tion.
- Page 158 LINK LOST The message is shown on the Only the flight data link (QBase) can be reestablished. transmitter and in QBase • Either select COME HOME or CONTINUE in the UAV command panel in • Both communication links are lost. The UAV QBase.
- Page 159 Troubleshooting MAG SELFTEST FAILED Sensor initialization error during startup. Disconnect the battery from the UAV and connect it again. MISSION ERROR Mission is incorrect. Please check the message box in QBase for additional information. MISSION FINISHED The automated flight is finished. Please land the UAV manually at the home waypoint by carefully pulling the left stick towards yourself.
- Page 160 PMB NOT FOUND The connection to the payload could not be Disconnect Battery, check connection and latching of payload compartment established during preflight check. and try again. POSSIBLE COLLISION Low altitude in come home path (come home Check come home path displayed in map if necessary assume IN RETURN PATH path = path from current UAV position to re- manual control to avoid collision...
- Page 161 Flying multiple UAV simultaneously FLYING MULTIPLE UAV SIMULTANEOUSLY...
-
Page 162: Flying Multiple Uav Simultaneously
15 FLYING MULTIPLE UAV SIMULTANEOUSLY It is possible to operate multiple UAV simultaneously. Please note that you need one QS RC Transmitter and one tablet, laptop or PC with an attached ground modem per UAV. The network ID of every air ground modem pair has to be unique. It is not possible to operate two UAV on the same network ID. Remember: For every UAV that you wish to operate one safety pilot is required. - Page 163 iBase file names iBASE FILE NAMES...
-
Page 164: Ibase File Names
16 iBASE FILE NAMES Day 341 Quantum- 01. Jan. = 001 Systems QS341B00.21R File format B = 01:00 Year 2021 (UTC Time, UK) A = 00:00 Counter of logs Year 2021 X = 23:00 within the hour JANUARY FEBRUARY MARCH... - Page 165 iBase file names JULY AUGUST SEPTEMBER OCTOBER NOVEMBER DECEMBER Date File Date File Date File Date File Date File Date File Date File Date File Date File Date File Date File Date File Trinity F90+ user manual...
- Page 166 Trinity F90+ user manual...
- Page 167 Trinity F90+ user manual...
- Page 168 Quantum-Systems GmbH Dornierstrasse 11 82205 Gilching • Germany www.quantum-systems.com 4 260574 660161 Trinity F90+ user manual...
Need help?
Do you have a question about the TRINITY F90+ and is the answer not in the manual?
Questions and answers
when takeoff time if headwind comes what is the distance