Advertisement
Advertisement
Table of Contents

Related Manuals for ML Accessories EMLSUS


Summary of Contents for ML Accessories EMLSUS
- Page 1 INSTALLATION & MAINTENANCE MANUAL EMLSUS...
- Page 2 EMLSUS These i nstructions s hould b e r ead c arefully a nd r etained a fter i nstallation b y t he e nd u ser f or f uture r e GENERAL INSTRUCTIONS maintenance. ...
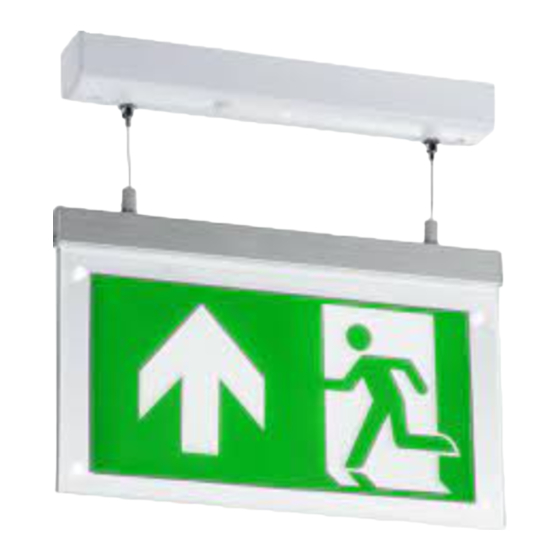
- Page 3 • Using the top plate as a template, mark the location for, and drill the fixing holes ensuring not to infringe with any gas/water pipes or electrical cables • Feed the mains cable through the cable entry hole in the top plate •...
- Page 4 Switch on and check for correct operation, ensuring the green indicator LED is illuminated • • The height of the sign can be adjusted via the compression clamp on the luminaire (see Fig. 3). The maximum overall length from the ceiling to the lower edge of the fitting is 800mm. Press this part of the clamp to adjust the length...
- Page 5 If this product should fail within its warranty period it should be returned to the place of purchase for a free of charge replacement. ML Accessories does not accept responsibility for any installation costs associated with the replacement product. Your statutory rights are not affected. ML Accessories...
- Page 6 TESTING FOR LUMINAIRES Recommended routine test procedure in accordance with BS5266 • Daily check – check LED charge indicator is illuminated • Monthly functional test – simulate a mains supply failure for approx. 30 seconds by operation of key switch or switching off circuit breaker. Ensure normal supply is restored after test and ensure charge indicator is illuminated •...
- Page 7 TEST RECORD SHEET SIGNED DATE INITIAL COMMISSIONING 3 HOUR TEST FIRST YEAR SECOND YEAR THIRD YEAR FOURTH YEAR FIFTH YEAR MONTH TEST SIGNED DATE SIGNED DATE SIGNED DATE SIGNED DATE SIGNED DATE FUNCTIONAL FUNCTIONAL FUNCTIONAL FUNCTIONAL FUNCTIONAL FUNCTIONAL FUNCTIONAL FUNCTIONAL FUNCTIONAL FUNCTIONAL FUNCTIONAL...
- Page 8 INTERNAT CONTACT D INTERNATIONAL CONTACT DETAILS 45°C ML Accessories Limited LU5 4LT www.mlaccessories.co.uk DCSEP21_V3...
Need help?
Do you have a question about the EMLSUS and is the answer not in the manual?
Questions and answers