
Subscribe to Our Youtube Channel
Related Manuals for MHP OCOL


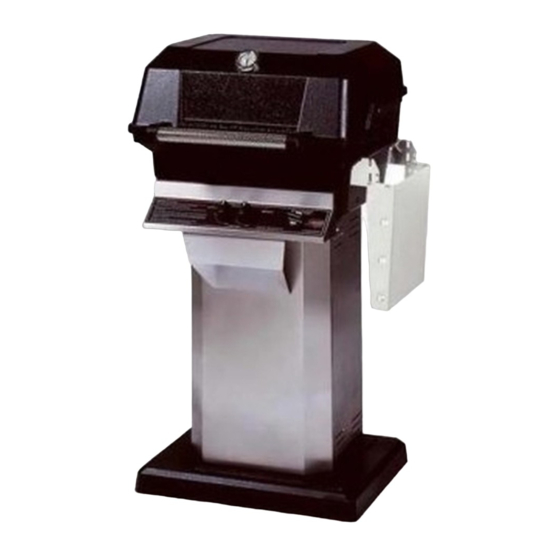
Summary of Contents for MHP OCOL
- Page 1 OCOL Installation Manual OCOL-OMN OCOL-OPN OCOL-OMP OCOL-OPP OCOL-OCN OCOL-OCP SCAN THE QR CODE FOR English ASSEMBLY VIDEO www.mhpgrills.com...
-
Page 2: Important Safety Warnings
The appliance is FOR OUTDOOR USE ONLY. It is not to be used inside a garage, other building or any type of enclosed area. WARNING: • All MHP Grill Heads may be mounted on the column. • The gas supply may be either LP or Natural •... - Page 3 NYLON TANK COLUMN HEX BOLTS (2) BAR SPACERS Locate the Tank Lock Bar from the OCOL Box • Align the holes on the bar to the pre-drilled holes on the column. • Use the 1/4 x 20" x 3/4" Hex Bolt, Nylon Lock Bar Spacer, and a Kep Nut on each side to fasten the Tank Lock Bar in place.
- Page 4 CAST ALUMINUM BASE AXLE AXLE CLIPS (2) 6" WHEELS (2) HUB CAPS (2) 12' NATURAL GAS HOSE ASSEMBLY VIDEO (Quick Disconnect PART NEEDED (FROM OCOL BOX) HARDWARE NEEDED TOOLS NEEDED GGGSKA/GGGSKB GGM4 GGM11 GGM6 7/16" OPEN ADJUSTABLE 2-PIECE GASKET (1)
- Page 5 ATTACH THE BASE TO THE COLUMN (OM BASE) STEP 3B-OM PARTS NEEDED FROM OC BOX PART NEEDED (FROM OCOL BOX) GGGSKA/GGGSKB SCAN THE GGAXL 2-PIECE GASKET (1) QR CODE FOR LEFT AND RIGHT CAST ALUMINUM BASE AXLE ASSEMBLY VIDEO HARDWARE NEEDED...
- Page 6 Attach the wheels by slipping the axle through the pre-drilled holes in the base, slide the wheels onto the axle and secure with the axle clips. GGWL1 OCOL • Finish by snapping the hub caps on before standing the unit upright.
- Page 7 ATTACH THE BASE TO THE COLUMN (OP BASE) STEP 3C-OP PART NEEDED PART NEEDED (FROM OCOL BOX) ADDITIONAL ITEMS NEEDED FOR PATIO BASE INSTALLATION (Not Included) Included with natural gas bases only SCAN THE GGGSKA/GGGSKB OP BASE GGCTSS QR CODE FOR...
- Page 8 Not recommended for use on patio pavers. Lag Bolts for your application LAG BOLTS (2) Not supplied by MHP SECURE THE BASE (FOR LP GAS INSTALLATIONS) • Choose a location where you are going to set up your grill. Make sure the surface is flat and...
- Page 9 CONNECT THE GRILL HEAD BOTTOM STEP 4 If you are using an OP Base the grill head should not be attached to the column until the base has been permanently mounted to a deck or patio surface. If this has not been done, see step 3X-OP for steps to secure the OP base. HARDWARE NEEDED TOOLS NEEDED GGM4...
- Page 10 (QUICK DISCONNECT) supply line's shut-off valve. Depending on the size of your gas line you may need a reducer (not supplied by MHP) to connect your gas line to the quick GAS VALVE disconnect socket (3/8" male pipe thread). SWIVEL •...
- Page 11 (QUICK DISCONNECT) supply line's shut-off valve. Depending on the size of your gas line you may need a reducer (not supplied by MHP) to connect your gas line to the quick GAS VALVE disconnect socket (3/8" male pipe thread). SWIVEL •...
- Page 12 CONNECTING THE GAS SUPPLY LINE (OP BASE) STEP 5C-OP CONNECT THE GAS LINE (FOR LP GAS INSTALLATIONS) • The LP Hose and Regulator are factory-installed onto your grill head's LP Valve • Attach the LP Regulator to your propane tank and securely hand tighten the coupling nut to the cylinder valve. •...
- Page 13 WRENCH Attach Natural Gas Line to the GGCTSS Flex Tube • Connect a 3/8" flare coupling (not supplied by MHP) to the GGCTSS gas supply line then the flexible stainless-steel tubing (GGCTSS) using a 3/4" wrench. The use of two wrenches is recommended—one wrench is used to hold fitting while the...
- Page 14 ATTACHING THE ACCESS PANEL STEP 6 Do not attach the front access panel until the control panel has been attached to the grill head bottom and the gas supply line has been properly connected and leak tested. Attach the Access Panel Cover •...
- Page 15 Preheat your grill to 350° and grill for 30 minutes. During this time the spicy heat will be cooked from the pepper and you can enjoy your jalapenos. Clean and Maintain Your Grill Keep your grill running smoothly with these accessories designed specifically to work with your MHP Grill. 21" Stainless Steel Handle Brass Bristle SearMagic Replacement Brass...
-
Page 16: Technical Support
Make the most out of your grilling experience! From side burners and rotisseries to grill covers and more— we carry a complete line of grill upgrades, accessories and grill parts designed specifically for your MHP Grill. Visit MHPGrills.com for more information TECHNICAL SUPPORT Modern Home Products 150 South Ram Road •...
Need help?
Do you have a question about the OCOL and is the answer not in the manual?
Questions and answers