Table of Contents
Advertisement
Quick Links
Advertisement
Table of Contents

Related Manuals for Sigma Metalytics PMV Pro PRO


Summary of Contents for Sigma Metalytics PMV Pro PRO
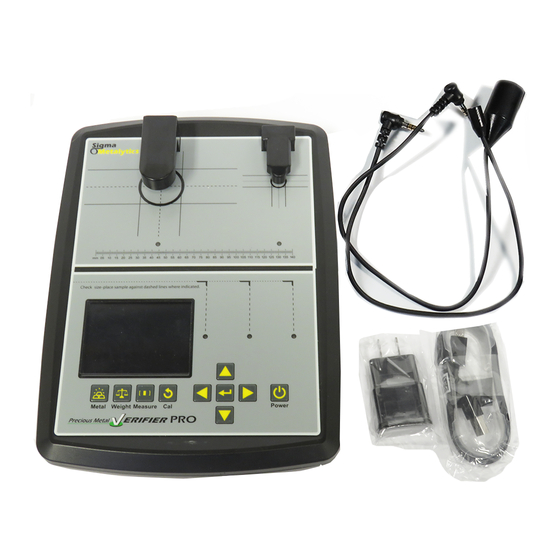
- Page 1 ERIFIER Precious Metal MANUAL MODEL #2601...
-
Page 2: Table Of Contents
Contents Caution ..........................3 PMV PRO Diagram ......................4 PMV PRO Functions ......................5 Power On and Calibrate ....................6 Setup ............................7 Metal Selection ........................8 Weight Entry ........................9 Measurement Screen ....................10 Measurement Interpretation ..................11 Dimension Verification ....................12 Wand Use ...........................14 PC Interface ........................15 External Bridge Use ......................16 Thickness Calibration ....................18 Common Questions .......................20 Warranty ..........................21... -
Page 3: Caution
DO NOT remove the plastic cover from the display. Sigma Metalytics and the Precious Metal Verifier PRO make no claim, guarantee, or promise that measurements made by the Precious Metal Verifier PRO indicate that any sample is or is not genuine. Measurement results, whether within or without the bounds consistent with the selected metal or alloy, are INFORMATIONAL ONLY and any judgment about or action taken with regard to any sample is entirely the responsibility of the user. -
Page 4: Pmv Pro Diagram
PMV Pro Small Sensor Large Sensor and Bridge and Bridge Sample Placement Sample Placement External Circle Circle Bridge Sample must cover inside Sample must cover inside Connector of placement circle of placement circle Active Sensor Wand Measurement Lamps Connector Scale 105 110 Place sample against dotted lines where indicated. -
Page 5: Pmv Pro Functions
PMV PRO Functions The PMV PRO uses up to four different measurements to determine if a coin or bar is consistent with genuine precious metals. The four measurements are: 1. Basic Verification Mode: The PMV PRO measures the sample’s resistivity just under the surface of the metal. -
Page 6: Power On And Calibrate
Power On and Calibrate Power on your PMV PRO by pressing the POWER button. The device will display the serial number, firmware version, FPGA version, and database version. The device needs to be calibrated each time it is turned on. This calibration checks the internal components and prepares the device for use. Press the CAL button to calibrate. -
Page 7: Setup
Setup You may change some settings in the SETUP screen. To access the SETUP screen, press the RIGHT button on the READY screen. Use the UP and DOWN buttons to select the category, and use the RIGHT and LEFT buttons to change the selection within a category. Press the ENTER button when done to exit the SETUP screen. -
Page 8: Metal Selection
Metal Selection Prior to taking a measurement, you must select the appropriate metal or alloy from the metal selection database. Press the METAL button open the selection menu. Use the LEFT and RIGHT buttons to navigate between metal categories, and use the UP and DOWN buttons to select a specific metal within a category. -
Page 9: Weight Entry
Weight Entry To enter the weight of a sample, press the WEIGHT button. You can either select from the options listed in the English Units (Ozt) and Metric Units (grams) categories, or you can manually enter a weight on your own. Use the LEFT and RIGHT buttons to navigate between categories, and use the UP and DOWN buttons to select options within a category. -
Page 10: Measurement Screen
Measurement Screen The MEASUREMENT screen will display when taking a reading. Below is a basic explanation of each part of the screen. The screen will not display the diameter, thickness, or weight if weight mode is turned off. When using a Wand attachment, only the Basic Verification Mode bar will display. Sample consistent with selected metal Selected Metal... -
Page 11: Measurement Interpretation
Measurement Interpretation The device is getting a reliable reading The device is getting a reliable reading The device is getting a reliable reading Reliable Reading, Good Sample Reliable Reading, Bad Surface Reliable Reading, Bad Interior and the reading is consistent with the but the Basic Verification Mode indicates but the Thru Verification Mode selected metal. -
Page 12: Dimension Verification
Dimension Verification To verify the dimensions of a sample, the correct metal must be selected and the correct weight must be entered. To verify the dimensions of a sample, press the MEASURE button while the device is reading the sample. Select the shape of the sample using the UP and DOWN buttons. Once the DIMENSION screen appears, you may move the sample away from the sensor. - Page 13 Dimension Verification Diagram Rectangular Sample Round Sample...
-
Page 14: Wand Use
Wand Use Wands are optional attachments for the PMV PRO. To use a Wand attachment, plug the Wand into the Wand Connector on the right-hand side of the device. When you plug in the Wand, the device will ask for calibration. Remove all samples from the device and ensure the Wand is at least one inch away from any metal, then press the CAL button. -
Page 15: Pc Interface
PC Interface The PMV PRO is capable of using a Windows PC (Windows 7, 8, 10, and 11) as an interface for the device. You must first install the PC Interface program by downloading it from our website (www. sigmametalytics.com/pro-pc) and following the included download and installation instructions. Once the program is successfully downloaded and installed, plug the PRO device into your PC using the included USB cable. -
Page 16: External Bridge Use
External Bridge The External Bridge is an optional attachment for the PMV PRO. To use the External Bridge, plug the External Bridge into the External Bridge connector on the right-hand side of the device. When you plug in the External Bridge, the device will ask for calibration. Remove all samples from the device and External Bridge, and ensure the External Bridge’s plunger is in the up position. - Page 17 Plunger External Bridge Dimension Verification The External Bridge can provide dimension verification, similar to the onboard sensors. Please refer to Page 12 for a basic overview. When verifying dimensions with the External Bridge, enter the measured weight, then, press the MEASURE button while the device is reading the sample.
-
Page 18: Thickness Calibration
Thickness Calibration In the event that your PRO device’s onboard sensors become miscalibrated, it may be important to re- calibrate the thickness measurement of your device. To do so, first power on the device and remove all samples. Once the device displays the READY screen, press and hold the CAL button for 3 seconds. The THICKNESS CALIBRATION screen will appear. - Page 19 Thickness Calibration Press Cal and hold 3 seconds Place Calibrator under sensor. Calibration Press Enter button mm 05 105 110 to cal Place sample against dotted lines where indicated. Place calibration Silver-Silver Pure coin under each sensor that that needs to be Ready - Place Sample calibrated Wt PM: 1.00...
-
Page 20: Common Questions
Common Questions Our “Pure Silver” range is calibrated to put .9999 silver in the green and .999 silver in the yellow on the right. We do this 1. Why does my silver read in the yellow? because we so frequently see .999 silver counterfeited that we want all users to be cautious of .999 silver samples and to check the other aspects (markings, weight, and size) of the sample prior to making any judgment. -
Page 21: Warranty
Precious Metal Verifier PRO and its accessories. If purchased through a retailer or distributor, you may be required to provide Sigma Metalytics with your original sales receipt from your purchase to qualify for our warranty service. - Page 22 ERIFIER Precious Metal MODEL #2601 www.sigmametalytics.com Made in USA info@sigmametalytics.com US Patents No. 9,922,487; 10,417,855; 10,839,633...
Need help?
Do you have a question about the PMV Pro PRO and is the answer not in the manual?
Questions and answers