Table of Contents
Advertisement
Quick Links
Advertisement
Table of Contents

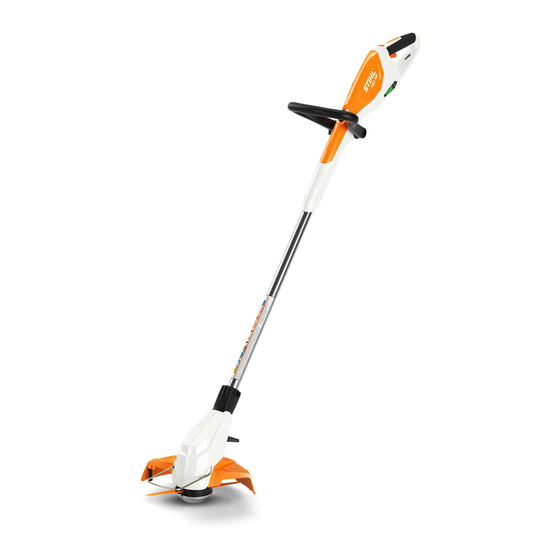
Summary of Contents for Stihl FSA 45
- Page 1 FSA 45 2 - 19 Instruction Manual...
-
Page 2: Table Of Contents
STIHL expressly commit themselves to a sus‐ tainable and responsible handling of natural resources. This user manual is intended to help you use your STIHL product safely and in an environmentally friendly manner over a long service life. We thank you for your confidence in us and hope you will enjoy working with your STIHL product. - Page 3 3 Overview English 15 Lever Locks selected angle between shaft and motor housing. 16 Bump Guard Protects objects from contact with the cutting attachment and maintains ground clearance when edging. 17 Charger Plug Connects charging cable to charger socket. 18 Connecting Cable Connects charger plug to appliance plug.
-
Page 4: Safety Precautions
Safety Precautions ■ Charging cables not explicitly approved for the Introduction trimmer by STIHL may cause a fire or explo‐ sion. This can result in serious or fatal injuries This product was designed for safe operation and damage to property. - Page 5 This may result in serious injury to ► If you have any queries: Contact a STIHL bystanders, children and animals and damage servicing dealer for assistance.
- Page 6 – The cutting attachment and deflector are prop‐ fatally injured and property may be damaged. erly mounted. ► Do not work in a highly flammable or explo‐ – Genuine STIHL accessories for this brushcut‐ sive environment. ter are fitted. 4.6.2 Charging cable –...
- Page 7 ► Work with a correctly installed line limiter Built-in battery blade. WARNING ► If you have any queries: Contact your STIHL servicing dealer. ■ The built-in battery is not protected against all ambient conditions. If the built-in battery is 4.7.3 Mowing Head exposed to certain ambient conditions, the The mowing head is in a safe condition if the fol‐...
- Page 8 ► Stop work, remove the activation key and Persons may be seriously or fatally injured, contact your STIHL servicing dealer. and property may be damaged. ■ Vibrations may occur during brushcutter oper‐ ► Ensure that the technical specifications for ation.
- Page 9 ► If the brushcutter, deflector, cutting attach‐ ■ Children are not aware of and cannot assess ment or charging cable require servicing or the dangers of a charging cable. Children may repairs: Contact your STIHL servicing sustain serious or fatal injuries. dealer for assistance. 0458-718-0121-C...
-
Page 10: Preparing Trimmer For Operation
State of Charge ► Adjust the loop handle, 8.3. ► Check the controls, 11.1. ► If you cannot carry out this work: Do not use 80-100% your brushcutter and contact your STIHL 60-80% 40-60% dealer for assistance. 20-40% Charging the Trimmer, 0-20%... - Page 11 7 Assembling the Trimmer English 7.2.2 Removing Mowing Lines ► Switch off the trimmer and remove the activa‐ tion key. ► Push the short end of the mowing line upwards out of the mowing head. ► Pull the short end of the mowing line upwards out of the mowing head.
-
Page 12: Adjusting Trimmer For User
English 8 Adjusting Trimmer for User ► Position the loop handle (2) so that the recess ► Depress lock button (1) and hold it in that posi‐ for the star knob nut (1) is on the right – tion. viewed from the control handle. ►... -
Page 13: Inserting And Removing Activation Key
Removing the Activation Key ► If the trigger can be pulled: Do not use your ► Stand the trimmer on a level surface. trimmer and contact your STIHL servicing ► Remove the activation key. dealer. ► Keep the activation key out of the reach of Release slide or trigger lockout is faulty. -
Page 14: Operating The Trimmer
PolyCut 2-2 head is visible: Have the PolyCut 12.3 Mowing 2-2 mowing head replaced by a STIHL servic‐ ing dealer. The cutting height is determined by the distance ► If the length of one of the blades, measured of the cutting attachment from the ground. -
Page 15: Storing
– Charging cable is out of the reach of chil‐ 15.1 Storing the brushcutter dren. STIHL recommends that you store the brushcut‐ – Charging cable is clean and dry. ter with a charge between 40% and 60% (2 – Charging cable is in an enclosed space. -
Page 16: Maintenance And Repairs
The charging cable requires no servicing and cannot be repaired. Every 12 months ► If the charging cable is defective or damaged: ► Have the trimmer checked by a STIHL servic‐ Replace the charging cable. ing dealer. 17.2 Servicing and Repairing the... -
Page 17: Combinations Of Cutting Attachments And Deflectors
Using the PolyCut 2-2 mowing head with nylon tection. lines may shorten the battery runtime. STIHL FSA 45 with PolyCut 2-2 mowing head Mowing head cannot be installed by the user. equipped with 1.6 mm diameter “round, quiet” ► Have the mowing head installed by a STIHL nylon line servicing dealer. -
Page 18: Ec Declaration Of Conformity
UK regulations Noise Emission The technical documents are stored at in the Environment by Equipment for use Out‐ ANDREAS STIHL AG & Co. KG Produktzulas‐ doors Regulations 2001, Schedule 9. sung. Notified body: Intertek Testing & Certification Ltd... - Page 19 24 UKCA Declaration of Conformity English Dr. Jürgen Hoffmann, Director Product Certifica‐ tion & Regulatory Affairs 0458-718-0121-C...
- Page 20 *04587180121C* 0458-718-0121-C...


Need help?
Do you have a question about the FSA 45 and is the answer not in the manual?
Questions and answers