
Subscribe to Our Youtube Channel
Related Manuals for Rosewill RNX-G100, RNX-G200, RNX-G300


Summary of Contents for Rosewill RNX-G100, RNX-G200, RNX-G300
- Page 1 Wireless G USB Adapter RNX-G100 Wireless G PCMCIA Adapter RNX-G200 Wireless G PCI Adapter RNX-G300(E) User Manual...
-
Page 2: Table Of Contents
RNX-G100 / RNX-G200 / RNX-G300(E) Contents Chapter 1 Introduction ... 3 1.1 Welcome ... 3 1.2 About This Guide... 3 1.3 Copyright statement... 3 1.4 Contents of Package ... 3 1.5 Before you begin ... 3 Chapter 2 Designing Your Wireless Network ... 4 2.1 Cardbus adapter- RNX-G200... -
Page 3: Chapter 1 Introduction
RNX-G100 / RNX-G200 / RNX-G300(E) Chapter 1 Introduction 1.1 Welcome The Wireless Network Adapter is a powerful 32-bit Cardbus/PCI/USB Adapter that installs quickly and easily into PCs. The Adapter can be used in Ad-Hoc mode to connect directly with other cards for peer-to-peer file sharing or in Infrastructure mode to connect with a wireless access point or router for access to the Internet in your office or home network. -
Page 4: Chapter 2 Designing Your Wireless Network
RNX-G100 / RNX-G200 / RNX-G300(E) A CD-ROM Drive Cardbus/PCI/USB controller properly installed and working in the laptop computer A 802.11g or 802.11b Access Point (for infrastructure Mode) or another 802.11g or 802.11b wireless adapter (for Ad-Hoc; Peer-to-Peer networking mode.) Chapter 2 Designing Your Wireless Network The wireless Cardbus/PCI/USB Adapter supports up to 54 Mbps connections. -
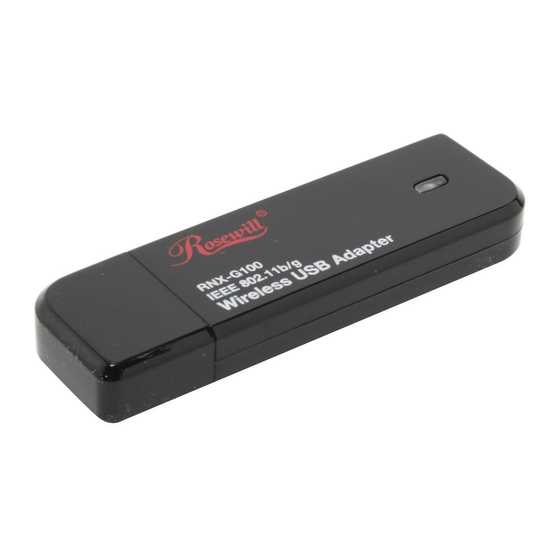
Page 5: Usb Adapter- Rnx-G100
RNX-G100 / RNX-G200 / RNX-G300(E) The status LED indicators of the PCI wireless adapter are described in the following. Lnk/Act ON (Green): Indicates a valid connection Lnk/Act Flashing: Indicates the Adapter is transmitting or receiving data. 2.3 USB adapter- RNX-G100 The status LED indicators of the USB wireless adapter are described in the following. - Page 6 RNX-G100 / RNX-G200 / RNX-G300(E) Click Install Driver & Utility on the Wireless Client Configuration Utility screen. Follow the Install Shield Wizard steps, and click Finish when done. Now turn off your PC or notebook Figure 2-2 Figure 2-3 User Manual...
-
Page 7: Install Adapter
RNX-G100 / RNX-G200 / RNX-G300(E) 3.2 Install Adapter 3.2.1 Cardbus Adapter- RNX-G200 Power on your notebook, let the operating system boot up completely, and log in as needed. Hold the adapter with the LOGO facing up and insert it into a Cardbus slot. If the Found New Hardware Wizard displays, choose Install the software automatically (Recommended), and click Next button. - Page 8 RNX-G100 / RNX-G200 / RNX-G300(E) screw. Then close your PC. Attach the external antenna to the adapter’s antenna port. Power on the PC. If the Found New Hardware Wizard displays, choose install the software automatically (Recommended), and click Next button. The driver will be installed automatically. 3.2.3 USB Adapter - RNX-G100 Power on your PC, let the operating system boot up completely, and log in as needed.
-
Page 9: Configuration Your Wireless Adapter
RNX-G100 / RNX-G200 / RNX-G300(E) 3.3 Configuration your wireless adapter The Wireless Client Configuration Utility screen will appear automatically. Click the Site Survey tab then click the Refresh button to search for available wireless networks. Figure 4-1 User Manual... -
Page 10: Chapter 4 Using The Wireless Client Configuration Utility
RNX-G100 / RNX-G200 / RNX-G300(E) To connect to one of the networks on the list, select the wireless network, and click Associate button. Chapter 4 Using the Wireless Client Configuration Utility Use the Wireless Client Configuration Utility to check the link information, search for available wireless networks, or create profiles that hold different configuration settings. -
Page 11: Site Survey
RNX-G100 / RNX-G200 / RNX-G300(E) Link Information Status: The status of the wireless network connection. Network SSID: The unique name of the wireless network. Network Type: The mode of the wireless network currently in use. Network BSSID: The MAC address of the wireless network’s access ... - Page 12 RNX-G100 / RNX-G200 / RNX-G300(E) The section of the window displays the Available Networks. Highlight the network to which you wish to connect. Click on the Associate button. Figure 4-2 Figure 4-3 User Manual...
-
Page 13: Admin
RNX-G100 / RNX-G200 / RNX-G300(E) User Manual Choose the Authorization modes and Encryption modes in the drop-down box. If the wireless network uses a Passphrase, enter the Passphrase in the Passphrase field. If the wireless network uses a WEP key, enter the WEP key in the Key field. Click the OK button to complete the network connection and return to the Site Survey screen, or click the Cancel button the cancel the network connection and return to the Site Survey screen. - Page 14 RNX-G100 / RNX-G200 / RNX-G300(E) Import profile Click the Import Profile button to import a profile that has been saved in another location. From the screen that appears, select the appropriate file, and click the Open button. Figure 4-5 Figure 4-6 User Manual...
-
Page 15: Profile Manager
RNX-G100 / RNX-G200 / RNX-G300(E) User Manual 4.4 Profile Manager Figure 4-7 On the Profile Manager tab, click the Create button to create a new profile. - Page 16 RNX-G100 / RNX-G200 / RNX-G300(E) User Manual Figure 4-8 When the Network Info screen appears (Figure 6-8), enter a name for the new profile. Enter the Network SSID. Choose the Infrastructure Mode in the Network Type drop-down box if you want your wireless computers to communicate with computers on your wired network via a wireless access point.
- Page 17 RNX-G100 / RNX-G200 / RNX-G300(E) User Manual Figure 4-9 Infrastructure Mode If you choose Infrastructure Mode, click the Next button. Figure 4-10 The Security screen (Figure 6-10) will appear. Choose the Authentication Mode and Encryption Method from the drop-down menu. To use WEP encryption (recommended to increase network security), select 64 bits or 128 bits WEP from the drop-down menu, and enter either a Passphrase or WEP key.
- Page 18 RNX-G100 / RNX-G200 / RNX-G300(E) The Protocol screen will appear. Select do not change settings, then, click Next button. The Complete Screen will appear. Click Finish button. You have successfully created a connection profile. Figure 4-11 Figure 4-12 User Manual...
-
Page 19: Chapter 5 Troubleshooting
RNX-G100 / RNX-G200 / RNX-G300(E) Chapter 5 Troubleshooting This chapter provides solutions to problems that may occur during the installation and operation of the Wireless Cardbus/PCI/USB Adapter. Read the descriptions below to solve your problems. The Wireless Cardbus/PCI/USB Adapter does not work properly. ... -
Page 20: Appendix A Specifications
-20ºC to 70º C Operating Humidity: 10% to 85%, Non-Condensing Storage Humidity: 5% to 90%, Non-Condensing Thank you for purchasing a quality Rosewill Product. Please register your product at : www.rosewill.com for complete warranty information and future support for your product. User Manual...
Need help?
Do you have a question about the RNX-G100, RNX-G200, RNX-G300 and is the answer not in the manual?
Questions and answers