
Related Manuals for Rosewill RNX-N250PC2


Summary of Contents for Rosewill RNX-N250PC2
-
Page 1: User Manual
Wireless N PCI Adapter RNX-N250PC2 User Manual Wireless N PCI Adapter RNX-N250PC2 User Manual... -
Page 2: Fcc Statement
Wireless N PCI Adapter RNX-N250PC2 User Manual FCC STATEMENT This equipment has been tested and found to comply with the limits for a Class B digital device, pursuant to part 15 of the FCC Rules. These limits are designed to pro-vide reasonable protection against harmful interference in a residential installation. -
Page 3: Ce Mark Warning
Wireless N PCI Adapter RNX-N250PC2 User Manual CE Mark Warning This is a class B product. In a domestic environment, this product may cause radio interference, in which case the user may be required to take adequate measures. National Restrictions 2400.0-2483.5 MHz... -
Page 4: Table Of Contents
Wireless N PCI Adapter RNX-N250PC2 User Manual Table of Content Package Contents ....................1 Chapter 1 Overview ...................2 Overview of the product.................2 Features ....................3 LED Status.....................3 Chapter 2 Installation ..................4 Hardware Installation ................4 Software Installation ................4 2.2.1 Overview ....................4 2.2.2 Software Installation for Windows XP ..........4 2.2.3 Software Installation for Windows Vista..........9... -
Page 5: Package Contents
Make sure that the package contains the above items. If any of the listed items are damaged or missing, please contact your distributor. Conventions: The Adapter mentioned in this user guide stands for RNX-N250PC2 Wireless N PCI Adapter without any explanations. -
Page 6: Chapter 1 Overview
The adapter is easy to install and manage with the Quick Setup Wizard guiding you step-by-step through the installation process and the Wireless N Client Utility instructing you to quickly set up a wireless connection. With unmatched wireless performance, reception, and security protection, the RNX-N250PC2 is... -
Page 7: Features
Wireless N PCI Adapter RNX-N250PC2 User Manual the best choice for easily adding or upgrading wireless connectivity to your desktop. 1.2 Features Complies with IEEE 802.11n, IEEE 802.11g, IEEE 802.11b standards Supports WPA/WPA2 data security, TKIP/AES encryption Supports high rate of up to 300Mbps for maximum throughput, supports automatically adjust... -
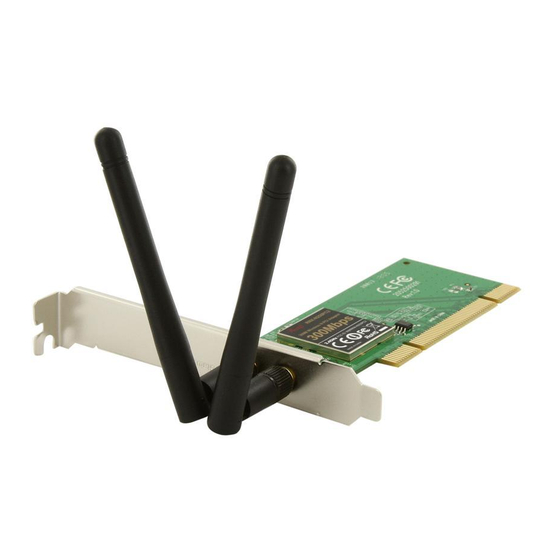
Page 8: Chapter 2 Installation
Wireless N PCI Adapter RNX-N250PC2 User Manual Chapter 2 Installation 2.1 Hardware Installation To install the adapter, follow these steps listed below: Turn off your desktop PC and disconnect the power. Remove your PC case and locate an available PCI slot on the motherboard. Remove the metal slot cover on the back of the PC. - Page 9 Wireless N PCI Adapter RNX-N250PC2 User Manual Figure 2-1 Soon, Figure 2-2 will display after a moment. Click Next to continue. Figure 2-2 After that, you should choose a Setup type. It is recommended that you select Install 2.4GHz Wireless Lite-N Client Utility and Driver. Select Install Driver Only to install...
- Page 10 Wireless N PCI Adapter RNX-N250PC2 User Manual Figure 2-3 Click Change to change the destination location for the software, then click Next in the screen below (shown in Figure 2-4). Figure 2-4 After that, the wizard is ready to begin installation. Click Install to begin the installation.
- Page 11 Wireless N PCI Adapter RNX-N250PC2 User Manual Figure 2-5 Wait a while for the setup as shown in Figure 2-6. Figure 2-6 Note: For Windows XP, the Setup Wizard will notify you of how to proceed with the installation duringthese steps (shown in Figure 2-7).
- Page 12 Wireless N PCI Adapter RNX-N250PC2 User Manual Figure 2-7 In Windows 2000, the warning screen is shown below (Figure 2-8), and please select Yes to continue installation. Figure 2-8 After all the steps above, you will see the screen below, click Finish to complete the...
-
Page 13: Software Installation For Windows Vista
2.2.3 Software Installation for Windows Vista Insert the Resource CD into your CD-ROM drive, and open the folder named RNX-N250PC2. Double-click Setup.exe in the proper folder to start the installation, and the following screen for preparing setup will appear. Figure 2-10... - Page 14 Wireless N PCI Adapter RNX-N250PC2 User Manual Figure 2-11 After that, you should choose a Setup type. It is recommended that you select Install 2.4GHz Wireless Lite-N Client Utility and Driver. Select Install Driver Only to install driver only. Click Next to continue.
- Page 15 Wireless N PCI Adapter RNX-N250PC2 User Manual Figure 2-13 After that, the wizard is ready to begin installation. Click Install to begin the installation. Figure 2-14 The following page will display and please wait a moment.
- Page 16 Wireless N PCI Adapter RNX-N250PC2 User Manual Figure 2-15 Note: For Windows Vista, the Setup Wizard will notify you of how to proceed with the installation during these steps. Our drivers have been tested thoroughly, and are able to work with the operating system.
-
Page 17: Software Installation For Windows 7
2.2.4 Software Installation for Windows 7 Insert the Resource CD into your CD-ROM drive. To continue, find the CD/DVD drive where the installation CD was placed. Open RNX-N250PC2 folder, and double-click Setup.exe. Then the following screen for preparing setup will appear. - Page 18 Wireless N PCI Adapter RNX-N250PC2 User Manual Figure 2-19 Wait for while, the following screen for setup will appear Click Next to continue. Figure 2-20 After that, you should choose a Setup type. It is recommended that you select Install 2.4 GHz Wireless Lite-N Client Utility and Driver.
- Page 19 Wireless N PCI Adapter RNX-N250PC2 User Manual Figure 2-21 Click Change to change the destination location for the software, then click Next in the screen below. Figure 2-22 After that, the wizard is ready to begin installation. Click Install to begin the installation.
- Page 20 Wireless N PCI Adapter RNX-N250PC2 User Manual Figure 2-23 The following page will display and please wait a moment. Figure 2-24 Note: For Windows 7, the Setup Wizard will notify you about the Windows Security with the installation during these steps.
- Page 21 Wireless N PCI Adapter RNX-N250PC2 User Manual Figure 2-25 Click Finish to complete the installation. Figure 2-26...
-
Page 22: Chapter 3 Connect To A Wireless Network
Method One (To connect using Wireless N Client Utility): RNX-N250PC2 uses the 2.4GHz Wireless Lite-N Client Utility as the management software. The utility provides you an easy interface to connect to a network and to change any settings related to the wireless adapter. - Page 23 Wireless N PCI Adapter RNX-N250PC2 User Manual Figure 3-2 If word None appears behind the SSID, this means the network to be connected is not security-enabled and you can connect to the network without entering a key. To prevent outside intrusion and safeguard your network, it is strongly recommended to set a password to your router or access point.
- Page 24 Wireless N PCI Adapter RNX-N250PC2 User Manual Figure 3-4 You have now successfully connected to your network. Click Close to enjoy the Internet. Figure 3-5 To view more information about the network currently connected, click Status in the tools section and the page will display information such as the network type, link quality and wireless mode.
-
Page 25: To Connect Using Wps
Wireless N PCI Adapter RNX-N250PC2 User Manual 3.2 To connect using WPS WPS (Wi-Fi Protected Setup) function allows you to add a new wireless device to an existing network quickly. If the wireless router supports Wi-Fi Protected Setup (WPS) or QSS, you can establish a wireless connection between wireless card and router using either Push Button Configuration (PBC) method or PIN method. -
Page 26: Pin Method
Wireless N PCI Adapter RNX-N250PC2 User Manual Figure 3-9 3.2.2 PIN method There are two ways to configure the QSS by PIN method: Enter the PIN from your AP device. Enter a PIN into your AP device. Following are detailed configuration procedures of each way. - Page 27 Wireless N PCI Adapter RNX-N250PC2 User Manual Figure 3-11 When Figure 3-9 appears, you have successfully connected to the network. Enter a PIN into your AP device 3.2.2.2. This method is only available in Windows XP and Windows Vista. Open Wireless N Client Utility and click WPS tab. Select Enter the PIN of this device into my access point or wireless router.
-
Page 28: To Connect Using Windows Built-In Wireless Utility
Wireless N PCI Adapter RNX-N250PC2 User Manual Figure 3-13 When Connect successfully appears on the screen, the WPS configuration is complete. Or you can view the adapter’s utility page to see whether the connection has been successful as shown in Figure 3-15. - Page 29 Wireless N PCI Adapter RNX-N250PC2 User Manual Figure 3-16 If the network you would like to connect is security-enabled, enter the same security key or passphrase that is on your router. Or push the WPS button (other brands may call it QSS) on the router or access point (You will be prompted to push the button on the window if WPS/QSS function is supported as shown in the figure below).
-
Page 30: In Windows Vista
Wireless N PCI Adapter RNX-N250PC2 User Manual Figure 3-18 3.3.2 In Windows Vista Windows Vista users may use the built-in wireless utility. Follow the steps below. Open the wireless utility by right-clicking on the wireless computer icon in your system tray as shown in the figure below. - Page 31 Wireless N PCI Adapter RNX-N250PC2 User Manual Figure 3-20 If the network you would like to connect is security-enabled, enter the same security key or passphrase that is on your router. If the network to be connected is not secure, the connection will be built without entering a key.
-
Page 32: In Windows Xp
Wireless N PCI Adapter RNX-N250PC2 User Manual Figure 3-22 3.3.3 In Windows XP Windows XP users may use the built-in wireless utility. Follow the steps below. Right-click on the utility icon in your system tray (lower-right corner). Select Switch to Windows wireless configuration tool. - Page 33 Wireless N PCI Adapter RNX-N250PC2 User Manual Figure 3-24 Figure 3-25 Right-click on the wireless computer icon in your system tray (lower-right corner). Select View Available Wireless Networks. Figure 3-26 The utility will display any available wireless networks in your area. Click on a network...
- Page 34 Wireless N PCI Adapter RNX-N250PC2 User Manual Figure 3-27 If the network is security-enabled, you will be prompted to enter the key as shown below. If not, you will connect to the network directly without entering a key. Figure 3-28...
-
Page 35: Chapter 4 Configuration Using Wireless N Client Utility
Chapter 4 Configuration Using Wireless N Client Utility RNX-N250PC2 can be configured by 2.4GHz Wireless Lite-N Client Utility. This chapter describes how to configure your Adapter for wireless connectivity on your Wireless Local Area Network (WLAN) and use the data security encryption features. -
Page 36: Add A Profile
Wireless N PCI Adapter RNX-N250PC2 User Manual Figure 4-1 4.1.1 Add a profile To add a profile, click the Add button on the bottom of the screen. Then the configuration window will appear. Figure 4-2 The following items can be found on the screen. -
Page 37: Modify A Profile
Wireless N PCI Adapter RNX-N250PC2 User Manual stands for no security. It is recommended to enable WPA-PSK/WPA2-PSK on your wireless router or access point before configuring your wireless adapter. Encryption Type: From the drop-down menu, select the encryption type that is the same as on your router or access point. -
Page 38: Delete A Profile
Wireless N PCI Adapter RNX-N250PC2 User Manual 4.1.3 Delete a profile To delete an existing profile, highlight the profile name and click Remove on the bottom of the screen or press the Delete button on your keyboard. When the following figure appears, click OK to continue. -
Page 39: About
Wireless N PCI Adapter RNX-N250PC2 User Manual 4.3 About You will see the information about the Driver and Utility versions of the adapter in the About Screen. Right-click on the icon in your system tray and select About from the list. -
Page 40: Chapter 5 Ap Mode (Windows 7 Only)
Wireless N PCI Adapter RNX-N250PC2 User Manual Chapter 5 AP Mode (Windows 7 Only) In Soft AP mode, the adapter will work as an AP. This function is available only in Windows7. Suppose that only one computer in your house can access the Internet for various reasons like only one WLAN port is available on your wired broadband router, however, other wireless-capable devices also want to share the Internet. - Page 41 Wireless N PCI Adapter RNX-N250PC2 User Manual The Soft AP icon should then appear beside Advanced icon in the utility. Figure 5-3 SoftAP mode: Select to enable or disable the function. Internet Connecting Share (ICS): Specify a connection through which devices connected to your AP can access the Internet.
-
Page 42: Appendix A: Specifications
Wireless N PCI Adapter RNX-N250PC2 User Manual Appendix A: Specifications Normal Interface 32 bit PCI Interface Standards IEEE 802.11n, IEEE 802.11g, IEEE 802.11b Operating System Windows XP, Windows Vista, Windows 7 Throughput 300Mbps (Maximal) 11b: 1/2/5.5/11Mbps Radio Data Rate 11g: 6/9/12/18/24/36/48/54Mbps... -
Page 43: Appendix B: Glossary
Wireless N PCI Adapter RNX-N250PC2 User Manual Appendix B: Glossary 802.11b - The 802.11b standard specifies a wireless product networking at 11 Mbps using direct-sequence spread-spectrum (DSSS) technology and operating in the unlicensed radio spectrum at 2.4GHz, and WEP encryption for security. 802.11b networks are also referred to as Wi-Fi networks. - Page 44 Wireless N PCI Adapter RNX-N250PC2 User Manual typically the configuration parameter for a wireless PC card. It corresponds to the ESSID in the wireless Access Point and to the wireless network name. See also Wireless Network Name and ESSID. WEP - (Wired Equivalent Privacy) - A data privacy mechanism based on a 64-bit or 128-bit or 152-bit shared key algorithm, as described in the IEEE 802.11 standard.
-
Page 45: Appendix C: Faq
Wireless N PCI Adapter RNX-N250PC2 User Manual Appendix C: FAQ This chapter provides solutions to problems that may occur during the installation and operation of the Wireless Adapter. Read the descriptions below to solve your problems. I cannot communicate with the other computers linked via Ethernet in the Infrastructure configuration. - Page 46 1. Move closer to the place where access point is located. 2. There could be too much people using the same radio channel. Ask the owner of the access point to change the channel number. Thank you for purchasing a quality Rosewill Product. Please register your product at: www.rosewill.com for complete warranty information and future support for your product.
Need help?
Do you have a question about the RNX-N250PC2 and is the answer not in the manual?
Questions and answers