Rose electronics QuadraVista Installation And Operation Manual
Video kvm switch
Hide thumbs
Also See for QuadraVista:
- Installation and operation manual (60 pages) ,
- Quick installation manual (4 pages)

Related Manuals for Rose electronics QuadraVista


Summary of Contents for Rose electronics QuadraVista
- Page 1 QuadraVista™ VIDEO KVM SWITCH INSTALLATION AND OPERATIONS 10707 Stancliff Road Houston, Texas 77099 MANUAL QUAD Phone (281) 933-7673 www.rose.com...
- Page 2 ® Rose Electronics warrants the QuadraVista™ to be in good working order for one year from the date of purchase from Rose Electronics or an authorized dealer. Should this product fail to be in good working order at any time during this one-year warranty period, Rose Electronics will, at its option, repair or replace the Unit as set forth below.
-
Page 3: D Eclaration Of C Onformity
EN 61000-4-4: 1995 + A1:2001 + A2:2001 EN 61000-4-5: 1995 + A1:2001 DIN EN 61000-4-6: 1996 + A1:2001 DIN EN 61000-4-11: 1994 + A1:2001 of C eclaration onformity Declaration of Conformity This declaration is valid for the following product: Type: QuadraVista... -
Page 4: Table Of Contents
Contents System Introduction ...1 Features...2 Compatibility ...3 Product Registration ...3 Package contents ...3 Rose Electronics web site...3 About this manual ...3 Installation...5 Installing the KVM station ...5 Installing the Computers ...6 Front Panel LEDs / Push-Button Commands ...7 Keyboard Commands ...9 On Screen Menu System...10 Main Menu ...11 System menu...11... - Page 5 Figures Page Figure 1. Front View ...4 Figure 2. Rear View ...4 Figure 3. KVM Installation...5 Figure 4. CPU Connect...6 Figure 5. Channel select window...8 Figure 6. HotKey menu...12 Figure 7. System HotMouse ...13 Figure 8. System Quad Mode...16 Figure 9. System / OSD Position ...16 Figure 10.
-
Page 6: System Introduction
The QuadraVista, Quad Video KVM Switch represents the latest in KVM switching technology. A user can connect to, display, and control four computers from a single KVM station. To add additional computers to the system, the QuadraVista can easily connect to additional QuadraVista’s or interface to a KVM switch and connect to 1,000’s of computers. -
Page 7: Features
Connect to KVM switches to view and control 1,000’s of computers, routers, Ethernet switches or other serial devices Using an XLM-based DCP (Device Control Protocol), the QuadraVista can be controlled remotely using a serial cable Quick and simple to install... -
Page 8: Compatibility
Visit out web site at www.rose.com for additional information on other products that are designed for data center applications, classroom environments and other applications. About this manual This manual covers the installation and operation of QuadraVista. Disclaimer While every precaution has been taken in the preparation of this manual, the manufacturer assumes no responsibility for errors or omissions. -
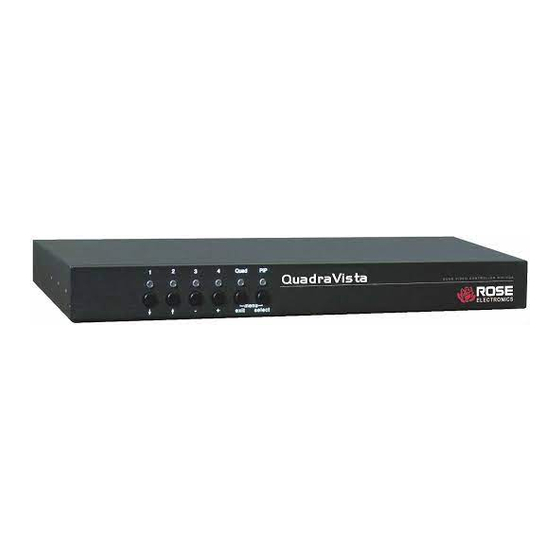
Page 9: Figure 1. Front View
Resets unit to factory defaults (video, keyboard, and mouse) RS232 RJ45 (Flash upgrade port or external device control) User Station (1) DVI, (2) USB-A Computers (4) DVI, PS/2 or USB-B (“Y” adapter required for PS/2 computer connection) QUADRAVISTA INSTALLATION AND OPERATIONS MANUAL... -
Page 10: Installation
Installing the KVM station Connect your KVM user station to the QuadraVista as shown in Figure 3. Connect a USB mouse and USB keyboard to the corresponding USB ports on QuadraVista. If a PS/2 keyboard and mouse are used, a PS/2 to USB converter must be used. -
Page 11: Installing The Computers
DVD player, or other compatible video sources and display it on your KVM monitor. When all cable connections have been made, turn the power on to the QuadraVista and the computers. All six front panel LEDs will flash momentarily, then the green QUAD led will light indicating that the unit is ready for operation and the user monitor will display in the Quad mode, showing all four computers video. -
Page 12: Front Panel Leds / Push-Button Commands
The front panel consists of 6 push buttons and 6 corresponding LEDs. The LEDs provide a visual representation of what mode the QuadraVista is in, what computer channel is selected, and what channels are receiving a video signal. The push buttons select a channel, select the quad or pip mode, and invoke the on-screen-menu system. -
Page 13: Figure 5. Channel Select Window
For each of the push-button features, there is a corresponding keyboard command that will perform the same feature. Following are the keyboard commands and their features. QUADRAVISTA INSTALLATION AND OPERATIONS MANUAL In the Quad mode, the channel selector window will switch active channels each time the PiP button is pressed. -
Page 14: Keyboard Commands
Keyboard Commands The QuadraVista uses a “HOTKEY” to accept and process a keyboard command. When the “HOTKEY” command is recognized by QuadraVista, the keyboard commands immediately following instruct QuadraVista to perform a function, not the connected computer. The default “HOTKEY” command is left CTRL + Alt keys pressed simultaneously followed by the command. -
Page 15: On Screen Menu System
ON SCREEN DISPLAY On Screen Menu System The QuadraVista has an easy to use menu system that enables you to customize the “System”, “Mode”, “Configuration”, “Console”, “Video”, and “Computers”. Each section is described in detail on the following pages. The On screen Menu System structure is shown below. -
Page 16: Main Menu
Main Menu System menu QUADRAVISTA INSTALLATION AND OPERATIONS MANUAL The Main Menu is called up by pressing the assigned HotKey + O (not zero) key. You can also simultaneously press the Quad and PiP front panel buttons. This is the starting point for the OSD menus. -
Page 17: System / Hotkey
Alt + O key). From the Main menu, highlight “SYSTEM” and press enter. Highlight “HOTKEY” and press enter. The SYSTEM / HOTKEY window shown in Figure 6 will display. Figure 6. HotKey menu QUADRAVISTA INSTALLATION AND OPERATIONS MANUAL From this menu you can modify which multiple keys and Double Click key defines the HOTKEY. -
Page 18: System / Hotmouse
The Hotmouse cursor will change depending on the view mode. Activating the Hotmouse in the Full screen mode will temporarily display the PiP images of the non-selected channels (see below). Moving the cursor to a PiP image and clicking on the left mouse button will switch, full screen, to that channel. - Page 19 Activating the Hotmouse in the Quad screen mode will display a box cursor with the active channel number in the box (see below). Moving the cursor to any quadrant and clicking on the left mouse button will switch control (keyboard / mouse) to that channel. Activating the Hotmouse in the PiP mode has three features;...
-
Page 20: Hotmouse Menu
Hotmouse by moving the cursor rapidly to the left and right 4 times. When the Hotmouse cursor appears, click the right mouse button and depending on the screen mode, the Hotmouse menu will display. QUADRAVISTA INSTALLATION AND OPERATIONS MANUAL Press and hold the left mouse button and drag the PiP window to the left or right to increase or decrease the PiP size. -
Page 21: System Quad Mode
System Quad Mode Figure 8. System Quad Mode System OSD Position Figure 9. System / OSD Position QUADRAVISTA INSTALLATION AND OPERATIONS MANUAL From the system / quad mode menu you can set the timeout of the quad selection window. Selecting OSD position allows you to set the screen position of the OSD menus. -
Page 22: System / Osd Language
Following lists the security level and functions each level can access. Level 1 security can perform all functions. Level 0 is the factory security setting which enables all functions. QUADRAVISTA INSTALLATION AND OPERATIONS MANUAL Selecting OSD Language from the System menu allows you to change the language from English, Deutsch, or Spanish. - Page 23 Computer Keyboard Mouse Reset PS/2 Help Command About Contact = Authorization to this OSD function is permitted Security level 0 is the factory default setting. All settings are allowed and all functions enabled QUADRAVISTA INSTALLATION AND OPERATIONS MANUAL Security Level...
- Page 24 - Set video output to VGA using keyboard command (Hotkey V) or front panel buttons 1+2 System – Disable channel Console – Multi-Monitor / Video output Computer – Mouse / Reset PS/2 Video – Video input QUADRAVISTA INSTALLATION AND OPERATIONS MANUAL...
-
Page 25: System / Test Pattern
System / Test Pattern Figure 12. System / Test Pattern There are nine test patterns to assist in adjusting the colors and skew. QUADRAVISTA INSTALLATION AND OPERATIONS MANUAL Use the Test Pattern to check the function of internal video circuits or to check the quality of the connected console monitor. -
Page 26: System / Disable Channel
The DCP (Device Control Protocol) offers three modes, off, control and synchronize. Set the DCP mode to “Control” if a single QuadraVista will be controlled from an external computer. Set the mode to “Synchronize” if you system features several linked QuadraVista’s. When in this mode the QuadraVista status is transmitted to the external computer. -
Page 27: Mode
Selecting “MODE” and pressing enter displays the mode screen. Two mode selections are available, PiP and Start. The PiP features and configuration can be set-up, and the channel and mode setting on start-up. QUADRAVISTA INSTALLATION AND OPERATIONS MANUAL The PiP menu allows you to change from triple to single PiP. Triple display shows the three non-active windows on the right of the screen. -
Page 28: Configure
Configure / Backup, Recall, Factory Reset The backup command saves the current device settings. Figure 16. Backup QUADRAVISTA INSTALLATION AND OPERATIONS MANUAL Selecting Start from the MODE menu defines which channel is active, the display mode, and the PiP settings... -
Page 29: Figure 17. Recall
The recall command replaces the current settings with the latest backup. Figure 17. Recall The Factory Reset command resets the unit to the original factory settings See Appendix C. for factory reset values. Figure 18. Reset QUADRAVISTA INSTALLATION AND OPERATIONS MANUAL... -
Page 30: Console
The new setting will display for 10 seconds. Within this time, press Enter / select to accept the new video output setting. No change is executed if enter is not pressed within the 10 second period. QUADRAVISTA INSTALLATION AND OPERATIONS MANUAL... -
Page 31: Console / Keyboard
Figure 19. Console, Video output Console / Keyboard Figure 20. Keyboard layout QUADRAVISTA INSTALLATION AND OPERATIONS MANUAL Changing the video resolution will display the notification window shown to the right. Press Enter to accept the new setting or any other key for no change. -
Page 32: Console / Multi-Monitor
Console / Multi-Monitor The QuadraVista can be set-up to connect to computers with multiple video outputs. Selecting Multi monitor opens the Multi monitor window. If your computer uses a graphic card with two video outputs, assign the computers keyboard and mouse for Monitor 1 and 2 to channel 1. -
Page 33: Console / Edid
Selecting Video Input will display the video information QuadraVista has automatically detected from the four video inputs (Plug & Play). Video / Video Input In the lower part of the Video Input window you define which video input is selected for display. -
Page 34: Video / Brightness / Contrast
Using he arrow keys, select the computer to adjust and increase or decrease the brightness or contrast. This setting is used to adjust brightness or contrast of the analog input signal for the desired computer. Figure 24. Video Brightness / Contrast QUADRAVISTA INSTALLATION AND OPERATIONS MANUAL... -
Page 35: Video / Horizontal And Vertical Position
Select "man" and adjust the position using the + and – keys. It is recommended that the Auto setting be used for all computers. Figure 25, Horizontal Position QUADRAVISTA INSTALLATION AND OPERATIONS MANUAL... -
Page 36: Video / Screen Width
Video / Screen width Figure 26. Screen width Video / Phase Figure 27. Clock phase QUADRAVISTA INSTALLATION AND OPERATIONS MANUAL The width of the screen can be adjusted to improve screen quality by selecting the screen width menu, the computer to... -
Page 37: Video / Format
Selecting Computer from the main menu will display the features that can be displayed or modified for each computer connection. Figure 29. Computer QUADRAVISTA INSTALLATION AND OPERATIONS MANUAL Wide screen monitors (aspect ratio 16:10) normally display black borders on the left and right side of the display. -
Page 38: Computer / Keyboard
Computer / Keyboard Figure 30. Computer / Keyboard Computer / Mouse Figure 31. Computer / Mouse QUADRAVISTA INSTALLATION AND OPERATIONS MANUAL Selecting keyboard and pressing enter will display the type of keyboard the system has detected for each connected computer (USB, PC1, PC2, or PC3). -
Page 39: Computer / Reset Ps/2
Computer / Reset PS/2 Figure 32. Computer / Reset PS/2 Computer / Change EDID/DDC Figure 33. Computer / Change EDID/DDC QUADRAVISTA INSTALLATION AND OPERATIONS MANUAL Select Reset PS/2 when the keyboard or mouse have been disconnected or get out of sync. -
Page 40: Figure 34. Edid Programming
/ SELECT twice to program the additional video modes. Reconnect the console monitor and computer monitor cable and the display to the right will display. Repeat this procedure for the other three video input ports if necessary. Figure 34. EDID Programming QUADRAVISTA INSTALLATION AND OPERATIONS MANUAL... -
Page 41: Help
Help Selecting the help section will display the keyboard command list, about, and contact information. The Command List option will display the keyboard commands recognized by QuadraVista. Figure 35. Help / Command The About section informs you of information pertaining to the QuadraVista. -
Page 42: Figure 37. Help / Contact
The Contact section provides you with information on who to contact for technical assistance and other information. Figure 37. Help / Contact QUADRAVISTA INSTALLATION AND OPERATIONS MANUAL... -
Page 43: Serial Features
SERIAL OPERATION Serial Features QuadraVista can be configured or controlled from a remote computer by connecting a serial cable from the computer’s COM port to the QuadraVista’s serial input port. To remotely configure the QuadraVista (Display / execute the OSD features only), download the communication software from our web site at /www.rose.com/htm/download.htm in the tech... - Page 44 Enter / Select key. DCP Synchronizing Multiple Units In systems that use multiple QuadraVista’s, the display mode can be synchronized so all units are the same display mode. To accomplish this, first display the OSD and navigate to the “Control”...
- Page 45 When the device has completed its startup phase and sent its DCP messages, switch on the next device in the chain. Finally, switch on the first device in the chain, which synchronizes the settings of all other devices in the chain with its own settings as it starts up. The synchronized chain can have any length.
- Page 46 DCP/XML Feature The QuadraVista can be controlled remotely from a PC or laptop connected to the RS232 port (serial) using the DCP/XML feature. This feature is different from the OSD serial features. The serial feature allows only the OSD functions to be performed. The DCP/XML feature sends a DCP/XML message containing the defined elements like switching to a given port, changing the display mode, defining the PiP features, and other items.
- Page 47 An example of a DCP/XML message containing all defined elements is shown below: <dcp-xml> <device> <type>VSQ</type> <version> <dcp-protocol>1.0</dcp-protocol> <hardware>32</hardware> <software>1.30</software> </version> <mode> <console> <channel>0</channel> </console> <video> <channel>0</cjannel> <layout>full</layout> <pip> <layout>triple-gap</layout> <size>15</size> <offset>5</offset> <direct> </direct> <fixed> </fixed> <scan-time>1</scan-time> </pip> </video> </mode> </decide> </dcp-xml> QUADRAVISTA INSTALLATION AND OPERATIONS MANUAL <channel>0</channel> <channel>0</channel>...
- Page 48 DCP/XML System Querying Using the DCP/XML feature, the QuadraVista can be queried to request setting information. Queries are only replied to in the DCP control mode. Sending the below text script to QuadraVista using Hyper Terminal, queries for the entire device status: <dcp-xml/>...
- Page 49 When sending a DCP message, the following constraints apply: Linefeed: LF Linefeed (0x0A) is used as terminating character of each line. QUADRAVISTA INSTALLATION AND OPERATIONS MANUAL Malformed XML. Opening and closing tags do not match. Opening tag without matching closing tag. Only occurs with Simple Elements.
- Page 50 Messages containing unknown elements must still be syntactically correct. Unknown tags may not be nested deeper than 5 levels. Empty elements An empty element is an opening tag immediately followed by a closing tag. ((tag)) may be abbreviated as ((tag)) QUADRAVISTA INSTALLATION AND OPERATIONS MANUAL...
-
Page 51: Service Information
If you are experiencing problems, or need assistance in setting up, configuring or operating your QuadraVista, consult the appropriate sections of this manual. If, however, you require additional information or assistance, please contact the Rose Electronics Technical Support Department at: Phone: (281) 933-7673 E-Mail: TechSupport@rose.com... -
Page 52: Safety
The QuadraVista has been tested for conformance to safety regulations and requirements, and has been certified for international use. Like all electronic equipment, the QuadraVista should be used with care. To protect yourself from possible injury and to minimize the risk of damage to the Unit, read and follow these safety instructions. -
Page 53: Safety And Emc Regulatory Statements
Servicing There are no user-serviceable parts inside these products. Only service-trained personnel must perform any servicing, maintenance, or repair. The user may adjust only items mentioned in this manual. QUADRAVISTA INSTALLATION AND OPERATIONS MANUAL... -
Page 54: Appendix A. Specifications
DB25 to VGA/USB CAB-CXV66MMnnn VGA/PS2 to VGA/PS2 (male/male) CAB-C1VS0600Cnnn DB25 to VGA-PS/2 CAB-MD6MMnnn PS/2 to PS/2 (male/male) CAB-MD6M2MD6M PS/2 “Y” cable CAB-QVRJ006 Serial DB9 to RJ45 cable ACC-DVIMVF DVI-I to VGA adapter RM-QV19 Rack Mount kit QUADRAVISTA INSTALLATION AND OPERATIONS MANUAL APPENDICES... -
Page 55: Appendix C. Factory Defaults
Format COMPUTER Keyboard Mouse Reset PS/2 Change EDID / DDC HELP Command About Contact QUADRAVISTA INSTALLATION AND OPERATIONS MANUAL Default Setting Ctrl + Alt On / 5 Sec. Timeout = 5 Sec. Centered English None (Level 0) None None Size = 15%; Zoom = 1; Mode = triple; gap,... -
Page 56: Appendix D. Supported Video-In Formats
1024 x 768 1024 x 768 WXGA 1152 x 864 1152 x 900 HDTVp 1280 x 720 HDTVp 1280 x 720 HDTVp 1280 x 720 QUADRAVISTA INSTALLATION AND OPERATIONS MANUAL Rate Mode Digital HDTVp WXGA WXGAp UWXGA 22-60 UWXGA SXGA... - Page 57 〒108-0075 東京都中央区日本橋蛎殻町1−16−11 TEL:03-3668-8089 FAX:03-3668-9872...
- Page 58 QuadraVista™ INSTALLATION AND OPERATIONS MANUAL SUPPLEMENT 10707 Stancliff Road Houston, Texas 77099 QUAD VIDEO KVM SWITCH Phone (281) 933-7673 www.rose.com...
- Page 59 VIDEO->INPUT MODE Manual Settings for Video Input Mode While input mode detection is automatic, in some cases it may be impossible for the QuadraVista to correctly determine the input video mode. In the case an input mode is recognized incorrectly, use the VIDEO INPUT menu to manually override the automatic mode detection.
- Page 60 If you connect a different video source, or change the video mode from the PC, you may need to change this setting again to get correct results. New Video Modes The QuadraVista supports four new video modes listed below: Mode Resolution...
- Page 61 Touchscreen: Optional Right Click Emulation This new setting in the CONSOLE->TOUCHSCREEN menu allows you to choose whether the QuadraVista will emulate the right mouse button. If set to Yes, touching the screen for 5 seconds will perform a right mouse click.
- Page 62 〒103-0014 東京都中央区日本橋蛎殻町 1-16-11 TEL:03-3668-8089 FAX:03-3668-9872 URL:http://www.cybernetech.co.jp...
Need help?
Do you have a question about the QuadraVista and is the answer not in the manual?
Questions and answers