Table of Contents
Advertisement
Quick Links
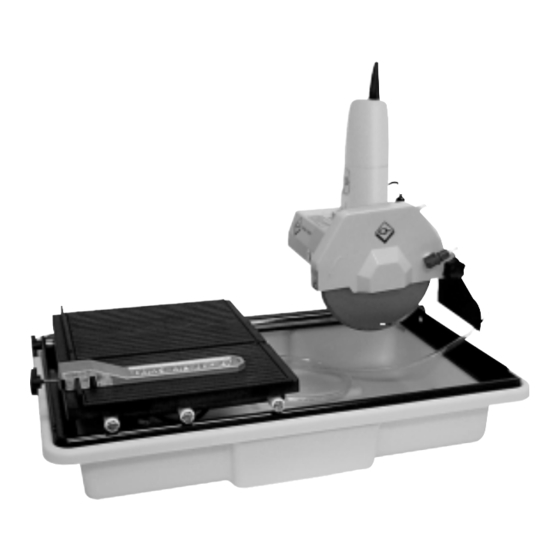
7" WET SAW
7" WET SAW
O W N E R ' S
SCIE à EAU de 7 pouces
SCIE à EAU de 7 pouces
M A N U E L
D ' U T I L I S A T I O N
SIERRA PARA AGUA de 7"
SIERRA PARA AGUA de 7"
M A N U A L
Model 60007
Modèle 60007
Articulo 60007
CAUTION!
Read and follow all safety and
operating instructions before
using this saw.
PRÉCAUTION!
Lire
et
suivre
toutes
directives
de
sécurité
d'opération avant d'utiliser
cette scie.
¡ AVISO!
Lea y siga todas las instrucciones
de funcionamiento y seguridad
antes de usar esta sierra.
Q EP CO., INC.
1081 Holland Drive
Boca Raton, FL USA 33487
561-994-5550 • Fax: 561-241-2830
www.qep.com
M A N U A L
D E
O P E R A C I Ó N
les
et
ROBERTS CONSOLIDATED INDUSTRIES, INC.
600 N. Baldwin Park Blvd.
City of Industry, CA USA 91749
626-369-7311 • Fax: 626-369-6191
A N D
P A R T S
E T
L I S T E
Y
L I S T A
L I S T
D E
P I È C E S
D E
P A R T E S
ROBERTS CO. CANADA LTD.
2070 Steeles Ave.
Bramalea, ON CANADA L6T-1A7
905-791-4444 • Fax: 905-791-1998
Advertisement
Table of Contents

Summary of Contents for QEP 60007
- Page 1 D ’ U T I L I S A T I O N SIERRA PARA AGUA de 7" SIERRA PARA AGUA de 7" M A N U A L Model 60007 Modèle 60007 Articulo 60007 CAUTION! Read and follow all safety and operating instructions before using this saw.
-
Page 2: Table Of Contents
ENGLISH TABLE OF CONTENTS Safety Instructions for Wet Saw ...3 Safety Guidelines...3 Electrical Requirements ...4 Warning ...5 State-of-the-Art Features ...5 Electrical / Motor Specifications ...5 Unpacking, Assembly & Set-Up ...5 Cutting Head Assembly Installation5 Blade & Blade Guard Installation...6 Water Pump Installation ...6 Water Pump Safety Guidelines ...6... -
Page 3: Safety Instructions For Wet Saw
4. Always wear safety goggles, dust mask and ear protection when operating the saw (to comply with ANSI-Z87.1). 5. Always remain alert when the saw is in use. Inattention on the part of the operator may lead to serious injury. -
Page 4: Electrical Requirements
The user should arrange a “drip loop” in the cord connecting the saw to a receptacle. The “drip loop” is that part of the cord below the level of the receptacle, or the connector if an extension cord is used, to prevent water from traveling along the cord and coming in contact with the receptacle. -
Page 5: Warning
SAW TO A POWER SOURCE OR TURNING THE MOTOR ON. Carefully open the container and remove all saw components and packing materials. Ensure that you have checked each item with the exploded view on Page ?? before discarding the container or packing materials. The contents of the container are as follows: •... -
Page 6: Blade & Blade Guard Installation
ENGLISH BLADE & BLADE GUARD INSTALLATION 1. Remove the blade guard and set it aside in the cutting head. 2. Raise the blade guard to the highest level and tighten the blade guard wing screw. Then, remove the blade shaft nut and outer flange. 3. -
Page 7: Saw Operation
5. Ensure the blade is mounted with the rotation arrow in the proper direction and is securely tightened with the wrench. 6. Always wear the proper safety equipment at all times when operating the saw. Wear goggles and dust mask at all times when operating saw. -
Page 8: Diagram Of Wet Saw
DIAGRAM OF WET SAW # 60007 DESCRIPTION Water Tray Assembly 7" WET SAW Frame Assembly Roller Guide Bar PARTS LIST Cutting Table 45°, 90° Rip Guide 45°, 90° Rip Guide Adjustment Knob L-Shaped Plate Angle Bar Rollers Set Metal Bushing (Set of 12...


Need help?
Do you have a question about the 60007 and is the answer not in the manual?
Questions and answers