Table of Contents
Advertisement
Quick Links
Advertisement
Table of Contents

Related Manuals for Bpt THANGRAM


Summary of Contents for Bpt THANGRAM
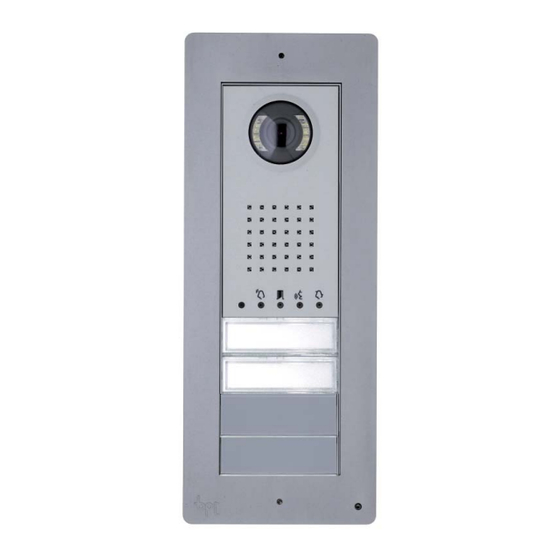
- Page 1 THANGRAM Programming Manual...
- Page 2 CONNECTION DIAGRAM WITHOUT SYSTEM CONTROLLER (VAS/100) THIS SYSTEM IS LIMITED TO ONE ENTRY PANEL...
- Page 3 CONNECTION DIAGRAM USING SYSTEM CONTROLLER (VA/01) THIS SYSTEM SUPPORTS MULTIPLE ENTRY PANELS & ACCESS CONTROL...
-
Page 4: Manual Programming
MANUAL PROGRAMMING ONLY 5 STEPS TO MAKE IT WORK To program a system without a VA01 Power Supply and System Controller, Press the PROG key on the Entry Panel for more than 3 seconds and release within 6 seconds until the PROG LED turns on. With a VA01 System Controller present, Press and hold the PROG key for more than 3 seconds until the Yellow PROG LED turns on. - Page 5 MANUAL PROGRAMMING ONLY 5 STEPS TO MAKE IT WORK ATTENTION To program the system with more than one entry panel repeat step 2 for each external panel Press the fi rst key on each entry panel until the LED stops fl ashing as do the backlighting LEDs. Repeat the above operation on all entry panels to be programmed at the end, the LED signals will assume dif-...
- Page 6 MANUAL PROGRAMMING ONLY 5 STEPS TO MAKE IT WORK To link the Receiver with the CALL button (for systems with handsets please lift the handset) SIMULTANEOUSLY PRESS both the Door LOCK button ( and the AUX2 button ( Both the Video and Audio Channels will now be on.
- Page 7 MANUAL PROGRAMMING INTERCOMUNICATION FUNCTION CALLS The feature is available using the VA01 only Press and hold the button on the VA08 Sys- tem Controller for 25 seconds Place the RFID PROG jumper in position “+” Now press and hold the button you want to associ- ate with the other receivers, a confi...
- Page 8 MANUAL PROGRAMMING INTERCOMUNICATION FUNCTION CALLS ATTENTION : To program the YVCL301 monitor or the PEC handsfree Audio only receivers you will need to set the jumper as per the following diagrams: Using YVCL301 or PEC the max performance is 2 groups of 2 receivers calling each other with unique code...
- Page 9 ADJUSTING THE VIEWING ANGLE OF THE ENTRY PANEL While still in “CALL BUTTON PROGRAMMING MODE” (steps 1 to 5) the Entry Panel’s camera fi eld of view can be adjusted. Any extension in “Standby” may be used to adjust the viewing settings. Press the “Self Confi...
-
Page 10: Access Control
ACCESS CONTROL ADDING TAG/CARD Place the RFID PROG jumper in the ‘+’ position The Entry panel confi guration LEDS will fl ash Present a confi gured credential to the Entry Panel Reader. A tone will sound. Press the CALL button to be associated with the cre- dential (a maximum of 5 credentials per call button) To exit programming mode return the RFID PROG jumper to the standby position. - Page 11 ACCESS CONTROL REMOVING TAG/CARD Place the RFID PROG jumper in the ‘-’ position The Entry panel confi guration LEDS will fl ash Present a confi gured credential to the Entry Panel Reader. A tone will sound. Present the credential a second time to erase all stored credentials.
- Page 12 ACCESS CONTROL ADDING CODE/PIN Place the RFID PROG jumper in the ‘+’ position The Entry panel confi guration LEDS will fl ash button and enter a access code (4 – 8 Press the digits) then press the button again, a confirmation tone will sound.
- Page 13 ACCESS CONTROL REMOVING CODE/PIN Place the RFID PROG jumper in the ‘-’ position The Entry panel confi guration LEDS will fl ash Press the button and enter the access code (4 – 8 digits) then press the button again, a confi rmation tone will sound.
-
Page 14: Receiver Settings
LYNEA RECEIVER SETTINGS Connection Terminals DOOR BELL BUS LINE INPUT Power supply local From 12÷16 V AC or 14÷18 V DC SELECTIONS - Video end of line termination The SW3 jumper on the last receiver in a daisy chain connection (max 5 receivers) must be in the closed setting (default). -
Page 15: Connection Terminals
PERLA RECEIVER SETTINGS CONNECTION TERMINALS ALARM INPUT DOOR BELL BUS LINE INPUT SELECTIONS - Video end of line termination The SW3 jumper on the last receiver in a daisy chain connection (max 5 receivers) must be in the closed setting (default). - Master &... -
Page 16: Receiver Setting
OPALE (W) RECEIVER SETTING TERMINAL BOARDS Power supply local 16-18 VDC BUS LINE INPUT DOOR BELL ALARM INPUT SELECTIONS - Video end of line termination The SW3 jumper on the last receiver in a daisy chain connection (max 5 receivers) must be in the closed setting (default). - Page 17 THANGRAM ENTRY PANEL SETTINGS loudspeaker volume microphone sensitivity latch output time (12Vdc) for 1-10s...
- Page 18 BPT SpA single member share company Via Cornia, 1/b BPT Asia Pacifi c Pty Ltd 33079 Sesto al Reghena (PN) - Italy Unit 55 / 11-21 Underwood Rd. Tel. +39 0434.698111 Fax +39 0434.698434 Homebush NSW 2140 info@bpt.it - www.BPT.it...
Need help?
Do you have a question about the THANGRAM and is the answer not in the manual?
Questions and answers