Table of Contents
Advertisement
Quick Links
Advertisement
Table of Contents

Summary of Contents for ZOJE AM-5770A-410
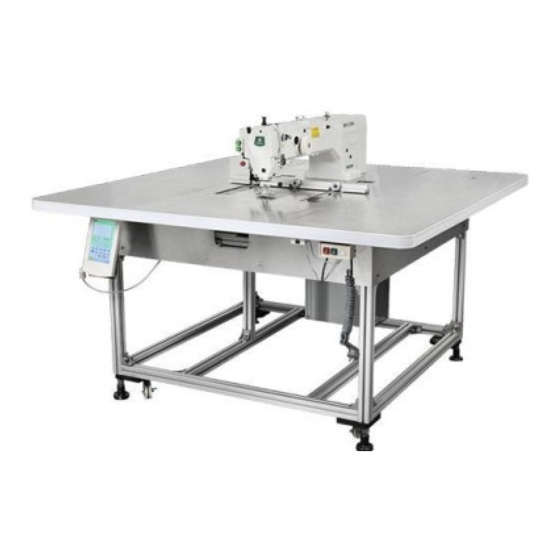
- Page 1 ZJ-AM-5770A(H)-410 AUTOMATIC MOLD SEWING MACHINE OPERATION MANUAL...
-
Page 2: Table Of Contents
目录 Contents I、 规格........................1 Specifications......................1 II、 各部的名称......................3 Names of parts.......................3 III、拆箱........................4 Unpacking......................4 安装........................5 IV、 Installation......................5 V、 模板的制作......................6 Making of Template....................6 VI、缝纫准备........................8 Sewing Preparation....................8 1、 机针的安装方法....................8 Attaching the needlel..................8 2、 上线的穿线方法....................8 Threading the machine head................8 3、... -
Page 3: I、 规格
I、 规格 规格 AM-5770A-410 AM-5770AH-410 AM-5770A-750 AM-5770AH-750 缝制范围 X 向无限,Y 向 410mm X 向无限,Y 向 750mm 最高缝纫速度 2200rpm(间距在 3.5mm 以内) 缝迹长度 0.1~12.7mm 压脚模板送布 间断送布(脉冲马达双轴驱动方式) 针杆行程 38mm 40mm 38mm 40mm 旋梭 1 倍旋梭 2 倍旋梭 1 倍旋梭 2 倍旋梭 机针 DP×5 7#~10# 压框高度... -
Page 4: Specifications
Specifications Specifications AM-5770A-410 AM-5770AH-410 AM-5770A-750 AM-5770AH-750 Sewing range X direction unlimited Y direction410mm X direction unlimited Y direction750mm Max. sewing speed 2200rpm(spacing within 3.5mm) Stitching length 0.1~12.7mm Presser-foot template Intermittent cloth feeding (double-shaft drive mode by pulse motor) cloth feeding... -
Page 5: 各部的名称
各部的名称 II、 Names of parts 图 1 Figure 1 1、辅助压脚 Auxiliary presser foot 2、急停开关 Emergency stop switch 3、启动按钮 Start button 4、压框按钮 Pressure frame button 5、操作屏 Operation panel 6、缝纫机机头 Sewing machine head 7、二线架及辅助线架 Two-thread stand and auxiliary thread stand 8、压框 Pressure frame 9、记号笔... -
Page 6: Unpacking
III、 拆箱 Unpacking ① ② 步骤 1、撬开板扣①,卸下 4 块围板②; Step 1: pry open board buckle ①, and remove 4 lateral plates ②; 齿轮箱油量加油口 Oil filling port of gear case oil ③ ④ ⑤ ⑥... -
Page 7: Installation
步骤 2、松开固定板③,敲出支撑条④; Step 2: Unclamp retaining plate ③, and knock out support rod ④; 步骤 3、将脚座⑥拧离托盘⑤,然后将机器推下托盘; Step 3: Screw off foot stand ⑥ on pallet ⑤, and move the machine out of the pallet; IV、 安装 Installation 1. 线架装置的安装方法/Installing the thread stand 组装线架装置,将它安装在台板的右上方的孔内。... -
Page 8: 模板的制作
V、 模板的制作 Making of Template 模板识别块的制作尺寸/The making size of template identification 1、 2、 模板的制作尺寸/Template making size... - Page 9 装配模板导轨后的尺寸/The size of assembled template guide rail 注意:装配后请勿小于此尺寸,否则会造成模板的损坏。 Note:Not allowed smaller size after assembled,...
-
Page 10: Vi、 缝纫准备
VI、 缝纫准备 Sewing Preparation 1、 机针的安装方法/ Attaching the needle 注意:为了防止缝纫机的意外启动,请关掉电源之后再进行操作。 Warning: Turn OFF the power before starting the work so as to prevent accidents caused by abrupt start of the sewing machine. 松开螺钉 1,把机针 2 的长沟朝向面前,放进针杆的深处,然后拧紧固定螺钉 1。 Loosen setscrew 1 and hold needle 2 with the long groove facing toward you. Then fully insert it into the hole in the needle bar, and tighten setscrew 1. -
Page 11: 3、 梭芯的安装方式
*注意:为了防止机器突然启动造成人身事故,请一定关掉电源后进行操作。 *WARNING: Turn OFF the power before starting the work so as to prevent accidents caused by abrupt start of the sewing machine. 3、 梭芯的安装方式/ Installing the bobbin 注意:为了防止缝纫机的意外启动,请关掉电源之后再进行操作。 Warning: Turn OFF the power before starting the work so as to prevent accidents caused by abrupt start of the sewing machine. -
Page 12: 4、 线张力的调整方法
*注意:若梭心装入的方向相反,缝制过程中底线会不稳定。 *Caution: If the bobbin is installed in the bobbin case orienting the reverse direction, the bobbin thread pulling out will result in and inconsistent state. 4、 线张力的调整方法/ Adjusting the thread tension 用 1 调节面线张力,用 2 调节底线张力。 Adjust needle thread tension with 1 and bobbin thread tension with 2. -
Page 13: 5、 挑线弹簧的调节
5、 挑线弹簧的调节/Adjusting the thread take-up spring 1) 移动量的调节松开螺钉 1,转动夹线器向右转动,动作量变大,拉线量变多。 Adjusting the stroke loosen setscrew1,and turn thread tension asm. 2. Turning it clockwise will increase the moving amount and the thread drawing amount will increase. 2) 强度的调节改变挑线弹簧 3 的强度时,请在螺钉 1 在锁紧的状态下,用螺丝刀调节线张力杆 4, 向右转动,挑线簧强度变强,向左转动之后,强度变弱。... -
Page 14: 7、 压脚压力的调节
7、 压脚压力的调节/Presser foot pressure 注意:为了防止缝纫机的意外启动,请关掉电源之后再进行操作。 Warning: Turn OFF the power before starting the work so as to prevent accidents caused by abrupt start of the sewing machine. 1)旋松调压螺母②顺时针(即 A 方向)转动压力脚调节螺钉,压力将增强; Loosen nut ②,as you turn presser spring regulator ① clockwise(in direction A), the presser foot pressure will be increased. -
Page 15: 8、辅助压脚的调节
8、辅助压脚的调节 Adjusting the auxiliary presser foot 将辅助压脚的底部调整到能把夹有缝料的模板压实为宜。辅助压脚的气压调整到 0.2Mpa。 Adjust the bottom of auxiliary presser foot such that the template with clamped sewing materials may be held down securely. Adjust the air pressure of auxiliary presser foot to 0.2Mpa. 9、中压脚的上下行程调节\Adjusting the up/down strokes of middle presser foot 1) 取下面罩。... -
Page 16: Vii、 保养方法
VII、 保养方法 Maintenance Method 请定期(建议不超过 2 个月)向指定部位补充润滑脂。由于清扫缝纫机等原因造成润滑脂减 少时,请立即加以补充。 Regularly add grease to the designated site (usually no more than three months). Reduced grease which is caused by cleaning sewing machines, please supplemented immediately. 1、 针杆、压杆部润滑脂补充\Needle bar, pressure lever grease replenishing 打开面板,拆下中压脚辅助弹簧... -
Page 17: 2、 中压脚提升部润滑脂补充
2、中压脚提升部润滑脂补充\Presser foot lifting parts grease replenishing 打开机头面板,请向毡垫部(3 处) 及其四周的平头螺丝、支点 1 ~ 7 和导向槽 8 里补充润 滑脂。 Open head panel, add grease to the felt pad (3 part), the grub screws around, fulcrum 1 to 7 and the guide slot 8. 3、X、Y 向齿轮部润滑脂补充\Adding grease to gears (directions X, Y) 打开后挡板,用针筒将润滑脂打入齿轮处,并轻轻转动,保证能够均匀的涂在齿轮表面。... -
Page 18: 4、 花键轴、导向轴润滑脂补充
to guarantee that the grease may be applied onto the gears evenly. Direction-Y motor gear Direction-X motor gear 4、花键轴、导向轴润滑脂补充\Adding grease to the spline shaft and guiding axle 打开黑色滑移板, 在花键轴②沟槽及导向轴①表面涂上适量润滑脂, 同时前后拉动送料组件, 保证能够均匀的涂在轴的表面。 Open a black sliding board, apply right amount of grease into the groove of the spline shaft and onto the surface of guiding axle, and push the material feeding subassembly backwards and forwards simultaneously to guarantee uniform application.


Need help?
Do you have a question about the AM-5770A-410 and is the answer not in the manual?
Questions and answers