Table of Contents
Advertisement
Quick Links
Advertisement
Table of Contents

Related Manuals for ZOJE A5300


Summary of Contents for ZOJE A5300
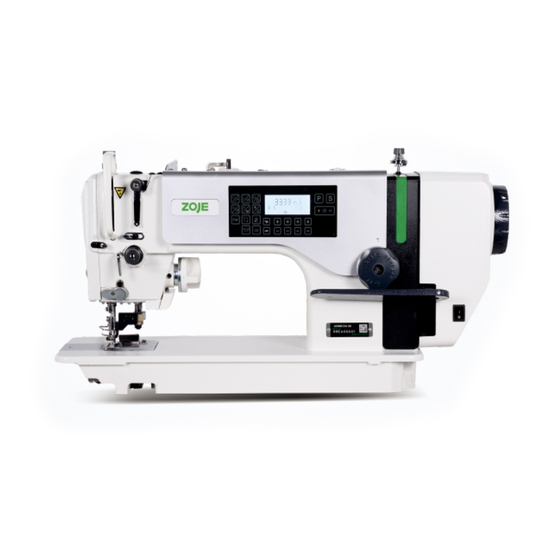
- Page 1 ZOJE A5300 A5300-D3 Instruction manual ZOJE Europe 2022...
- Page 2 Keep oil out of reach of children When fixing the cable, do not bend the cable excessively or fix it too tightly with clamps, which may cause fire or electric shock. ZOJE Europe 2022...
- Page 3 Be careful to observe all safety precautions The Company will not be liable for any accident or malfunction caused by the modification of the sewing machine. ZOJE Europe 2022...
- Page 4 CAUTION Moving parts may cause Injury Operate with safety devices. Turn off main switch before threading changing bobbin and needle, cleaning etc. Be careful not to damage by moving the thread take-up lever . ZOJE Europe 2022...
-
Page 5: Table Of Contents
Use of back Feeding Wrench …………………………………………………… Hand-touch Backstitch Device Operating the Treadle ……………………………………………………………… … … … … … … … … … … … … … … … … … … … … … … … Adjusting the Treadle ZOJE Europe 2022... - Page 6 … … … … … … … … … … … … … … … … … … … … … … … … … … … Cutting knife ……………………………………………………………… Changing other parts Maintenance ………………………………………………………………………… Carrying and Placing of the Sewing Machine …………………………………… ZOJE Europe 2022...
-
Page 7: Precautions Prior To Startup
7. Never remove or mount the protection cover or other protection devices before the machine is stopped. 8.Never wipe up the surface of machine head using paint thinner such as acetone. ZOJE Europe 2022... -
Page 8: Main Techanical Specifications
For medium weight Application materials Max sewing 4500sti/min speed Max stitch 5-7mm length Needle DB×1 9#~18# Presser 5.5mm(Max) Hand lifter foot 13mm(Max) lift height Knee lifter Lubricating system Auto Lubrication oil 10# White oil Motor power 220V/550W ZOJE Europe 2022... -
Page 9: Mounting The Machine
1.Installation of plastic rear cover 1) Plug in the connecting wires on the elec ④ -tronic control. ⑥ ⑧ 2)Install the plastic rear cover on the se ⑤ -wing machine as shown . Fig.3 ⑦ ⑤ Fig.4 ④ ⑧ Fig.5 ZOJE Europe 2022... -
Page 10: Lubrication Of Machine
1.As shown in right-hand figure, mount the thread stand component onto the mounting h -ole for thread stand on the sewing machine t -able. 2.Screw down retaining nut ① for lower se -gment of thread stand lever to fix the thread stand. ZOJE Europe 2022... -
Page 11: Mounting The Needle
-er supply before the operation is co -nducted. 2.Needles are available in different sizes. Please select appropriate ne -edle as per the thickness of threads and the sewing materials. 图9 Fig.9 ZOJE Europe 2022... -
Page 12: Installation Of Bobbin Case
C, and thread is reeled o -nto bobbin ①. Once the reel is full, winding lever ③ is pushed toward direction B, and wi -nding is over. 4) Remove bobbin ①, and trim off the thre -ad using winding trimmer ④. ZOJE Europe 2022... - Page 13 -ction E indicated in the right-hand figure. c.When the winding tension disco reach -es its suitable position, screw down fixing s -crew ⑥. 3)Adjust the winding tension of bobbin thr -ead by turning thread tension nut ⑧. ZOJE Europe 2022...
-
Page 14: Threading The Needle Thread
④ ③ ⑤ ④ ⑩ ⑨ ⑥ ⑤ ⑦ ⑨ ⑧ ⑥ ⑧ ⑦ Fig.13 ① ② ⑦ ① ⑨ ⑥ ⑦ ② ⑧ ③ ⑩ ④ ⑥ ⑧ ⑤ ⑨ ③ ⑩ ⑤ ④ Fig.14 -10- ZOJE Europe 2022... -
Page 15: Lifting Of Presser Foot
2.Press the reverse feeding wrench above machine head,Loose needle gauge kn -ob ①. ② towards B direction and rorate nee -dle gauge knob ① when changing th -e scale of it from largest to smallest. -11- ZOJE Europe 2022... -
Page 16: Use Of Back Feeding Wrench
(before trimming). 3.Use of the light push-button The illuminating lamp goes on at full brightness once the machine is powered on. Push illuminating lamp control button ③ to reduce in sequence the brightness till turn off. -12- ZOJE Europe 2022... -
Page 17: Operating The Treadle
-ng the length of treadle connecting rod: unsc -rew screw ①, and adjust the length of treadle connecting rod by moving upward/downward the upper connecting rod ② and lower connec -ting rod ③. 2)Screw down screw ① when adjustment is over. -13- ZOJE Europe 2022... - Page 18 2)Tighten nut ⑥ after adjusting stepping ret ④ -urn strength. ⑤ Caution: 1.To prevent the unexpected startup of sewing machine, trim off the pow-er supply before the operation is conducted. a b c d Fig.21 -14- ZOJE Europe 2022...
-
Page 19: Oil Mass Adjustment Of Rotating Hook
2.Confirming the Oil Mass 1) Remove the thread from all points from the thread take-up to the needle. 2) Use the lifting lever to lift the presser foot. -15- ZOJE Europe 2022... - Page 20 -nd over much oil mass may lead to contami -nation of the sewing materials. 2)Test the oil mass 3 times using special oil mass confirmation paper till the oil traces indicated by the special paper show no chan -ges. -16- ZOJE Europe 2022...
-
Page 21: Adjusting The Presser Foot Pressure
4.Tighten the screw ④ in compression rod guide frame and assembly the rubber plug ③ ⑤ after adjusting. 5.Adjust pressure of presser foot through p -ressure adjusting screw ①, tighten the nut ② Fig.27 after adjusting. -17- ZOJE Europe 2022... -
Page 22: Adjustment Of The Knee Lift Height
(by knee, the standard height:10 mm , the maximum height :13mm) ② ① 4.Securely tighten the nut ①. Caution: 1.To prevent the unexpected startup Fig.28 of sewing machine, trim off the pow -er supply before the operation is co -nducted. -18- ZOJE Europe 2022... -
Page 23: Adjusting The Tension Of Stitch Thread
-g when turning toward the clockwise(A), oth -erwise weak when toward anti-clockwise (B). Caution: 1.To prevent the unexpected startup of sewing machine, trim off the pow -er supply before the operation is co -nducted. ② Fig.30 -19- ZOJE Europe 2022... -
Page 24: Adjustment Of The Upper Thread Length After Trimming
② 2.For heavy duty , move the right thread hook to left to add amount of thread. ② 3.For light material , move the right thread hook to right to reduce amount of the t -hread. -20- ZOJE Europe 2022... -
Page 25: Adjusting The Take-Up Spring
2 .Adjustment of the Stroke to the Thread take-up Spring ※The tension of take-up spring is ※The take-up spring keeps on functioning till too high, so needle thread is the end. drawn out of place B in process of the action. Fig.33 -21- ZOJE Europe 2022... -
Page 26: Adjust The Height Of The Needle Bar
DB X1 and DPX5, the mark A on the needle bar ① should be match to the bottom of needle bar lower bushing; When using DAX1, the mark C -22- ZOJE Europe 2022... -
Page 27: Adjust The Synchronization Of The Needle And Hook
2.If the clearance between notch on needle and thread hooking tip of rotating hook is too small, rotating hook tip may be worn;if the clearance is excessive,skipped stitch may take place. 3.It may lead to needle breakage if over-rotating the eccentric wheel towards A direction. -23- ZOJE Europe 2022... -
Page 28: Adjust The Synchronization Of The Needle And Feed
2.If the feed lifting eccentric cam ② Fig.36 is turned too far in the direction A, it may cause the needle to break. 3.To prevent material slippage from occurring,retard the needle timing. 4.To improve thread tightening, adv ance the needle timing. -24- ZOJE Europe 2022... -
Page 29: Adjustment Of The Height Of Feed Dog
-cted. Adjust the lean of feed dog(Fig. 38) ① Standard ④ Lower the front ④ Raise the front ④ D ③ ② Fig.38 -25- ZOJE Europe 2022... -
Page 30: Replacing The Fixed Knife And Movable Knife
-nge after the angle has been adjust -ed,so it will be necessary to re-adju -st the height of the feed dog. Replacing the fixed knife and movable knife (Fig. 39, Fig. 40, Fig. 41) ④ ③ ② ① Fig.39 -26- ZOJE Europe 2022... - Page 31 -ut movable trimmer ⑩. Caution: 1.To prevent the unexpected startup of sewing machine, trim off the pow -er supply before the operation is co -nducted. 2.Carry out the above steps in rever -se to install the movable knife. -27- ZOJE Europe 2022...
-
Page 32: Adjusting The Thread-Trimming Device
-er supply before the operation is co -nducted. 3.Adjusting the positions of movable trimmer and stationary trimmer Hold down electromagnet core so that the b -alls in slide block assembly ③ is pressed into the recess on thread-trimming cam ①. Turn th -28- ZOJE Europe 2022... -
Page 33: The Use Of Clearance Hole Cover
A al ⑤ -ign red marker dot B knob,The cutter is go -ne down and the machine is driven at the sa -me time. 2)Let cutting knife stop the action, convert -29- ZOJE Europe 2022... - Page 34 1.To prevent the unexpected startup of sewing machine, trim off the pow -er supply before the operation is co -nducted. 3.The change of cutting width The cutting width is decided By changing the needle plate assembly . -30- ZOJE Europe 2022...
- Page 35 F, And then turn the handwheel to tighten the other screw E and install the rubber plug ⑧. The adjustment of cutter with asynchronous Fig.46 -31- ZOJE Europe 2022...
-
Page 36: Changing Other Parts
-ut width of the non-wrapper configuration is 3/16 in(4.8mm) . According to user needs , we also additionally equipped with other specific -ations of the cutting width, see the following table to replace parts if you need to replace. -32- ZOJE Europe 2022... -
Page 37: Maintenance
8)Remove the bobbin from the bobbin case Fig.49 ④and clean the bobbin case ④ with a cloth. 9)Insert the bobbin into the bobbin case ④,and then place the bobbin case ④ back into the machine. -33- ZOJE Europe 2022... -
Page 38: Carrying And Placing Of The Sewing Machine
It needs to hold tight frame body of the sewing machine by two people as the picture shows. 2.Attention for placing Must be put in the plain site. Clear the screwdriver or something embossment out of theplacing site. Fig.50 Fig.51 -34- ZOJE Europe 2022... - Page 39 ZOJE Europe 2022...
Need help?
Do you have a question about the A5300 and is the answer not in the manual?
Questions and answers