Advertisement
Quick Links
Advertisement

Related Manuals for ZOJE ZJ5780


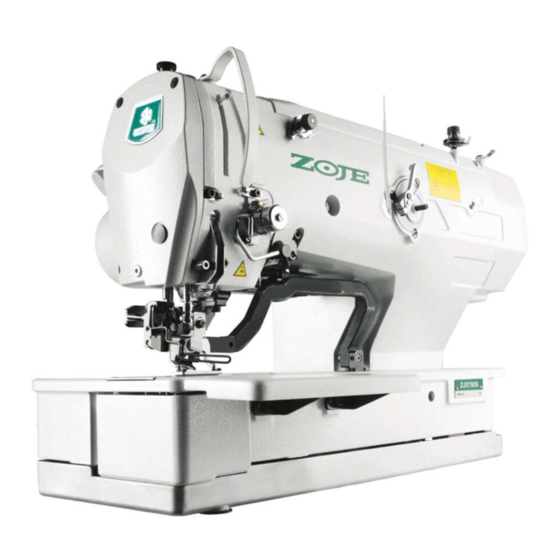
Summary of Contents for ZOJE ZJ5780
-
Page 2: Specifications
When operating this sewing machine, turn the power switch ON after setting the sewing machine to the bed base properly. II.规格/ SPECIFICATIONS 1. 机种/Subclass ZJ5780 平缝电子锁扣眼缝纫机有以下的系列机种。 ZJ5780 Computer-controlled, high-speed, lockstitch buttonholing, ZJ5780, has the subclass machines below. 机种 Subclass 主要用途 缝制衬衣、衬衫、工作服、女装等棉布钮扣... - Page 3 2. 规格/Specifications 缝纫速度 标准速度:3600rpm(最高:4200rpm) DPx5 #11J~#14J 使用机针 使用旋梭 DP 型全旋转旋梭 摆针驱动方式 脉冲马达驱动 送针驱动方式 脉冲马达驱动 压脚提升驱动方式 脉冲马达驱动 6mm(可以任意设定)最大:17mm 压脚提升量 切布匹刀驱动方式 双向电磁铁驱动 30 种 标准缝衣形状 记忆图案数 99 图案 单相 220V 电源 Sewing speed Standard speed :3600rpm(Max.: 4200rpm) Needle DPx5 #11J~#14J Hook DP type full-rotary hook Needle rocking drive method Drive by stepping motor Presser lifting drive method...
- Page 4 3. 标准缝衣形状一览表/Standard sewing shape list...
- Page 5 3. 标准缝衣形状一览表/Standard sewing shape list...
- Page 6 4. 构成 ZJ5780 由以下部分所构成 电源 ON/OFF 开关 Power ON/OFF switch Machine head (ZJ5780) 缝纫机机头(ZJ5780) 操作板 Operation panel Control box 电控箱 Presser lifting pedal and start pedal 抬压脚、启动踏板 Thread stand device 线架装置...
- Page 7 III.安装/INSTALLATION ★危险: 搬运缝纫机时,请至少 2 人以上进行。 ★ WARNING:To prevent possible accidents caused by fall of the sewing machine, perform the work by two persons or more when the machine is moved. (1)板的安装/Set-up of the table 1)把控制箱 、电源开关 、固定到台板 上。 2)用固定条把电源开关 的电缆线固定起来。 3)把底座锁紧螺钉⑩(4 个)穿过底座...
- Page 8 (2)电源线的连接/Connecting the power cord 单相 220V 的连接/Connecting single phase 220V 注意:在电压规格不同的状态下绝对不能使用。 ►CAUTION :Never use under the wrong voltage and phase. (3)缝纫机主体的安装/ Installing the sewing machine main unit . : 注意 ► 搬运缝纫机时,请一定 2 人以上进行。 ►注意:不要把橡胶铰链和金属铰链安装 反了,否则放倒缝纫机时会有危险。 ►CAUTION : To prevent possible accidents caused by the tail of the sewing machine, perform the work by two personal or more when the machine is moved.
-
Page 9: Tilting The Sewing Machine Head
缝纫机的放倒方法/ Tilting the sewing machine head ★危险: 放倒或抬起缝纫机时,请注意不要被缝纫机夹住手指。 为了防止突然的起动造成的事故,请关掉电源之后再进行操作。 放倒缝纫机时,请轻轻地放倒,让缝纫机被机头支撑杆 支撑住。 1. 放倒缝纫机之前,请先确认台板 上是否装有机头支撑杆 。 ►注意 2. 为防止缝纫机突然倒下,请一定 把缝纫机放到水平的地方,再放 倒缝纫机。 ★WARNING : When tilting /raising the sewing machine head, perform the work so as not to allow your fingers to be caught in the machine, to avoid possible accidents caused by abrupt start of the machine, turn OFF the power to the machine before starting the work. - Page 10 (5)安全开关的连接/ Connecting the safety switch connector 打开机头后罩,把安全开关的 插 口 连 接 到 机 头 后 端 电 路 板 JP7 上,再重新罩上后罩。 After open the machine cover, connecting safety switch connector with connect located on the PCB which is on the back of the machine.
- Page 11 (7)操作板的安装/ Installing the operation panel 用木螺钉 把操作板座 固 定到台板上, 再把电缆穿过 台板孔 。 Install hook oil shield plate onto bed base with setscrew (8)电缆的处理/ Managing the cord 请一边慢慢地放倒缝纫机,一边确认电缆没有被勾住。 注意 ► :放倒缝纫机时,请确认机头支撑杆安装在台板上。 Slowly tilting the sewing machine, check that the cords are not forcibly pulled. ►CAUTION :...
- Page 12 (9) 眼睛防护罩的安装/ Installing the eye protection cover : ★危险 为了保护断针飞起弄伤眼睛,请一定安装起来。 请一定安装眼睛防护罩 后使用缝纫机。 ★WARNING :Be sure to attach this cover to protect the eyes from the disperse of needle breakage Be sure to install and use eye protection cover and use the sewing machine. (10)急停开关的固定/ Fixing the temporary stop switch 出货时,暂停开关为...
- Page 13 (11)过线柱/ Thread guide rod 请把过线柱按 2 个横孔朝向正面 的方向安装好。 Securely fit the thread guide rod so that two side holes in the thread guide rod face the thread guide. (12)线架装置的安装/ Installing the thread stand 1)安装线架装置,把它安装到 台板右上的孔里。 2)拧紧固定螺母 ,不让线架 装置松动。 3)如果顶部可以配线时,请把 电源线从线架杆 中穿过去。 1) Assemble the thread stand, and set it in the hole in the top right corner of the machine...
- Page 14 IV、缝纫机开机前的准备/ PREPARATION BEFORE OPERATION 1. 加油/ Lubrication ★ : 注意 为了防止突然启动造成人身事故,请关掉电源,确认马达停止转动后再进行。 WARNING :To protect against possible personal injury due to abrupt start of the machine, be sure to start the following work after tuning the power off and ascertaining that the motor is at rest. 1)...
- Page 15 2. 机针的安装方法/Inserting the needle : ★危险 为了防止突然启动造成人身事故,请关掉电源,确认马达停止转动再进行。 ★WARNING : To protect against possible personal injury due to abrupt start of the machine, be sure to start the following work after tuning the power off and ascertaining that the motor is at rest. 1) 从缝纫机的正面看,...
- Page 16 3. 上线的穿线方法/ Threading the needle-thread 上线如图 ~ 的顺序进行穿线。 把线穿针时,使用附件的穿线器时操作会更加方便。 使用机线不同,导线器的穿线方法也不同。 Pass the needle thread in the order as shown in the figures. The threading can be done easily by using the needle threader supplied with the machine. Change the thread guide threading method according to the thread to be used.
- Page 17 4. 梭壳的穿线方法/ Threading the bobbin case 梭心转动方向和穿线方法 1) 头所示方向把梭心插进去。 2) 请把缝线穿过穿线口 ,然后再从张力弹簧 的下面穿过去,再次穿过穿线口, 从 把线拉出来。 3) 请注意进行直锁眼缝和锯齿缝时, 的穿线方法不同。 Rotating direction of bobbin and threading Fit the bobbin so that it rotates in the direction of the arrow. Pass the thread through thread slit , then through under the tension spring , again through thread slit...
- Page 18 5. 底线张力的调整/ Adjusting the bobbin thread tension 在梭壳穿线口 在上方的位置,把底线向上拉出之后,请按照下列的方法调整底线张力。 0.05~0.15N 直锁眼缝 手拿从梭壳出来的线头,轻轻地上下摆动时,梭壳就稍稍下 降 0.15~0.3N 锯齿边缝 手拿从梭壳出来的线头,用稍稍强的力量摆动时,梭壳才下 降 1) 把线张力螺钉 向右转动,底线张力变强,向左转动,底线张力变弱。 2) 使用化纤缝纫机线时,请把张力稍稍减弱,棉纱线时请稍稍加强。因为本机装有防止 空转弹簧,所以装上旋梭之后的线张力请再调强 0.05N 左右。 ►注意:调整了底线张力之后,请确认存储器开关的上线张力设定。 ►注意: 调整了底线张力后,请确认存储器中上线张力。 Adjust the bobbin thread tension as given below when the bobbin thread is pulled up at the position where thread slit of bobbin case comes up Purl stitch...
- Page 19 6. 梭壳的安装方法/Installation of bobbin case. : ★注意 为了防止突然启动造成人身事故,请关掉电源,确认马达停止转动后再进行。 ★ WARNING: To protect against possible personal injury due to abrupt start of the machine, be sure to start the following work after 1) 扳起梭壳抓手。 2) 插入旋梭轴 ,关闭抓 手。 梭壳被按到一定位 置会听到喀喳的声音。 1) Lift up and hold bobbin case latch lever between two fingers. 2) Push the bobbin case into the hook so that it is supported by the hook shaft then snap in the latch lever.
- Page 20 7. 切布刀的安装方法/ Installing the knife : ★注意 为了防止突然启动造成人身事故,请关掉电源,确认马达停止转动后再进行。 ★ WARNING :To protect against possible personal injury due to abrupt start of the machine, be sure to start the following work after turning the power of and ascertaining that the motor is at rest. 请按如下的步骤更换新的切布...
- Page 21 V.维修 1. 机针和旋梭的同步时间调整 危险: ★ 为了防止突然启动造成人身事故,请关掉电源,确认马达停止转 动后再进行。 机针和旋梭的同步调节,请在机针落到 针板孔的中央时调整。 (1) 针杆高度 1) 把针杆降到最下点; 2) 把高度尺[1]的部分如图所示插入针板 和针杆下端之间,使针杆碰到高度尺; 3) 拧紧针杆套管固定螺钉 ,决定针杆高 度。 (2) 机针和旋梭的同步 1) 按逆时针的转动主向转手轮,让机针从 最下点开始上升; 2) 把高度尺[2]的部分插入针板和针杆下 端之间,让针杆顶到高度尺; 3) 拧松轴套固定螺钉,把旋梭尖调整到机 针的中心; 此时,机针与旋梭尖之间的间隙为约 0.05mm,距离过大会导致跳针,过小会 磨损旋梭尖; (3) 内旋梭的固定和调整 用固定螺钉 把内旋梭固定器 的 前端和内旋梭 的端面的咬合调整 为...
-
Page 22: Maintenance
V.MAINTENANCE 1. Adjusting the needle-to-hook relation ★ : WARNING o protect against possible personal injury due to abrupt start of the machine, be sure to start the following work after turning the power off and ascertaining that the motor is at rest. Adjust the needle-to-hook relation when the needle enters the center of the needle hole in the throat plate... - Page 23 2. 上线切线的调整/ adjusting the needle thread trimmer : ★注意 为了防止突然启动造成人身事故,请关掉电源,确认马达停止转动后再进行。 ★CAUTION :To protect against possible personal injury due to abrupt start of the machine, be sure to start the following work after turning the power off and ascertaining that the motor is at rest. (1)上线切刀的切线力的调整...
- Page 24 3. 压脚压力的调整/ adjusting the presser bar pressure : ★注意 为了防止突然启动造成人身事故,请关掉电源,确认马达确实停止转动后再 进行。 ★CAUTION : To protect against possible personal injury due to abrupt start of the machine, be sure to start the following work after turning the power off and ascertaining that the motor is at rest. 压脚的压力用压脚调节螺钉...
- Page 25 4. 旋梭定位勾座位置的调整/ Adjusting of the bobbin presser unit : ★ 注意 为了防止突然启动造成人身事故,请关掉电源,确认马达确实停止转动 后再进行。 ★ CAUTION : To protect against possible personal injury due to abrupt start of the machine, be sure to start the following work after turning the power off and ascertaining that the motor is at rest. 缝纫机停止时,拧松挑线连接块复...
- Page 26 5. 线张力/ Thread tension (1)挑线弹簧(直锁眼缝) 1)挑线弹簧 的挑线量为 8~10mm,开始 强度 0.06~0.1N 左右较为适当。 2)改变挑线弹簧的动作量时,请拧松螺钉 , 把螺丝刀插到线张力杆 的缺口部转动调 节。 3)改变挑线弹簧的强度时, 请在螺钉 拧紧 的状态下,把螺丝刀插到线张力杆 的缺口 部转动调节。向右转动之后,挑线弹簧的强 度变强,向左转动之后,强度变弱。 (1)Thread take-up spring (purl stitch ) 1) The thread take-up amount of thread take-up spring is 8 to 10mm, and the appropriate pressure at the start is approximately 0.06 to 0.1N.
- Page 27 6.滤清器的清扫/ Cleaning the filter : ★注意 为了防止突然启动造成人身事故,请关掉电源,确认马达停止转动后再进行。 ★ WARNING : To protect against possible personal injury due to abrupt start of the machine, be sure to start the following work after turning the power off and ascertaining that the motor is at rest. 请每周清洗台板下面的风...
-
Page 28: Troubles And Corrective Measures
故障现象与原因、处理对策/TROUBLES AND CORRECTIVE MEASURES 现 象 原 因 处 理 对 策 页 1.上线断线 1. 平行部张力过强; ○减弱平行部张力; — 2. 挑线弹簧的强度过强,移动量过大; ○减弱挑线弹簧的弹力,或缩小移 动量; — 3. 旋梭尖部分有毛刺,有伤痕; ○锉平旋梭尖的毛刺, 或更换旋梭; — 4. 旋梭的同步时间不对; ○用高度尺调整旋梭的同步时间; 5. 线道上有伤痕; ○用布或锉刀去除伤痕和毛刺; — 6. 机针安装不良; ○调整机针的朝向和高度; 7. 机针过细; ○更换成粗机针;... - Page 29 Trouble Causes Corrective measures Page 1.Needle thread Thread tension at parallel section is too ○ decrease the thread tension at — breakage high. parallel section. Pressure stroke thread ○ decrease the tension of thread — take-upspring is too large. take-up spring or decrease its stroke. —...
- Page 30 size of presser. one. Material flops because of light-weight. ○ Delay the hook-to-needle timing. Attaching needle is wrong. (Lower the needle bar by 0.5mm) ; Needle id bent. ○Adjust again the direction, height, There is a burr or scratch on the blade etc.
Need help?
Do you have a question about the ZJ5780 and is the answer not in the manual?
Questions and answers