Table of Contents
Advertisement
Advertisement
Table of Contents

Related Manuals for VisualSonics Vevo 3100


Summary of Contents for VisualSonics Vevo 3100
-
Page 2: Legal
8,078,256; 8,275,449; 8,310,133; 8,316,518; 8,317,714; 8,343,289; 8,708,909; D520,140; D520,139; D531,316; D518,574 and D541,942. Notice of non-liability: FUJIFILM VisualSonics, Inc. is providing the information in this document to you as is with all faults. FUJIFILM VisualSonics, Inc. makes no warranties of any kind (whether express, implied or statutory) with respect to the information contained herein. -
Page 3: Table Of Contents
Set up the ramp Remove the system Set up the system Connect the system to power Basic operating instructions Connecting and Disconnecting Transducers Turning the system on and off Product Safety Warnings Cautionary Notes Vevo 3100 Imaging System Safety Labels - 3 -... -
Page 4: Overview
Overview The Vevo 3100 Getting Started Guide explains how to unpack, set up, and begin using ® the Vevo 3100 Imaging System. For more in-depth instructions on how to use the system, see either: Vevo 3100 Help, available on the system. To access Help on the system, tap More and then tap Help. -
Page 5: Unpack The Box
2 Raise the lid on the packing box. Avoid damaging the lid, as it will be used later as a ramp. Figure 1-1 The Vevo 3100 Imaging System packing box with lid. 3 Remove the sides of the packing box. -
Page 6: Set Up The Ramp
Set up the ramp The crate lid can be used as a ramp that allows you to remove the system from the crate. 1 With a box cutter, cut all four corners of the lid so that it lays flat. 2 With the corrugated ramp supports on the bottom, place the highest end of the ramp next to the base of the crate. - Page 7 4 Using a 3/8-inch wrench, loosen and remove the wheel clamps. Figure 1-3 Removing the wheel clamps. - 7 -...
-
Page 8: Remove The System
Remove the system 1 To unlock the wheels, press upon the rear of the locking lever on the wheels. 2 Roll the system down the ramp. Figure 1-4 Roll the system down the ramp. 3 Remove the plastic bag and packaging materials from the system and inspect the system for damage. - Page 9 4 Wheel the system to its intended destination. When transporting the system, push forward instead of pushing downward on the bar or pushing the display monitor. Figure 1-5 Push forward to wheel the system. 5 When the system is at its desired location, lock the wheels: press down on the lever on the wheels.
-
Page 10: Set Up The System
Set up the system 1 Raise and adjust the display monitor: a Grasp the display monitor on both sides and fold it upward. Figure 1-6 Folding the display monitor up. b Grasp the display monitor on both sides and tilt or rotate it to adjust its angle. - 10 -... - Page 11 2 Grasp both sides of the touch panel and pull it forward or push it backward to the desired angle. Figure 1-7 Angling the touch panel display. - 11 -...
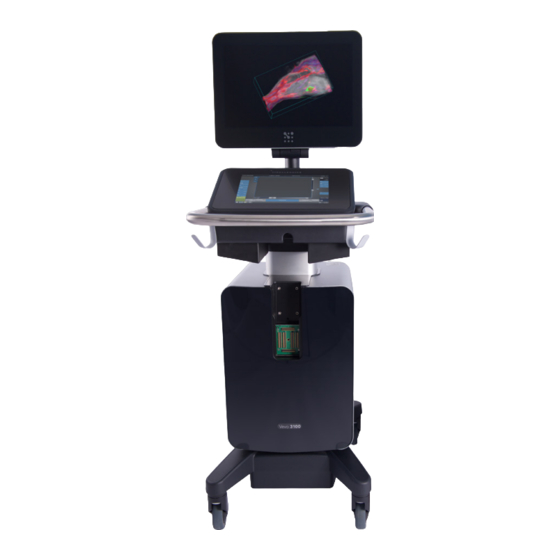
- Page 12 3 When you are finished, your system should look as it does in Figure 1-8. Figure 1-8 Vevo 3100 Imaging System. - 12 -...
-
Page 13: Connect The System To Power
Plug the system only into a grounded outlet. Using a non- grounded outlet may damage the system. Warning: Use only power cords provided by FUJIFILM VisualSonics with the system. Using power cords from other sources, may damage the system. 1 Connect the AC power cord, located in the accessory box, to the stand base and secure the AC power cord with the retainer wire. - Page 14 4 When connected to AC power, the system can be turned on by the power button and used immediately. Figure 1-10 The power button. - 14 -...
-
Page 15: Basic Operating Instructions
Basic operating instructions For detailed instructions on using the Vevo 3100 Imaging System, please refer to one of the following sources: Vevo 3100 Help, available on the system. To access Help on the system, tap MORE, and then tap Help. -
Page 16: Connecting And Disconnecting Transducers
Connecting and Disconnecting Transducers Caution: Only MX series transducers manufactured by FUJIFILM VisualSonics may be used with the Vevo 3100 Imaging System. Using transducers not manufactured by FUJIFILM VisualSonics will cause damage to the system. Caution: Only use coupling gels that are specifically approved for use with the Vevo 3100 Imaging System. - Page 17 4 Rotate the handle on the transducer counterclockwise to the horizontal (locked) position and push down on the handle to lock the transducer. To disconnect the transducer from the system 1 Flip the lock handle up and rotate clockwise to the vertical (unlocked) position. 2 Pull the transducer connector away from the transducer interface.
-
Page 18: Turning The System On And Off
To turn the system on To turn on the Vevo 3100 Imaging System, you must connect the AC power cord to an outlet first, then turn on the system using the power switch and then the power button. 1 Connect the AC power cord to the stand base and secure the AC power cord with the retainer wire. - Page 19 Figure 1-10 The power button. Caution: Do not use the system if an error message appears on the display monitor. Note the error code and turn off the system. Call FUJIFILM VisualSonics Caution: When using AC power, position the system to allow easy access to disconnect it.
- Page 20 Restarting the system while it is performing data-intensive background activities, such as exporting data files, can result in loss of data. FUJIFILM VisualSonics recommends waiting at least 3 minutes before restarting an unresponsive system. To power down an unresponsive system, press the power button and wait until the system shuts down.
-
Page 21: Product Safety
The information applies to the ultrasound system, transducer, accessories and peripherals. Please read the safety information before using the Vevo 3100 Imaging System. The following information applies to the Vevo 3100 Imaging System and supporting equipment. - Page 22 Warning: Do not remove any panels from the Vevo 3100 Imaging System. Do not remove the outer transducer housing. Any internal adjustments, replacements or modifications to the system electronics or to the transducers, should be made only by qualified FUJIFILM VisualSonics...
- Page 23 Warning: The Vevo 3100 Imaging System should never be used where safety could be affected by the malfunction of medical devices. The Vevo 3100 Imaging System is designed for use in preclinical laboratories and is not cleared for use with or in the vicinity of active medical devices. High levels of electromagnetic energy may interfere with the operation of the Vevo 3100 Imaging System.
- Page 24 Chemicals Warning: If any part of the Vevo 3100 Imaging System is in contact with hazardous chemicals or biological materials, appropriate precautions must be taken by all who come into contact with the system until the system is declared free of harmful contamination.
-
Page 25: Cautionary Notes
The use of controls, adjustments or performance of procedures in ways other than those specified in this manual may result in hazardous radiation exposure. Vevo 3100 Imaging System Safety Labels The following table describes the safety symbols used on the system cart. Symbol... - Page 26 Caution: Ensure that the wheels are locked when the Vevo 3100 Imaging System is not being transported to ensure safety to yourself and the system. Caution: Watch out for pinching from the adjustable monitors.
- Page 27 Operation of this equipment in a residential area is likely to cause harmful interference in which case the user will be required to correct the interference at their own expense. Warning: Changes or modifications not expressly approved by FUJIFILM VisualSonics could void the user’s authority to operate the equipment. - 27 -...
- Page 28 51394 *51394*...
Need help?
Do you have a question about the Vevo 3100 and is the answer not in the manual?
Questions and answers