Advertisement
Quick Links
Advertisement

Subscribe to Our Youtube Channel
Related Manuals for Bob and Brad QL/DMS.X6-C


Summary of Contents for Bob and Brad QL/DMS.X6-C
- Page 1 User Manual QL/DMS.X6-C Massage Gun...
-
Page 3: Maintenance
Maintenance The battery in this device is not designed to be removed or exchanged by the user. If any problem with the power supply occurs, please contact us directly. Do not try to open the device, repair it, or fix it by taking the device apart yourself. - Page 4 Do not hang the unit by the power cord. Disclaimer Please contact your physician before using the Bob and Brad X6 PRO if you have any health concerns or have any of the following conditions: Pregnancy, diabetes, epilepsy, migraines, herniated disks, spondylolisthesis, recent joint replacements, or IUDs.
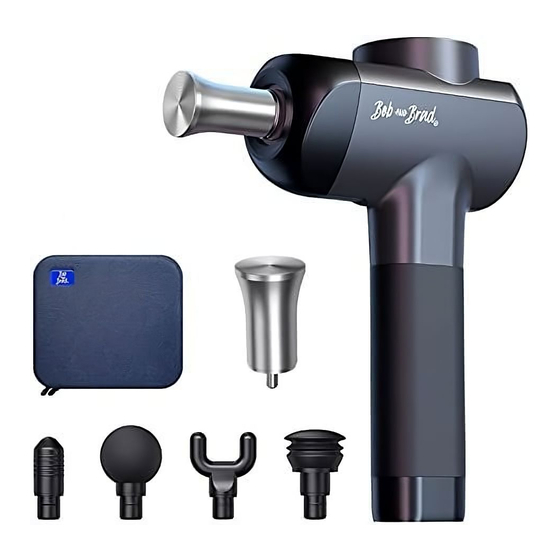
- Page 5 Main Structure and the fittings Removeable and repalceable massage head Gear indicator On/off/ gear Silicone handle DC Charging Port Battery Indicator LED1 LED2 LED3 LED4 Bottom 25% 50% 75% 100% LED1 flashes means battery is running down to less than 10% 1.
-
Page 6: Operation Steps
Operation Steps Connect the massage head when the device is turned off. Insert the massage head completely with pressure and pull it out when removing the vibrating head (note: The Fork head should be positioned for installation. When the buckle is inserted into the slot, it means the installation is in place. -
Page 7: Battery Display
Battery Display LED1 LED2 LED3 LED4 25% 50% 75% 100% LED1 flashing means the battery is running down to less than 10% and recharging is required. When the first indicator light is on, it’s indicating 25% of the battery is remaining. -
Page 8: Technical Details
Technical Details: QL/DMS.X6-C Massage Gun Speed: 2000-3200 r/min Rated Power: 25W Dimensions: 24.4 x 14.7 x 7.3cm / 9.6" x 5.7" x 2.9" Battery Information: Battery Rated Voltage: 14.8V Battery Capacity: 2500mAh Charging Time: 180 minutes Guarantee This product comes with a one-year warranty from the date of purchase. - Page 10 CHEST 2 Minutes ATTACHMENT: BALL HEAD PROTOCOL: Sweep from A to B on each sice for 1 minute DURATION: 2 minutes 2 Minutes ATTACHMENT: BALL HEAD PROTOCOL: Sweep from A to B on each sice for 1 minute DURATION: 2 minutes...
- Page 11 UPPER TRAPS 1 Minute ATTACHMENT: BALL HEAD PROTOCOL: Sweep from A to B on each side for 30 seconds DURATION: 1 minute UPPER BACK 4 Minutes ATTACHMENT: BALL HEAD STEP 1: Upper back PROTOCOL: Sweep from A to B on each side for 1 minute DURATION: 2 minutes STEP 2: Lower back...
- Page 12 SHOULDERS 2 Minutes ATTACHMENT: BALL HEAD PROTOCOL: Sweep from A to B on each side for 1 minute DURATION: 2 minutes BICEPS 2 Minute ATTACHMENT: BALL HEAD PROTOCOL: Sweep from A to B on each side for 1 minute DURATION: 2 minutes...
- Page 13 TRICEPS 4 Minutes ATTACHMENT: BALL HEAD PROTOCOL: Sweep from A to B on each side for 2 minutes DURATION: 4 minutes FOREARM 2 Minutes ATTACHMENT: BALL HEAD PROTOCOL: Sweep from A to B on each sice for 1 minute DURATION: 2 minutes...
- Page 14 HANDS 1 Minute ATTACHMENT: BALL HEAD PROTOCOL: Sweep from A to B on each side for 30 seconds DURATION: 1 minutes HIP FLEXORS 2 Minutes ATTACHMENT: BALL HEAD PROTOCOL: Sweep from A to B on each sice for 1 minute DURATION: 2 minutes...
- Page 15 SHINS 1 Minute ATTACHMENT: BALL HEAD PROTOCOL: Sweep from A to B on each sice for 30 seconds DURATION: 1 minute GLUTES 4 Minutes ATTACHMENT: FLAT HEAD PROTOCOL: Sweep from A to B on each side for 2 minutes DURATION: 4 minutes...
- Page 16 HAMSTRINGS 2 Minutes ATTACHMENT: BALL HEAD PROTOCOL: Sweep from A to B on each sice for 1 minute DURATION: 2 minutes CALVES 2 Minutes ATTACHMENT: BALL HEAD PROTOCOL: Sweep from A to B on each sice for 1 minute DURATION: 2 minutes...
- Page 17 FEET 4 Minutes ATTACHMENT: BALL HEAD PROTOCOL: Sweep from A to B on each sice for 2 minutes DURATION: 4 minutes...
- Page 18 A Dedicated Team Just For You Every Bob and Brad product is backed by a 1-year warranty and an award-winning customer service team. If you are in any way dissatisfied with a product you ordered, we’ll exchange it, replace it or refund your money under the warranty.
Need help?
Do you have a question about the QL/DMS.X6-C and is the answer not in the manual?
Questions and answers
remove battery QL/DMS.X6-C
The battery in the Bob and Brad QL/DMS.X6-C is not designed to be removed or exchanged by the user. Do not attempt to open or disassemble the device, as this will void the warranty. If there is a problem with the power supply, contact the manufacturer directly.
This answer is automatically generated