
Related Manuals for Angekis Saber Light


Summary of Contents for Angekis Saber Light
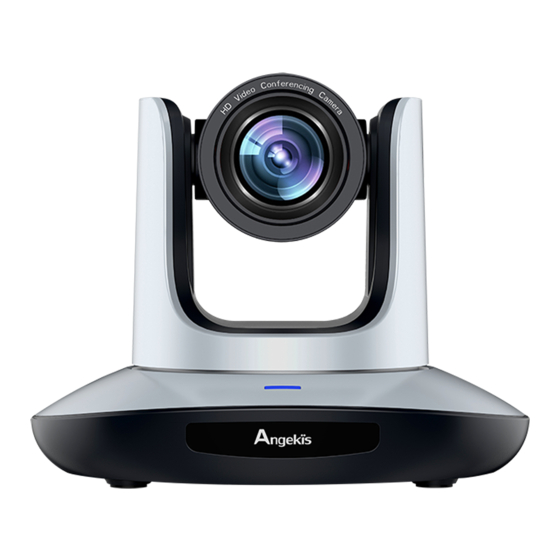
- Page 1 FHD PTZ Camera Saber Light User Manual V(1.0) I EN PLEASE REFER THIS DOCUMENT BEFORE USING.
-
Page 2: Table Of Contents
CONTENT SAFETY GUIDES....................ACCESSORIES....................QUICK START ..................... PRODUCT HIGHLIGHTS..................PRODUCT SPEC....................CAMERA INTERFACE..................CAMERA DIMENSION..................IR REMOTE CONTROLLER.................. VISCA IN ( RS232 PORT )................. VISCA PROTOCOL.................... PELCO-D PROTOCOL ..................PELCO-P PROTOCOL ..................OSD MENU...................... IR TRANSFER (IR PASS)&UVC CONTROL............ -
Page 3: Safety Guides
SAFETY GUIDES 1.Before opera on, please fully read and follow all instruc ons in the manual. For your safety, always keep this manual with the camera. 2.The camera power input range is 100-240VAC(50-60Hz),ensure the power supply input within this rate before powering on. - Page 4 DO NOT use hands for catching; or moving the camera barrel, otherwise it may damage the camera mechanical structure DO NOT use hands to quick rotate the camera barrel, otherwise it maydamage the camera mechanical structure, even break the motor driving.
-
Page 5: Accessories
ACCESSORIES Check all bellow items when open the package: Camera······················································································1 PCS Power Adapter·············································································1 PCS Power Cable················································································1 PCS RS232 Control Cable······································································ 1 PCS USB3.0 Cable···············································································1 PCS Remote Controller·········································································1 PCS User Manual··············································································· 1 PCS Double-sided Adhesive···································································1 PCS QUICK START 1. Check all cable connec ons before power on. -
Page 6: Product Highlights
2.DIP Switch Se ng(at the bo om of the camera): Dial Switch(ARM) SW-1 SW-2 Instruc on Upda ng mode Debugging mode Working mode Dial Switch(USB) SW-5 SW-6 Instruc on Upda ng mode Debugging mode Undefined Undefined PRODUCT HIGHLIGHTS · 3 cables in 1 design: video, control & power and be transited via signal USB3.0 cable. (No ce: to achieve stable power supply via USB3.0 cable, we suggest only use the 3m USB3.0 cable supplied by the factory, and the PC’s USB 3.0 port can supply more than 5V 1000mA power;... -
Page 7: Product Spec
SPEC PRODUCT 1080P60/50/30/25, 720P60/50/30/25, USB3.0 1024x576@30,960x540@30,640x360@30,352x288@30 Video Format USB2.0 1024x576@30,960x540@30,640x360@30,352x288@30 Video Port USB3.0, USB2.0 Sensor 1/2.8 inch high quality 5MP CMOS sensor Lens F3.1 ~ 15.5mm(5X), F1.8 – 2.8, Field of view:90°(wide)-20°(tele) Pan/ lt Rota on Pan: 170° ; Tilt: -30° ~ +90°, support up-side down installa on ±... -
Page 8: Camera Interface
CAMERA INTERFACE 1.Camera Lens 6. Tripod Screw Hole 10. RS232 (VISCA IN) Port 2.Camera Base 7. Installa on Hole 11.USB 3.0 Port 3.IR Receiver Panel 8. Power Indicator light(red) 4.Indicator Light 9. 12V DC Power Input 5.Dial Switch CAMERA DIMENSION... -
Page 11: Visca In (Rs232 Port
VISCA IN (RS232 PORT) Func on IR OUT Camera VISCA IN Windows DB-9 Camera VISCA IN RS485 A(+) A(+) A(+) IR OUT IR OUT B(-) B(-) B(-) SERIAL PORT CONFIGURATION: Parameter Value Parameter Value Baud rate 2400/4800/9600/115200 Stop Bit 1 bit Start Bit 1 bit Verify Bit... -
Page 12: Visca Protocol
VISCA PROTOCOL Part1 Camera Return Command Ack/Comple on Message Command Packet Note z0 41 FF Returned when the command is accepted. Comple on z0 51 FF Returned when the command has been executed. z = camera adderss+8 Error Messages Command Note Packet Returned when the command format is different or when a command with... - Page 13 Command type func on Command packet Note 8x 01 04 35 04 FF Manual 8x 01 04 35 05 FF Sodium lamp 8x 01 04 35 08 FF fluorescent 8x 01 04 35 09 FF Reset 8x 01 04 03 00 FF 8x 01 04 03 02 FF Manual Control of R Gain CAM_RGain...
- Page 14 Command type func on Command packet Note 8x 01 04 0C 00 00 0p 0q Direct pq: Gain Positon (0~0x0E) Reset 8x 01 04 0D 00 FF 8x 01 04 0D 02 FF Bright Se ng CAM_Bright Down 8x 01 04 0D 03 FF 8x 01 04 4D 00 00 0p 0q Direct pq: Bright l Positon...
- Page 15 Command type func on Command packet Note 8x 01 04 A2 00 00 0p 0q CAM_Contrast Direct (0~0x0F) CAM_Gamma Direct 81 01 04 5B 0p FF (0~0x04) 50HZ 81 01 04 23 01 FF FLICK 60HZ 81 01 04 23 02 FF 81 01 04 23 00 FF Menu On 8x 01 06 06 02 FF...
- Page 16 Command type func on Command packet Note Reset 8x 01 06 05 FF 8x 01 06 07 00 0W W:1 UpRight 0:DownLe 0Y 0Y 0Y 0Y 0Z 0Z 0Z 0Z FF Pan- ltLimitSet YYYY: Pan Limit Posi on(TBD) 8x 01 06 07 01 0W ZZZZ: Tilt Limit Posi on(TBD) Clear 07 0F 0F 0F 07 0F 0F 0F FF...
- Page 17 y0 50 02 FF IR_Transfer 8x 09 06 1A FF y0 50 03 FF Off y0 50 02 FF IR_Receive 8x 09 06 08 FF y0 50 03 FF Off y0 07 7D 01 04 00 FF Power ON/OFF y0 07 7D 01 04 07 FF Zoom tele/wide y0 07 7D 01 04 38 FF AF On/Off...
- Page 18 1/15 1/12 16dB 18dB 20dB 22dB Gain Gain 24dB 10dB 26dB 12dB 28dB 14dB 30dB IRIS GAIN F1.8 +28dB F1.8 +26dB F1.8 +24dB F1.8 +22dB F1.8 +20dB F1.8 +18dB F1.8 +16dB F1.8 +14dB F1.8 +12dB F1.8 +10dB F1.8 +8dB F1.8 +6dB F1.8 +4dB...
-
Page 19: Pelco-D Protocol
PELCO-D PROTOCOL Func on Byte1 Byte2 Byte3 Byte4 Byte5 Byte6 Byte7 0xFF Address 0x00 0x08 Pan Speed Tilt Speed Down 0xFF Address 0x00 0x10 Pan Speed Tilt Speed 0xFF Address 0x00 0x04 Pan Speed Tilt Speed Right 0xFF Address 0x00 0x02 Pan Speed Tilt Speed... -
Page 20: Pelco-P Protocol
PELCO-P PROTOCOL Func on Byte1 Byte2 Byte3 Byte4 Byte5 Byte6 Byte7 Byte8 0xA0 Address 0x00 0x08 Pan Speed Tilt Speed 0xAF Down 0xA0 Address 0x00 0x10 Pan Speed Tilt Speed 0xAF 0xA0 Address 0x00 0x04 Pan Speed Tilt Speed 0xAF Right 0xA0 Address... -
Page 21: Osd Menu
OSD MENU 1. Under working mode, press the menu bu on on the IR remote controller, to enter the OSD menu: 2, Use the navigate bu on to select the main menu. Once been selected, the main menu will change to blue background, and the right side will show all sub menu op ons. - Page 22 FOCUS MODE AUTO/MANUAL/PUSH Default:AUTO FOCUS LIMIT Focus Distance between camera and object: Default:1.5M 1.5M/2M/3M/6M/10M FOCUS DZOOM DIGITAL ZOOM: ON/OFF Default:OFF RATIO DIS Zoom Rate Display (include Digital Zoom):ON/OFF Default:OFF RETURN RETURN to Main menu EXP.MODE AUTO、MANUAL、BRIGHT、SHUTTER、IRIS Default:AUTO Shu er speed:1/8~1/10000, only valid when EXP Default:1/100 SHUTTER MODE set to MANUAL or SHUTTER mode...
- Page 23 RETURN Return to Main Menu 2D NR 2D Noise Reduc on: OFF/ON Default:OFF 3D NR 3D Noise Reduc on: OFF/ON Default:AUTO SHARPNESS Sharpness se ng: OFF/0~15 Default:OFF CONTRAST Contrast se ng: 0~15 Default:8 QUALITY SATURATION Color Satura on Se ng: 0~15 Default:8 BRIGHT Brightness se ng: 0~15...
- Page 24 IR TRANSFER(IR PASS) 1.Currently the camera support NEC code format. For customized with other codes, pls contact us. 2.Once the camera finish power configura on, enable the IR transfer func on via sending COM command. 3.Get the targeted remote controller point to the camera IR receiver, press keys on the remote controller, then the camera will output the received IR code via VISCA IN port.
- Page 25 CT_ZOOM_ABSOLUTE_CONTROL 8x 01 04 47 0p 0q 0r 0s FF CT_PANTILT_ABSOLUTE_CONTROL 8x 01 06 02 VV WW 0Y 0Y 0Y 0Y 0Z 0Z 0Z 0Z F CT_PANTILT_RELATIVE_CONTROL 8x 01 06 01 pp qq rr ss FF CT_ZOOM_RELATIVE_CONTROL 8x 01 04 07 pp FF...
- Page 26 ® Copyright Angekis Technology Co., Ltd All Rights Reserved. FACEBOOK https://www.angekis.com...
Need help?
Do you have a question about the Saber Light and is the answer not in the manual?
Questions and answers