Table of Contents
Advertisement
Quick Links
Advertisement
Table of Contents

Related Manuals for Bosch HRA558B 1 Series


Summary of Contents for Bosch HRA558B 1 Series
- Page 1 Oven HRA558B.1 User manual and installation instructions [en]...
-
Page 2: Table Of Contents
en Safety ¡ Keep the instruction manual and the Table of contents product information safe for future refer- ence or for the next owner. ¡ Do not connect the appliance if it has been USER MANUAL damaged in transit. Safety .............. 2 1.2 Intended use Preventing material damage ....... -
Page 3: Safety
Safety en on the oven door, as they may scratch the Loose food remnants, fat and meat juices surface. may catch fire. The appliance and its parts that can be ▶ Before using the appliance, remove the touched may have sharp edges. worst of the food residues and remnants ▶... -
Page 4: Preventing Material Damage
en Preventing material damage ▶ Do not let children play with packaging ma- Hot steam is generated in the cooking com- terial. partment. Children may breathe in or swallow small ▶ Do not reach into the cooking compartment parts, causing them to suffocate. when using steam. -
Page 5: Environmental Protection And Saving En- Ergy
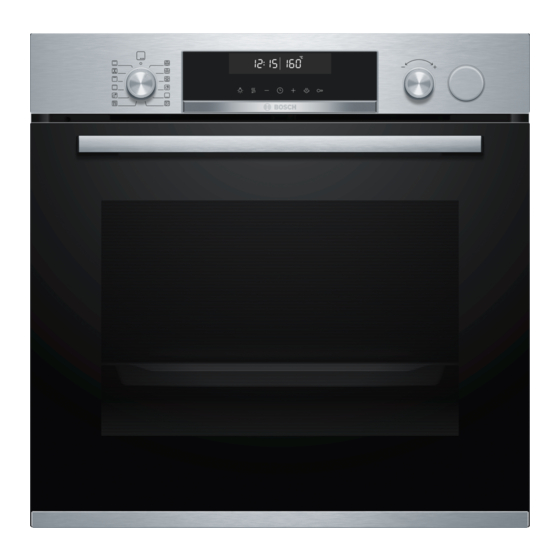
Environmental protection and saving energy en Fruit juice dripping from the baking tray leaves stains 2.2 Steam that cannot be removed. Follow these instructions when using the steam func- When baking very juicy fruit flans, do not pack too ▶ tion. much on the baking tray. ATTENTION! If possible, use the deeper universal pan. - Page 6 en Familiarising yourself with your appliance 4 Familiarising yourself with your appliance 4.1 Controls You can use the control panel to configure all functions of your appliance and to obtain information about the operat- ing status. Note: On certain models, specific details such as col- our and shape may differ from those pictured.
- Page 7 Familiarising yourself with your appliance en Symbol Function Time-setting options Select the time , timer , cooking time and the end time . To select the individual time-setting options, press the button sev- eral times. The red bar above or below the respective symbol indicates the function to which the setting in the display corresponds.
-
Page 8: Programme
en Familiarising yourself with your appliance Symbol Type of heating and What it's used for/how it works temperature range Hot air grilling Roast poultry, whole fish and larger pieces of meat. 30 - 275 °C The grill element and the fan switch on and off alternately. The fan circulates the hot air around the food. - Page 9 Accessories en Use the cleaning function regularly to help retain the Cooling fan cleaning ability of the self-cleaning surfaces and pre- The cooling fan switches on automatically during oper- vent damage. ation. The hot air escapes above the door. → "EcoClean ", Page 23 ATTENTION! Do not cover the ventilation slot above the appliance Lighting...
- Page 10 Push the accessory all the way in, making sure that your appliance in our brochures and online: it does not touch the appliance door. www.bosch-home.com Accessories vary from one appliance to another. When Note: Take any accessories that you will not be using...
- Page 11 Basic operation en Wait until the cooking compartment has cooled Temperature 240 °C down. Cooking time 30 minutes Empty the water tank and dry the cooking compart- Switch off the appliance after the specified cooking ment. time. → "After every steam operation", Page 13 Wait until the cooking compartment has cooled Set the type of heating with steam assistance and down.
- Page 12 en Steam Press on the water tank and pull the water tank Intensity Setting . High a The appliance starts to heat and produce steam after a few seconds. Cancelling steam-assisted cooking Press the button repeatedly until the steam in- ▶...
- Page 13 Time-setting options en Open the appliance door. 8.4 After every steam operation Note: The remaining water is pumped back into the water The drip trough is underneath the cooking com- tank after every operation with steam. Then empty and partment. dry the water tank and the cooking compartment. Emptying the water tank WARNING ‒ Risk of burns! The water tank may heat up while the appliance is in...
- Page 14 en Time-setting options minutes. The timer has its own audible signal so that Changing the cooking time you can tell whether it is the timer or a cooking time You can change the cooking time at any time. which has elapsed. is highlighted on the display.
- Page 15 Programme en Reset the end time to the current time plus the set Press the button. ▶ cooking time using the button. a The time that is set appears on the display. a After a few seconds, the appliance applies the Tip: You can go to the basic settings → Page 19 to change and starts heating up.
- Page 16 en Programme No. Food Cookware Weight range Add liquid Shelf Information posi- Weight setting tion Baking tray with 0.4–1.0 kg The cooking compart- 07 Flatbread greaseproof paper Weight of dough ment must be cold to begin with. Universal pan 0.3–1.5 kg 08 Baked potatoes, Total weight whole Unpeeled, starchy...
- Page 17 Programme en No. Food Cookware Weight range Add liquid Shelf Information posi- Weight setting tion Roasting dish with 0.5–2.5 kg Add stock, Do not sear the meat 21 Beef roulades Stuffed with vegetables Total weight of all water or an- beforehand or meat the stuffed roul- other liquid ades...
- Page 18 en Childproof lock No. Food Cookware Weight range Add liquid Shelf Information posi- Weight setting tion Roasting dish 1.0–2.0 kg Place in the cook- 29 Joint of pork, with without lid or bak- Weight of meat ware fatty side up; crackling E.g. shoulder, ing tray salt the rind well seasoned, and scored...
- Page 19 Sabbath mode en If rapid heating does not switch off automatically, 12.1 Setting rapid heating press the button. To ensure an even cooking result, do not place the appears in the display. food in the cooking compartment until rapid heating a Rapid heating starts after a few seconds. has come to an end.
- Page 20 en Basic settings Display Basic setting Selection Interior lighting during operation = no = yes Cooling fan run-on time = short = medium = long = extra-long Telescopic shelves retrofitted = no (for rails and 1-level pull-out) = yes (for 2- and 3-level pull-out) ...
- Page 21 Cleaning and servicing en 15 Cleaning and servicing Do not use cleaning products with a high alcohol To keep your appliance working efficiently for a long ▶ content. time, it is important to clean and maintain it carefully. Do not use hard scouring pads or cleaning ▶...
- Page 22 en Cleaning and servicing Cooking compartment Area Suitable cleaning agents Information Enamel surfaces ¡ Hot soapy water Soak any heavily soiled areas and use a brush or steel wool. ¡ Vinegar water Leave the appliance door open to dry the cooking compartment after cleaning it.
- Page 23 EcoClean en 16 EcoClean Clean the cooking compartment regularly using the 16.2 Preparing the appliance for the cleaning function EcoClean to help retain the cleaning cleaning function ability of the self-cleaning surfaces and prevent dam- In order to achieve a good cleaning result, prepare the age.
- Page 24 en Cleaning assistance Wipe the cooking compartment clean with a damp dish patches may be left over from salty food – the cloth. spots are not rust. These spots are not harmful. These marks do not impair the cleaning ability of Note: Marks may appear on the self-cleaning sur- the self-cleaning surfaces.
-
Page 25: Descaling
Shelf supports en Note: Do not pour more than 150 ml of liquid into the 18.4 Fourth step ( ) water tank throughout the descaling process. Fill the water tank with 150 ml water and insert it. Mixing a descaling solution: a At the end of the rinse cycle, ... - Page 26 en Appliance door First, push the rail into the middle of the rear Push the rail into the front socket until the rail socket until the rail rests against the cooking also rests against the cooking compartment wall, compartment wall, and then push this back ...
- Page 27 Appliance door en Close the appliance door fully . Grab hold of the Open the locking levers on the left- and right-hand appliance door with both hands (on the left and hinges . right) and pull it upwards and out . a The locking levers are open.
- Page 28 en Appliance door If necessary, you can remove the condensate Slide the intermediate pane into the left- and right- trough for cleaning. hand retainers . Open the appliance door. ‒ Tilt the condensate trough upwards and remove ‒ Push the intermediate pane upwards until it is in the left- and right-hand retainers ...
-
Page 29: Troubleshooting
Troubleshooting en Close the locking levers on the left- and right-hand Close the appliance door. hinges . Note: Do not use the cooking compartment again until the door panes have been correctly fitted. a The locking levers are closed. The appliance door is secured and cannot be detached. - Page 30 en Troubleshooting Fault Cause and troubleshooting lights up in the dis- Childproof lock is activated. play and no settings Use the button to deactivate the childproof lock. ▶ can be made on the → "Childproof lock", Page 18 appliance. appears in the Cleaning recommendation display.
- Page 31 Disposal en Fault Cause and troubleshooting During operation with Steam escapes for physical reasons. steam assistance, Wait until the cooking with steam assistance ends. ▶ steam escapes from After the end of cooking with steam assistance, no more steam will escape after a short the ventilation slots.
-
Page 32: How It Works
en Customer Service 23 Customer Service If you have any queries on use, are unable to rectify 23.1 Product number (E-Nr.) and production faults on the appliance yourself or if your appliance number (FD) needs to be repaired, contact Customer Service. You can find the product number (E-Nr.) and the pro- Detailed information on the warranty period and terms duction number (FD) on the appliance's rating plate. - Page 33 How it works en ¡ Depending on the size and type of the food to be ¡ Place the cookware onto the wire rack. roasted, add up to 1/2 litre water to the universal ¡ If you do not have any suitable cookware, use the pan.
- Page 34 en How it works Food Accessories/cook- Shelf pos- Heating Temperature in Steam intens- Cooking ware itions function °C/grill setting time in mins Chicken, 1.3 kg, un- Cookware without 200-230 60-70 stuffed Small chicken portions, Cookware without 220-230 35-45 250 g each Goose, unstuffed, 3 kg Cookware without 1.
- Page 35 How it works en Recommended settings for slow cooking Food Accessories/cook- Shelf pos- Type of Searing Temperature in Cooking ware ition heating time in °C time in mins mins Duck breast, 300 g each Cookware without lid 60-70 Fillet of pork, whole Cookware without lid 75-100 Beef topside, 6–7 cm thick,...
-
Page 36: Installation Instructions
en Installation instructions Food Accessories/ Shelf posi- Heating Temperature in Steam in- Cooking cookware tions function °C/grill setting tensity time in mins Small cakes, 2 levels Universal pan 3 + 1 25-35 Baking tray Small cakes, 3 levels Universal pan 5 + 3 + 1 25-35 Baking tray Hot water sponge cake... - Page 37 Installation instructions en 25.3 Installation below a worktop Observe the installation dimensions and the installation instructions when installing below a worktop. ¡ Wear protective gloves so that you do not cut yourself. Parts that are accessible dur- ing installation may have sharp edges. ¡...
- Page 38 en Installation instructions ¡ To ensure that the appliance door can be opened, 25.5 Installing two appliances on top of you must take the minimum dimensions into consid- each other eration when installing in a corner. The dimension Your appliance can also be installed above or below is dependent on the thickness of the unit front and another appliance.
- Page 39 Installation instructions en 25.8 Installing the appliance Slide the appliance in fully and centre it. Screw the appliance into place. For handleless kitchens with vertical bar handle strips: Attach a suitable filling piece in order to cover ‒ any sharp edges and to guarantee a safe install- ation.
- Page 40 Expert advice for your Bosch home appliances, help with problems or a repair from Bosch experts. Find out everything about the many ways Bosch can support you: www.bosch-home.com/service Contact data of all countries are listed in the attached service directory.
Need help?
Do you have a question about the HRA558B 1 Series and is the answer not in the manual?
Questions and answers