Advertisement
Quick Links
1150MM
Imported by
Amart Furniture
For any assistance with assembly or for missing parts please phone
Amart Furniture,
1632MM
2183MM
Pty Ltd, Qld, Brisbane Australia.
Customer Service Free call 1800 351 084
ASSEMBLY INSTRUCTION
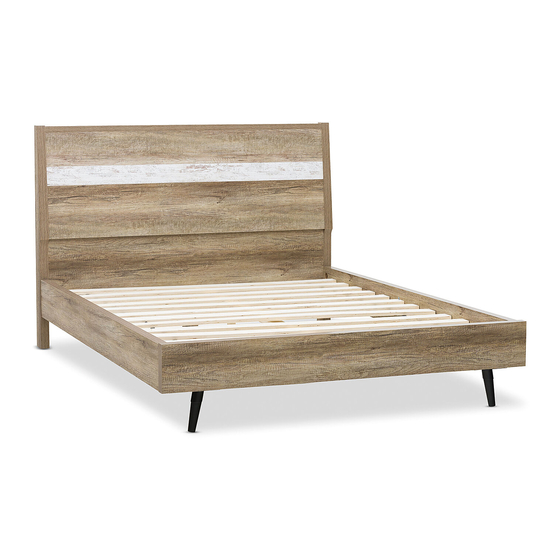
KORI QUEEN BED
ITEM CODE 61196
Imported by Amart Furniture Pty Ltd, Qld, Brisbane Australia.
For any assistance with assembly or for missing parts please phone
Amart Furniture , Customer Service Free call 1800 351 084
1
61196
Advertisement

Subscribe to Our Youtube Channel
Summary of Contents for Amart Furniture KORI 61196
- Page 1 KORI QUEEN BED ITEM CODE 61196 Imported by Amart Furniture Pty Ltd, Qld, Brisbane Australia. For any assistance with assembly or for missing parts please phone Amart Furniture , Customer Service Free call 1800 351 084 1632MM 1150MM 2183MM Imported by Amart Furniture Pty Ltd, Qld, Brisbane Australia.
-
Page 2: Pre-Assembly Preparation
PRE-ASSEMBLY PREPARATION Before you start: Choose a clean, level, spacious assembly area. Avoid hard surfaces that may damage the product Take care when lifting. Product should be assembled as near as possible to the point of use Ensure that you have all required contents for complete assembly Always read the assembly instructions carefully before beginning assembly. - Page 3 EXPLODED EXAMPLE LEFT SIDE PANEL RINGT SIDE PANEL HEADBOARD SUPPORT LEG FOOTBOARD SUPPORT BAR LEFT LEG RIGHT LEG MIDDLE SUPPORT PANEL SUPPORT LEGS SLATS 1870mmx1540mm angle iron hexagon socket dowel hexagon socket 5MM allen key screw screw M6x25mm M6x40mm M8x50mm Bx18 hexagon socket 8MM nut...
- Page 4 (MM) 2050x190x42 205x190x42 1630x1150x110 263x70x25 1630x192x42 390x46x25 2050x70x20 260x30x30 1535x70x15 61196...
- Page 5 STEP 1: Insert dowel to left side panel and right side panel . Fix angle irons to left side panel and right side panel with 6MM spring washer ,6MM washer , hexagon socket screw using 4MM allen key . Bottom veneer edge Top veneer edge Back vedge Front edge...
- Page 6 STEP 3: Attach left side panel and right side panel headboard using 8MM washer ,hexagon socket screw ,6MM nut and 5MM allen key Top veneer edge Front veneer edge Top veneer edge Front edge Front edge 61196...
- Page 7 STEP 4: Attach support bar to footboard using 6MM spring washer ,6MM washer ,hexagon socket screw using 4MM allen key .Attach left leg and right leg to footboard with screws . Attach left leg and right to footboard with 6MM spring washer 6MM washer ,hexagon socket screw using 4MM...
- Page 8 Top veneer edge STEP 5: Attach left side panel and right side panel to and footboarb with 6MM spring washer ,6MM washer ,hexagon socket screw using 4MM allen key . Top veneer edge eer edge Left veneer edge 61196...
- Page 9 STEP 6: Attach legs to middle support panel with hexagon socket screw using 6MM allen key .Attach middle support panel to support leg and support bar with 6MM washer ,6MM spring washer ,hexagon socket screw using 4MM allen key . Top veneer edge Left veneer edge 61196...
- Page 10 STEP 7: Attach slats to the existing unit using screws . ASSEMBLY COMPLETE DO NOT PUSH OR DRAG THIS FURNITURE – IT WILL CAUSE DAMAGE TO THE LEGS CAUTION ALWAYS LIFT YOUR BED WHEN MOVING/RELOCATING – DO NOT DRAG. DRAGGING CAN CAUSE THE CENTRE SUPPORT LEGS TO BEND/BREAK 61196...
-
Page 11: Product Care
PRODUCT CARE: To protect your furniture,we suggest the following: *Avoid placing your furniture in direct sunlight. *Do not place furniture directly under windows. *Do not place sharp materials(knife,fork,etc) directly onto your furniture as sharp material may scrape and damage the finish. Do not place material with high temperature directly onto the surface of your furniture.


Need help?
Do you have a question about the KORI 61196 and is the answer not in the manual?
Questions and answers