LEYBOLD VARODRY VD 65 Operating Instructions Manual
Hide thumbs
Also See for VARODRY VD 65:
- Operating instructions manual (32 pages) ,
- Operating instructions manual (52 pages) ,
- Operating instructions manual (60 pages)
Table of Contents
Advertisement
Quick Links
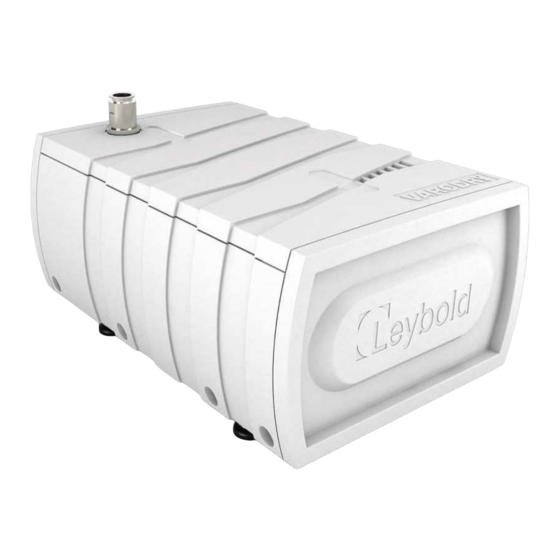
VARODRY VD65-200
Minor Service
Manual Belt
Replacement
Operating Instructions 300757580_002_C3
Part Numbers
111065V10 VARODRY VD 65, 50Hz
111065V11 VARODRY VD 65, 60Hz
111065V15 VARODRY VD 65, 50Hz, Purge
111065V16 VARODRY VD 65, 60Hz, Purge
111100V10 VARODRY VD 100, 50Hz
111100V11 VARODRY VD 100, 60Hz
111100V15 VARODRY VD 100, 50Hz, Purge
111100V16 VARODRY VD 100, 60Hz, Purge
111160V10 VARODRY VD 160, 50Hz
111160V11 VARODRY VD 160, 60Hz
111160V15 VARODRY VD 160, 50Hz, Purge
VARODRY VD 160, 60Hz, Purge
111160V16
111200V10 VARODRY VD 200, 50Hz
111200V11 VARODRY VD 200, 60Hz
VARODRY VD 200, 50Hz, Purge
111200V15
VARODRY VD 200, 60Hz, Purge
111200V16
Advertisement
Table of Contents

Related Manuals for LEYBOLD VARODRY VD 65


Summary of Contents for LEYBOLD VARODRY VD 65
- Page 1 Operating Instructions 300757580_002_C3 Part Numbers 111065V10 VARODRY VD 65, 50Hz 111065V11 VARODRY VD 65, 60Hz 111065V15 VARODRY VD 65, 50Hz, Purge 111065V16 VARODRY VD 65, 60Hz, Purge 111100V10 VARODRY VD 100, 50Hz 111100V11 VARODRY VD 100, 60Hz 111100V15 VARODRY VD 100, 50Hz, Purge...
-
Page 2: Table Of Contents
1.3.11 Fail safe gear assembly 1.3.12 Belt chamber cover assembly 1.3.13 Fan assembly 1.3.14 Drive enclosure assembly 1.3.15 Electric connection 1.3.16 Cable route 1.3.17 Verify motor rotation 1.3.18 Install the enclosure Original operating instructions. 300757580_002_C2 - 05/2019 - © Leybold... - Page 3 Operating Instructions and follow the information so as to ensure optimum and safe working right from the start. The Leybold VARODRY VD65-200 has been designed for safe and efficient operation when used properly and in accordance with these Operating Instruc- tions.
-
Page 4: Important Safety Information
Contaminated parts can be detrimental to health and environment. Before beginning with any work, first find out whether any parts are contami- nated. Adhere to the relevant regulations and take the neces- sary precautions when handling contaminated parts. 300757580_002_C2 - 05/2019 - © Leybold... -
Page 5: Belt Replacement
Sr No. Description Quantity Kit Number Toothed Belt DSTD-960-DS8M-15 CXP 50Hz E6525604 Toothed Belt DSTD-960-DS8M-15 CXP 60Hz E6525605 Kit Fail safe gear NR Polyamid EK6530258 Fail-safe gear NR Polyamid O-ring Bushing Screw,soc. HD CP-M6x20,DIN912 300757580_002_C2 - 05/2019 - © Leybold... -
Page 6: Procedure
Switch off the pump and isolate from the electrical supply (Certified electrician). Using 10mm spanner to loosen the 8 screws (Figure 1, item 1) which secure pump enclosure and carefully lift the pump enclosure (Figure 1, item 2) by hand. CAUTION 300757580_002_C2 - 05/2019 - © Leybold... -
Page 7: Disassemble Drive Enclosure
Cap screw M6X16 8.8 Drive enclosure Procedure: Using 5mm Allen key, remove the 3 screws (Figure 2, item 1) which secure CAUTION drive enclosure and carefully separate the drive enclosure (Figure 2, item 2) from pump. 300757580_002_C2 - 05/2019 - © Leybold... -
Page 8: Disassemble Rotor Disc, Screw And Fan
Using an 8 mm Allen key, remove the screws, washer and rotor washer (Figure CAUTION 3, Item 1, 2, 3) which secure the fan on belt chamber. Separate fan (Figure 3, Item 4) from pump. 300757580_002_C2 - 05/2019 - © Leybold... -
Page 9: Disassemble Belt Chamber Cover
Procedure: Using 5mm Allen key remove the 4 screws (Figure 4, item 1) which secure CAUTION belt chamber cover (Figure 4, item 2). Carefully separate belt chamber cover (Figure 4, item 2) from pump. 300757580_002_C2 - 05/2019 - © Leybold... -
Page 10: Disassemble Fail Safe Gear Ii
3) by 1 rotation with 5mm Allen key and remove 4x bolts. Remove the bushing (Figure 5, Item 4), o-ring (Figure 5, Item 2) and fail-safe gears (Figure 5, Item 1 & Item 5). 300757580_002_C2 - 05/2019 - © Leybold... -
Page 11: Loose The Motor Screws And Push Motor To Loosen The Belt
To enable belt removal, using an 8mm Allen key loosen the 4 screws CAUTION (Figure 6 items 1 & 2) which secure the motor and pulley to the bearing flange (Figure 6 items 3). Push motor towards pump body to loosen the belt. 300757580_002_C2 - 05/2019 - © Leybold... -
Page 12: Disassemble Tooth Belt
1.3.7 Disassemble tooth belt Items: Tooth belt Procedure: Take tooth belt out of gears and pulley. CAUTION Clean gears and pulley with recommended cleaning agent. Old toothed belt to be disposed of once removed. 300757580_002_C2 - 05/2019 - © Leybold... -
Page 13: Assemble Tooth Belt
Taking a new tooth belt, fit it using following technique on both gears and CAUTION pulley. To install the new tooth belt on pulley, keep imprint readable in front. Then move the pulleys 3 times in running direction. 300757580_002_C2 - 05/2019 - © Leybold... -
Page 14: Tighten Tooth Belt By Tool
(Hz). Tighten the belt with wrench 19mm, Ensure the frequency by pushing the belt, Value 83+/- 5 Hz. Move pulley 5 to 8 times. 300757580_002_C2 - 05/2019 - © Leybold... -
Page 15: Motor Screw
Rotate Pulley by hand 5 to 8 times and make sure that the belt is tightened and running correctly. NOTICE Note: If no torque tool is available closest to the exact torque is acceptable. 300757580_002_C2 - 05/2019 - © Leybold... -
Page 16: Fail Safe Gear Assembly
NR Polyamid (Figure 11, Item 1) and change it in case of necessary. Place the bolts for fastening the gears. Fasten plastic gear with 2 bolts (10Nm). 300757580_002_C2 - 05/2019 - © Leybold... - Page 17 Rotate the motor pully counter clockwise by hand for three revolutions. Make sure that the gears do not touch. 10 If gears touch, repeat step 28-32. Note: If no torque tool is available closest to the exact torque is acceptable. 300757580_002_C2 - 05/2019 - © Leybold...
-
Page 18: Belt Chamber Cover Assembly
4 cap screws (Figure 12, Item 1) using 5mm Allen key. Tighten cap screws by hand and torque each screw to 2.5Nm. NOTICE Note: If no torque tool is available closest to the exact torque is acceptable. 300757580_002_C2 - 05/2019 - © Leybold... -
Page 19: Fan Assembly
(Figure 13, Item 4,3,2 and 1) using 8mm Allen key. Tighten cap screw by hand and torque screw to 20Nm after locking fan by NOTICE span- ner. Note: If no torque tool is available closest to the exact torque is acceptable. 300757580_002_C2 - 05/2019 - © Leybold... -
Page 20: Drive Enclosure Assembly
(Figure 14, Item 1) using 5mm Allen key. Tighten cap screws by hand and torque each screw to 2.5Nm. Note: If no torque tool is available closest to the exact torque is acceptable. NOTICE 300757580_002_C2 - 05/2019 - © Leybold... -
Page 21: Electric Connection
460 V, 60 Hz ±10% (“Star connection of motor”) Figure 15 – Electrical connection view 1.3.15 Electric connection Procedure: Open the motor terminal box. Do the electrical connection (certified electrician) before installing the enclosure. See manual for the pump. 300757580_002_C2 - 05/2019 - © Leybold... -
Page 22: Cable Route
Belt replacement Figure 16 – Cable route view 1.3.16 Cable route Procedure: Feed in the cable as shown in the picture. 300757580_002_C2 - 05/2019 - © Leybold... -
Page 23: Verify Motor Rotation
In case of a wrong direction swap two phases at the motor clamping board. 300757580_002_C2 - 05/2019 - © Leybold... -
Page 24: Install The Enclosure
Figure 18 – Drive enclosure assembly 1.3.18 Install the enclosure Procedure: Reassemble the pump enclosure shown on the picture. CAUTION Use 10mm spanner to tighten the 8 screws which secure pump enclosure on frame. 300757580_002_C2 - 05/2019 - © Leybold... - Page 25 Notes © 300757580_002_C2- 05/2019- Leybold...
- Page 26 Sales: F: +44-13-7273 7301 Leybold GmbH T: +1-724-327-5700 Leybold Malaysia sales.ln@leybold.com Sales Area North F: +1-724-333-1217 Leybold Singapore Pte Ltd. No. Service: Branch Office Berlin Service: 1 Jalan Hi-Tech 2/6 T: +44-13-7273 7320 Industriestrasse 10b T: +1-724-327-5700 Kulim Hi-Tech Park...
Need help?
Do you have a question about the VARODRY VD 65 and is the answer not in the manual?
Questions and answers