Table of Contents
Advertisement
Available languages
Available languages
Quick Links
MANUALE DI ISTRUZIONI
MANUALE DI ISTRUZIONI
IT
IT
PER UN USO CORRETTO E SICURO DELL'APPARECCHIO
PER UN USO CORRETTO E SICURO DELL'APPARECCHIO
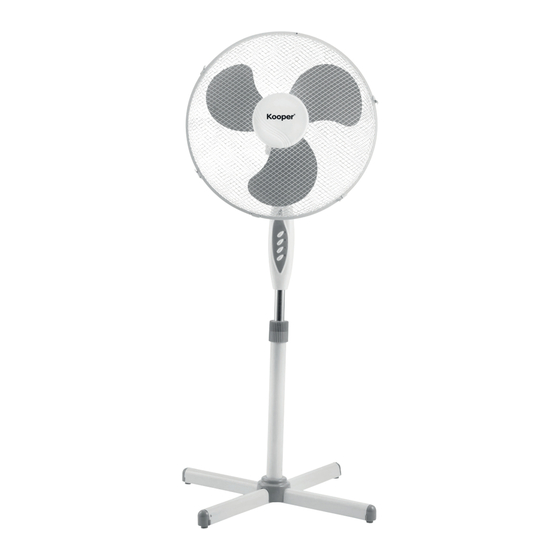
VENTILATORE A PIANTANA
Aria
ART. 2408574
VENTILATORE A PIANTANA
ART. 2408553 - 2408554
POTENZA MAX. ASSORBITA 50 W
220/230 V
50/60 HZ
•
•
POTENZA MAX. ASSORBITA 45 W • 230 V • 50 HZ
UNICAMENTE AD USO DOMESTICO
ATTENZIONE! LEGGERE ATTENTAMENTE LE ISTRUZIONI E LE AVVERTENZE CONTENUTE NEL PRESENTE LIBRETTO E CONSERVARLE PER ULTERIORI CONSULTAZIONI PER
TUTTA LA VITA DEL PRODOTTO. ESSE INFATTI FORNISCONO INDICAZIONI IMPORTANTI PER QUANTO RIGUARDA LA FUNZIONALITÀ E LA SICUREZZA NELL'INSTALLAZIONE,
NELL'USO E NELLA MANUTENZIONE DEL PRODOTTO.
PRODOTTO IMPORTATO DA GALILEO SPA - STRADA GALLI N. 27 - 00019 VILLA ADRIANA (RM) - MADE IN EXTRA UE
PRODOTTO IMPORTATO DA GALILEO SPA - STRADA GALLI N. 27 - 00019 VILLA ADRIANA (RM) -
MADE IN EXTRA UE
Advertisement
Table of Contents

Subscribe to Our Youtube Channel
Related Manuals for Kooper Aria


Summary of Contents for Kooper Aria
- Page 1 MANUALE DI ISTRUZIONI MANUALE DI ISTRUZIONI PER UN USO CORRETTO E SICURO DELL’APPARECCHIO PER UN USO CORRETTO E SICURO DELL’APPARECCHIO VENTILATORE A PIANTANA Aria ART. 2408574 VENTILATORE A PIANTANA ART. 2408553 - 2408554 POTENZA MAX. ASSORBITA 50 W 220/230 V 50/60 HZ •...
- Page 2 AVVERTENZE GENERALI DI SICUREZZA ATTENZIONE! LEGGERE ATTENTAMENTE LE ISTRUZIONI E LE AVVERTENZE CONTENUTE NEL PRESENTE LIBRETTO E CONSERVARLE PER ULTERIORI CONSULTAZIONI PER TUTTA LA VITA DEL PRODOTTO. ESSE INFATTI FORNISCO- NO INDICAZIONI IMPORTANTI PER QUANTO RIGUARDA LA FUNZIONALITA’ E LA SICUREZZA NELL’INSTALLAZIONE, NELL’USO E NELLA MANUTENZIONE DEL PRODOTTO.
-
Page 3: Manutenzione
• Riparare da sé l’apparecchio può essere estremamente pericoloso. • Un apparecchio fuori uso deve essere reso inutilizzabile, tagliando il cavo di alimentazione elettrica, prima di buttarlo. • Pulire l’apparecchio utilizzando un panno umido. Non usare solventi o detersivi abrasivi. •... - Page 4 (1) Fissare l’alloggio dell’interruttore ruotandolo verso sinistra. (2) Collocare il foro nella parte inferiore dell’alloggio dell’interruttore sopra l’asta interna. (3) Ruotare l’alloggio dell’interruttore, collocare la vite e ruotarla in senso orario finché non sarà fissat ATTENZIONE PRESTARE ATTENZIONE AL MONTAGGIO DELLA BASE PER ASSICURARE LA GIUSTA STABILITA’...
- Page 5 3. Variazione dell’inclinazione: spegnere il ventilatore prima di apportare qualsiasi mo- difica all’inclinazione. Il flusso d’aria può esser direzionato in alto o in basso muovendo semplicemente la griglia di sicurezza del ventilatore. 4. Variazione dell’altezza: allentare la manopola dell’altezza, posizionare il ventilatore...
- Page 6 INSTRUCTION MANUAL MANUALE DI ISTRUZIONI PER UN USO CORRETTO E SICURO DELL’APPARECCHIO FOR A CORRECT AND SAFE USE OF THE APPLIANCE VENTILATORE A PIANTANA Aria ART. 2408574 STAND FAN ART. 2408553 - 2408554 POTENZA MAX. ASSORBITA 50 W 220/230 V 50/60 HZ •...
-
Page 7: General Safety Instructions
GENERAL SAFETY INSTRUCTIONS WARNING! READ THE INSTRUCTIONS CONTAINED IN THIS MANUAL VERY CAREFULLY AND SAVE THEM FOR FU- TURE REFERENCE DURING THE WHOLE LIFE OF THE PRODUCT SINCE THEY PROVIDE IMPORTANT INDICATIONS ABOUT THE FUNCTIONING AND THE SAFETY OF INSTALLATION, USE AND MAINTAINANCE OF THE PRODUCT. RISK FOR CHILDREN! •... -
Page 8: List Of Parts
MANTEINANCE 1. As further precaution, it is recommended to use pliers to remove the front grid. Remove the screws and the clips from the outside plastic ring in order to disassemble the front grid. 2. Use the appliance in dry places with a low humidity level. 3. - Page 9 (1) Fix the switch slot turning it to the left. (2) Place the hole on the lower part of the switch housing on top of the inside rod. (3) Turn the switch slot, place the screw and tighten it counter-clockwise to secure it. WARNING INSTALL THE BASE CORRECTLY IN ORDER TO GIVE THE APPLIANCE THE RIGHT STABILITY...
-
Page 10: Blade Assembly
BLADE ASSEMBLY 1.Motor components 2.Rear grid 3.Grid blocking nut 4.Blade 5.Nut lock 6.Front grid 7.Screw 1.Install the rear grid on the motor and secure it using the nut. 2.Place the blade on the drive shaft and secure it with the nut lock. 3.Mount the front grind with one of the 2 following methods according to the model of the fan in your possession: (1)Install the grid placing the hook on top of the rear grid. - Page 11 TRATTAMENTO DEL DISPOSITIVO ELETTRICO ED ELETTRONICO A FINE VITA Informazione agli utenti per il corretto smaltimento del prodotto ai sensi della Direttiva Europea 2012/19/EU e del D.lgs N. 49/2014. Caro consumatore, è importante ricordarti che, come buon cittadino, avrai l’obbligo di smaltire questo prodotto non come rifiuto urbano, ma di effettuare una raccolta separata. Il simbolo sopra indicato e riportato sull’apparecchiatura indica che il rifiuto deve essere oggetto di “raccolta separata”.
Need help?
Do you have a question about the Aria and is the answer not in the manual?
Questions and answers