Table of Contents
Advertisement
Quick Links
Advertisement
Table of Contents

Related Manuals for Zephyr Pisa ZPI-E24BG


Summary of Contents for Zephyr Pisa ZPI-E24BG
- Page 1 WWW.ZEPHYRONLINE.COM Pisa ZPI-E24BG, ZPI-E24BG290 ZPI-E24BW, ZPI-E24BW290 ZPI-E30BG, ZPI-E30BG290 ZPI-E30BW, ZPI-E30BW290 ZPI-E36BG, ZPI-E36BG290 EN Use, Care, and Installation Guide FR Guide d’utilisation, d’entretien et d’installation JAN21.0101...
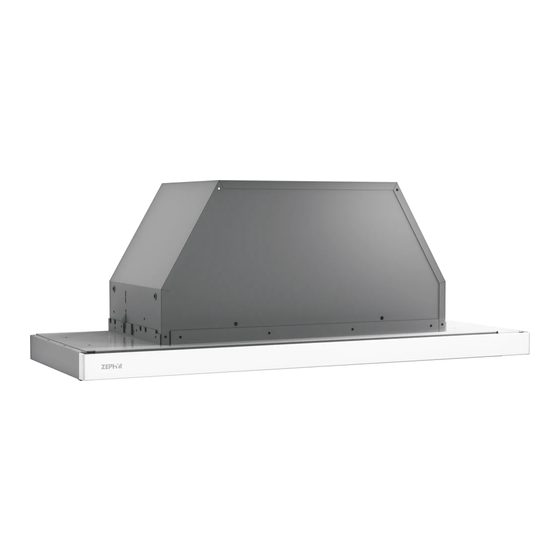
- Page 2 C O R E P I S A U N D E R - C A B I N E T Pisa Use, Care, and Installation Guide...
-
Page 3: Table Of Contents
Contents ZEPHYRONLINE.COM Page Safety Information ................4-6 Types of Safety Warnings ..............4 General Safety ..................4-5 Operation ................... 6 Electrical Requirements ..............6 List of Materials ................... 7 Installation Instructions ..............8-20 Ducting Calculation Sheet ..............8 Mounting Height, Clearance, & Ducting ........... 9-10 Ducting Options ................. -
Page 4: Safety Information
C O R E Safety Information P I S A U N D E R - C A B I N E T READ AND SAVE THESE INSTRUCTIONS Your safety and the safety of others are very important. WARNING We have provided many important safety messages in this manual for your appliance. - Page 5 Safety Information ZEPHYRONLINE.COM READ AND SAVE THESE INSTRUCTIONS WARNING WARNING WARNING - TO REDUCE THE RISK OF FIRE, ELECTRIC SHOCK, WARNING - TO REDUCE THE RISK OF INJURY TO PERSONS OR INJURY TO PERSONS, OBSERVE THE FOLLOWING: IN THE EVENT OF A RANGE TOP GREASE FIRE, OBSERVE THE FOLLOWINGa: Installation work and electrical wiring must be done by qualified person(s) in accordance with all applicable codes and...
-
Page 6: Operation
C O R E Safety Information P I S A U N D E R - C A B I N E T READ AND SAVE THESE INSTRUCTIONS Operation Always leave safety grilles and filters in place. Without these components, operating blowers could catch onto hair, fingers and loose clothing. -
Page 7: List Of Materials
List of Materials ZEPHYRONLINE.COM Parts Supplied (1) 6” round damper (pre-installed) (1) hood body with sliding glass (2) upper installation brackets (2) lower installation brackets (24” model only) (1) LumiLight LED, 6W (24” model) (2) LumiLight LED, 6W (30” & 36” models) (1) hardware package HARDWARE PACKAGE CONTENTS (4) M3.5x10 (24”... -
Page 8: Installation Instructions
C O R E Installation Instructions P I S A U N D E R - C A B I N E T Ducting Calculation Sheet Equivalent number Equivalent number Duct pieces Duct pieces length x used Total length x used Total 3- 1/ 4”... -
Page 9: Mounting Height, Clearance, & Ducting
Installation Instructions ZEPHYRONLINE.COM Mounting Height, Clearance, & Ducting i n . ” m i n . ” m ” m ” NOTE: The Pisa minimum mount height for electric cook tops is 20”, but is 24” for gas cook tops. Pisa Use, Care, and Installation Guide... - Page 10 C O R E Installation Instructions P I S A U N D E R - C A B I N E T Mounting Height, Clearance, & Ducting A minimum of 6” round ducting must be used to maintain maximum air flow efficiency. Always use rigid type metal ducts only.
-
Page 11: Ducting Options
Installation Instructions ZEPHYRONLINE.COM Ducting Options WARNING Fire Hazard: NEVER exhaust air or terminate ductwork into spaces between walls, crawl spaces, ceilings, attics, or garages. All exhaust must be ducted to the outside, unless using the recirculating option. Use single wall rigid metal ductwork only. Fasten all connections with sheet metal screws and tape all joints w/ certified Silver Tape or Duct Tape. -
Page 12: Hood Specifications
C O R E Installation Instructions P I S A U N D E R - C A B I N E T 2-3/16” (24”) 5-3/16” (30”) 8-3/16” (36”) 19-9/16” 23-7/8” (24”), 29-7/8” (30”), 35-7/8” (36”) FRONT Ø6” 9-7/8” BACK Ø6”... -
Page 13: Electrical Supply
Installation Instructions ZEPHYRONLINE.COM Electrical Supply WARNING Electrical wiring must be done by qualified person(s) in accordance with all applicable codes and standards. Turn off electrical power at service entrance before wiring. For personal safety, remove house fuse or open circuit breaker before beginning installation. Do not use extension cord or adapter plug with this appliance. -
Page 14: Preparing The Cabinet
C O R E Installation Instructions P I S A U N D E R - C A B I N E T Preparing the Cabinet 7” 7-3/4” 7” *6-3/16” 19-7/8” *Dimension used for rear ducting option FIG. B front edge glass handle FIG. -
Page 15: Horizontal Ducting Conversion
Installation Instructions ZEPHYRONLINE.COM Horizontal Ducting Conversion These steps below convert 6” round vertical ducting to horizontal ducting. If you plan on having vertical ducting, please skip these steps. 1. Remove aluminum mesh filter. From inside the hood, disconnect blower plug located toward the right side interior of hood body. -
Page 16: Mounting The Hood
C O R E Installation Instructions P I S A U N D E R - C A B I N E T Mounting the Hood 1. Prepare electrical wiring and ducting in cabinet. Location of the junction box and blower outlet can be found on page 12. - Page 17 Installation Instructions ZEPHYRONLINE.COM Mounting the Hood 6. 24” Models Only. From inside the hood, secure (1) M4x8 screw into each lower installation bracket. The position of this screw is adjustable to accommodate various cabinet bottom thicknesses. 7. 24” Models Only. Install (2) 3/16x40 screws into the captive nuts of each upper installation bracket.
- Page 18 C O R E Installation Instructions P I S A U N D E R - C A B I N E T Mounting the Hood 10. Place 6” round ducting over blower collar and secure with aluminum duct tape. If using hood in ductless recirculating mode, refer to the Ductless Recirculation section.
-
Page 19: Ductless Recirculation
Installation Instructions ZEPHYRONLINE.COM Ductless Recirculation Ductless recirculation is intended for applications where an exhaust duct work is not possible to be installed. When converted, the hood functions as a recirculating hood rather than an exhaust hood. Fumes and exhaust from cooking are drawn and filtered by a set of optional charcoal filters. The air is then purified and re-circulated back within the home. - Page 20 C O R E Installation Instructions P I S A U N D E R - C A B I N E T 4. In order to recirculate the air properly, a return air vent must be installed to allow recycled air to be returned to the kitchen.
-
Page 21: Features & Controls
Features & Controls ZEPHYRONLINE.COM Slide Controls Blower On/O I I I BLOWER ON/OFF/SPEED SELECTION LIGHTS OFF/DIM/BRIGHT NOTE: Pisa Use, Care, and Installation Guide... -
Page 22: Maintenance
C O R E Maintenance P I S A U N D E R - C A B I N E T Hood & Filter Cleaning Surface Maintenance Do not use corrosive detergents, abrasive detergents or oven cleaners. Do not use any product containing chlorine bleach or any product containing chloride. Do not use steel wool or abrasive scrubbing pads which will scratch and damage surface. -
Page 23: Lumilight Led
To order parts, visit us online at http://store.zephyronline.com. LumiLight LED In the unlikely event that your LumiLight LED fails, please contact Zephyr to order replacement parts. See the list of parts and accessories page for part numbers and contact information. -
Page 24: Wiring Diagram
C O R E Wiring Diagram P I S A U N D E R - C A B I N E T ZPI-E24BS WIRING DIAGRAM BLACK GREEN BODY MOTOR BODY Pisa Use, Care, and Installation Guide... -
Page 25: Troubleshooting
Troubleshooting ZEPHYRONLINE.COM Possible Problem Possible Cause Solutions After installation, the The power source is not turned ON. Make sure the circuit breaker and the unit’s unit doesn’t work. power is ON. The power line and the cable Check the power connection with the unit is locking connector is not connecting connected properly. - Page 26 C O R E Troubleshooting P I S A U N D E R - C A B I N E T Possible Problem Possible Cause Solutions The hood is not venting Using the wrong size of ducting. Change the ducting to the correct size. out properly.
-
Page 27: List Of Parts & Accessories
List of Parts & Accessories ZEPHYRONLINE.COM Description Part Number Replacement Parts LumiLight LED, 6W Z0B0049 Aluminum Mesh Filter 50200054 Optional Accessories Recirculating Kit ZRC-00PI Replacement Charcoal Filter Z0F-C0PI To order parts, visit us online at http://store.zephyronline.com. Pisa Use, Care, and Installation Guide... -
Page 28: Notes
C O R E Notes P I S A U N D E R - C A B I N E T Pisa Use, Care, and Installation Guide... -
Page 29: Limited Warranty
Zephyr Ventilation, LLC (referred to herein as “we” or “us”) warrants to the original consumer purchaser (referred to herein as “you” or “your”) of Zephyr products (the “Products”) that such Products will be free from defects in materials or workmanship as follows:... -
Page 30: Product Registration
Prompt registration helps in more ways than one. Ensures warranty coverage should you need service. Ownership verification for insurance purposes. Notification of product changes or recalls. Zephyr Ventilation | 2277 Harbor Bay Pkwy. | Alameda, CA 94502 | 1.888.880.8368 Pisa Use, Care, and Installation Guide...
Need help?
Do you have a question about the Pisa ZPI-E24BG and is the answer not in the manual?
Questions and answers