Advertisement
Quick Links
ASSEMBLY INSTRUCTIONS
Note: The gazebo needs to be installed in cooperation with five people.
The following tools are not included and needed for assembly:
Pistol Drill Tape Measure Hammer
If you have comments or questions, please contact BJ's Wholesale Club at 1-800-934-1204.
If you have any issues with the product, do not return the product back to the store.
For any questions, replacement parts or issues about our product, call Sunjoy Customer
Service 1(866) 578 6569. For further assistance, please email us at bj@sunjoygroup.com.
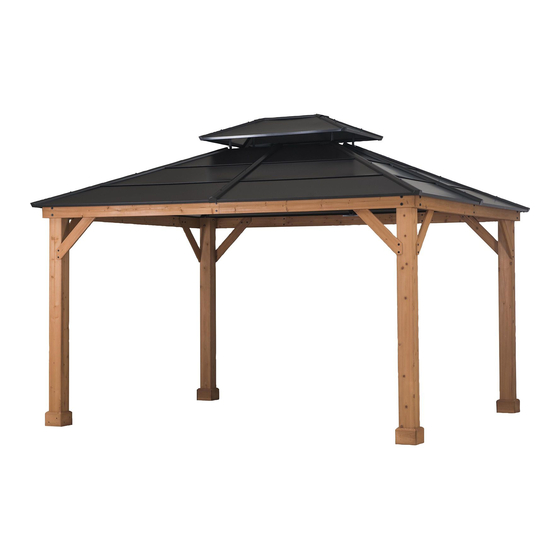
10'x12'
HARDTOP GAZEBO
WITH CEDAR WOOD POST
A R T I C L E # 1 8 5 65 0
Screwdriver
Ladder
5 people
Advertisement

Subscribe to Our Youtube Channel
Related Manuals for Berkley Jensen 185650


Summary of Contents for Berkley Jensen 185650
- Page 1 10’x12’ HARDTOP GAZEBO WITH CEDAR WOOD POST A R T I C L E # 1 8 5 65 0 ASSEMBLY INSTRUCTIONS Note: The gazebo needs to be installed in cooperation with five people. The following tools are not included and needed for assembly: Pistol Drill Tape Measure Hammer Screwdriver Ladder...
-
Page 2: Important Safety Instructions
Important Safety Instructions Warning! To reduce the risk of serious injury, read the following safety instructions before assembling and using the gazebo. Caution! Always keep children under close supervision while they are using or around this product. Never leave children unattended. This product is intended for outdoor use only. - Page 3 Part List Description Label Part Number Part Image Long left beam P000401052 Long right beam P000401054 Short left beam P000401056 Short right beam P000401058 Long beam P000401060 Short beam 1 P000401049 Short beam 2 P000401050 Post P000200544 Base cover P006100201 Arc support 1 P005000525 Arc support 2...
- Page 4 Small top cover P00080011501 Small top roof P00080011401 cover Base P00010014301 Slanting bar P00050058101 connector Middle beam P00050058201 connector Long pipe 1 P00570020301 Long pipe 2 P00570020401 Short pipe 1 P00570020501 Short pipe 2 P00570020601 Top slanting bar P00060069801 Big top middle P00060069701 beam Long side left roof...
- Page 5 Short side left roof P00070025101 panel 1 Short side right roof P00070025201 panel 2 Short side left roof P00070025301 panel 2 Short side right roof P00070025401 panel 3 Big roof panel P00080011601 cover Top slanting bar P00080011701 Big roof top beam P00060069901 (short side) 1 Big roof top beam...
-
Page 6: Hardware Pack
Hardware Pack Bolt M10*205 H010010276 Flat Washer M6 H050030001 Screw M5*35 H030050037 Nut M6 H040010004 Screw M5*25 H030050036 Bolt M6*15 H010020011 Bolt M6* 45 H010020016 Bolt M8*35 H010030083 Bolt M8*35 H030030010 Bolt M6*55 H010020009 Bolt M8*25 H010030084 Non-slip Nuts H040050020... - Page 7 Flat Washer M8 H050030002 Flat Washer H050030003 Screw M10*80 H030010031 Stake Φ8*180 H070010003 Bolt M6*35 H010020013 M3 Drill H090990002 T-Nut H040090005 M8*20 T-Nut H040090004 M8*8 Wrench M6 H090010017 Allen Key M8 H090030005 Wrench M10 H090010015...
- Page 8 Install the post base.
- Page 9 Connect the Long beam to short beam.
- Page 10 Install the Long Beam & Short Beam.
- Page 11 Tighten the Screw.
- Page 12 Install the Middle beam connector.
- Page 13 Connect the Beam to the post.
- Page 14 Connect the Beam to the post.
- Page 15 Install the Arc support. d1=d2 Rt∠90 Assembly Tip: We advise to measure the distance between d1 & d2 to ensure that they are equal in distance. In addition, best to use a Bubble Level Gauge” to ensure all the posts are upright.
- Page 16 Connect the Big top frame to Big top bar.
- Page 17 Install the Top slanting bar.
- Page 18 Install the Big top middle beam.
- Page 19 Install the Small top support (C1) & Beam Small top connector (D1) & Hook(E1).
- Page 20 Connect the Installed 12 step to roof.
- Page 21 Install the Top roof small panel.
- Page 22 Install the Small top cover (H1) & Small top roof cover(I1).
- Page 23 Install the Big roof top beam.
- Page 24 Install the Big roof top beam.
- Page 25 Install the Big roof top beam.
- Page 26 Install the Long pipe.
- Page 27 Install roof panel.
- Page 28 Install roof panel.
- Page 29 Install roof panel.
- Page 30 Install the B ig roof panel cover (N3) & Top slanting bar (O3).
- Page 31 Secure the assembled gazebo to the lawn with the stakes (PP).
-
Page 32: Cleaning And Maintenance
Cleaning and Maintenance Check all screws and nuts periodically for tightness, fastening them again as required. Disassemble the gazebo in the reverse order of the assembly steps. Always disassemble the gazebo completely. A partially disassembled gazebo is not stable enough to resist wind and bad weather, and therefore can be damaged and/or cause damage.
Need help?
Do you have a question about the 185650 and is the answer not in the manual?
Questions and answers
need to order part G3 roof panel