Table of Contents
Advertisement
Quick Links
Advertisement
Table of Contents

Related Manuals for YOSensi YO Analog


Summary of Contents for YOSensi YO Analog
- Page 1 YO Analog User guide v2.0...
- Page 2 YO Analog User guide v2.0 page 2/15 Release notes Released Version Key changes 11.06.2021 Initial release. Change of power supply from 100~240 V AC, 50/60 Hz 13.12.2021 to 6 - 30 V DC, 5 - 21 V AC. REV 2.0.0...
-
Page 3: Table Of Contents
YO Analog User guide v2.0 page 3/15 Content Release notes Product description Overview Applications IoT system components Device configuration Configurable parameters Quick start guide Node configuration YO Suite configuration Payload description Revision history REV 2.0.0 www.yosensi.io... -
Page 4: Product Description
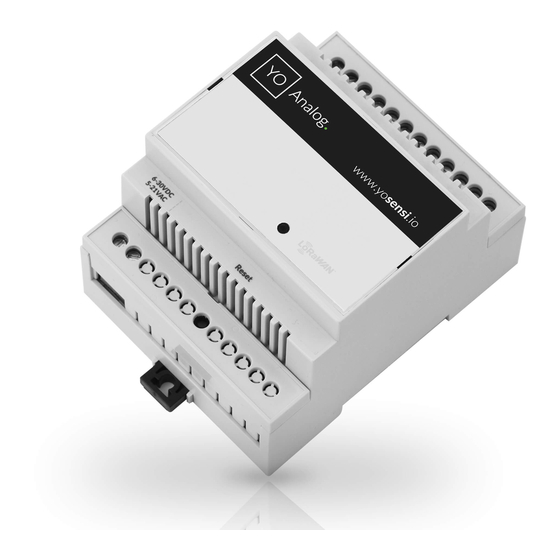
4/15 Product description Overview YO Analog is used for measuring analogue signals. The device has six configurable measurement inputs, each of which can be used in one of two modes: voltage input (0–10 V) or current input (4–20 mA). -
Page 5: Applications
5/15 Applications Based on the data collected by YO Analog, it is possible to monitor measurement values of devices and processes in automation. IoT system components Typical IoT systems consist of 3 main elements (Figure 2), brief described below. In order to set communication, each element must be properly configured. -
Page 6: Device Configuration
YO Analog User guide v2.0 page 6/15 Device configuration Configurable parameters A few parameters must be set in order to send data to the gateway. The default firmware is configured in ABP connection type with predefined deveui, appkeyota, keyotaa, nwkskey by MCU. - Page 7 4. Measuring threshold (measlevel) YO Analog is checking for changes in signal every 0,5 s. If consecutive measurement readings differ by more than specified by this parameter (see equation below) the present value and timestamp will be saved and prepared for transmission to the server (see figure 4).
- Page 8 YO Analog User guide v2.0 page 8/15 Figure 4 Threshold algorithm visualisation. - measinter, t - time between consecutive measurements, p … p - measurements values, th - measlevel [%]...
-
Page 9: Quick Start Guide
2. Make sure you have your Bluetooth LE adapter turned on and working properly. 3. Download and run the CLI tool in the terminal/console application. 4. Connect power supply pins (regardless of polarity) of the YO Analog device. See Quick Installation Guide for step by step instructions. -
Page 10: Yo Suite Configuration
IoT systems management (like the root directory in operating systems). It can be created only by Yosensi staff, and all clients using YO Suite have it created for them by default (in case of any problems you can find us on support@yosensi.io). - Page 11 (list_dev_params). Select a model that is compatible with your device—it affects the number of charts, its placement and data source (YO Analog model). You can also set the node’s ‘Location’ , if locations have been pre-defined. If you haven’t defined a suitable location, leave this field set at <None>.
- Page 12 YO Analog User guide v2.0 page 12/15 Figure 7 Node creation form. 5. Every new node must be added in OTAA mode. You must then switch its type to ABP after activation in YO Suite by changing the Node configuration. Click on the link in the ‘Node Name’...
-
Page 13: Payload Description
‘DETAILS’ tab (‘Node Name’ column link) and clicking ‘CHARTS’ . Payload description If you want to connect to your own server you need the payload decoder which can be found at https://yosensi.io/support. Example of YO Analog payload with description: 02:00:00:09:2e:00:11:01:00:00:2e:00:11:02:01:90:2e:00:11:03:04:1a:32:00:11:04:00:00:32:0 0:11:05:01:e6:32:00:11:06:00:f1 Payload header... - Page 14 YO Analog User guide v2.0 page 14/15 Second measurement 0x2E 0x00 0x11 0x02 0x01 0x90 type = 11, addr_len = 1, val = 400 md [s] = 0 addr = 2 prec = 2 meas_len = 2 (4,0 [mA]) Third measurement...
-
Page 15: Revision History
YO Analog User guide v2.0 page 15/15 Revision history Date Version Changes 11.06.2021 Initial release Change of power supply from 100~240 V AC, 50/60 Hz 13.12.2021 to 6 - 30 V DC, 5 - 21 V AC. REV 2.0.0 www.yosensi.io...
Need help?
Do you have a question about the YO Analog and is the answer not in the manual?
Questions and answers