LEHNER POLARO Operating Manual
Hide thumbs
Also See for POLARO:
- Operating manual with parts list (31 pages) ,
- Operating instructions with parts list (32 pages)

Related Manuals for LEHNER POLARO


Summary of Contents for LEHNER POLARO
- Page 1 Operating manual with parts list POLARO ® Last updated: March 2022 Serial number: ..........Original operating manual 1143136-26...
- Page 2 Publisher's information Publisher's information LEHNER Maschinenbau GmbH Häuslesäcker 14 D-89198 Westerstetten Tel.: +49 7348 95 96 22 Fax: +49 7348 959 640 www.lehner.eu info@lehner.eu This document must not be distributed, duplicated or utilised, nor may its content be communicated without express permission.
-
Page 3: Table Of Contents
Determining the spreading width...............14 5 Maintenance/Cleaning..................15 Maintenance....................15 Cleaning..................... 16 Transport and storage................16 6 Appendix......................17 EC Declaration of conformity..............17 Identification....................19 Distribution box reference list..............20 Parts list POLARO®.................. 21 7 POLARO® error message list................ 23 POLARO 3 / 34 ®... - Page 4 Table of contents 8 Care and maintenance instructions POLARO®..........24 9 Spring steel...................... 25 10 Attaching POLARO® to the Husqvarna Rider P 500 series......27 4 / 34 POLARO ®...
-
Page 5: What You Should Know
What you should know 1 What you should know 1.1 Foreword Congratulations on purchasing the POLARO®, a high-quality and innovative product. Thank you for this expression of confidence. Thanks to its advanced design, meticulous material selection, state-of-the art manufacturing techniques and the precision work of our employees, this equipment meets all efficiency, quality, reliability and value requirements. -
Page 6: Technical Data For Polaro
Subject to proper use, LEHNER Maschinenbau GmbH provides a 12-month warranty period on the POLARO ® Prior to any work being carried out, repairs under guarantee must be agreed with LEHNER Maschinenbau GmbH. For replacement parts, additional expenses are charged for any changes made to cables and plugs by the customer. -
Page 7: About Your Safety
• Spreading tables and additional information about the spreading material used can be requested from the • spreading material manufacturer in question. LEHNER Maschinenbau GmbH cannot accept any liability for the storage and application of the spreading • material. POLARO 7 / 34 ®... -
Page 8: Mounting And Start-Up
The load carrying capacity shall be based on the regulations for load bearing equipment. Warning! Risk of injury. Do not operate the spreader if there are technical safety defects. The POLARO can be mounted on the front or rear of the tractor, off-road vehicle or ATV. ® The POLARO can be mounted using an auxiliary bracket. -
Page 9: Electrical Connection
As an alternative for slow-flowing salt, a refined salt agitator is available as an accessory. This agitator is not suitable for grit or sand. 1. Mount the hopper 2. Check that the hopper is well seated in the hopper platform (see arrow). 3. Check that the POLARO is securely fixed. ® 2.3 Electrical connection... -
Page 10: Fill The Spreading Material Hopper
Risk of injury. Never open the hopper or touch the spreading disc when the drive motor is running. 1. Fill the hopper with spreading material immediately before starting work. 2. After filling, close the hopper. 10 / 34 POLARO ®... -
Page 11: Operating The Polaro
Operating the POLARO ® 3 Operating the POLARO ® 3.1 Controls on the control panel On/off button Display Rotary control for spreading disc speed Slider closed indicator Slider open indicator Start/Stop button 3.2 Switching spreading disc and agitator on and off... -
Page 12: Setting The Speed
With setting 0 the slider is almost closed and on 20 it is fully open. Within this range, the slider opening is infinitely adjustable. 3.5 Opening/closing the slide Before opening the slider, make sure that the POLARO is switched off, as otherwise it will immediately start ®... -
Page 13: Setting The Spreading Width
Operating the POLARO ® Slider closed Slider open This symbol indicates whether the slider is open or closed. If the spreader is switched off without first closing the slider, the controller automatically closes the slider. Slider adjustment The slider elements are spaced to prevent clogging of the spreading material. To prevent the slider from moving across the opening and closing it in the case of vibrations and impacts, a pulse about every 60 seconds regulates the slider position according to the Open or Closed setting. -
Page 14: Settings
With setting 0 the slider is almost closed and on 20 it is fully open. Now by turning down again with a modified scale setting, the correct value can be found. When starting spreading, however, the ejected quantity and the lateral distribution must be checked. 14 / 34 POLARO ®... -
Page 15: Maintenance/Cleaning
The drive motor of the spreading disc should be cleaned and greased at the end of the season. This extends the service life of the motor. Carry out the maintenance work correctly, otherwise the manufacturer's warranty may be invalidated. POLARO 15 / 34 ®... -
Page 16: Cleaning
For transportation, only the trolley available as a special accessory should be used. Warning! Risk of injury from stored device falling over. Place the device on a clean, dry surface with an adequate load capacity. For extended periods, the device may only be stored completely empty. 16 / 34 POLARO ®... -
Page 17: Appendix
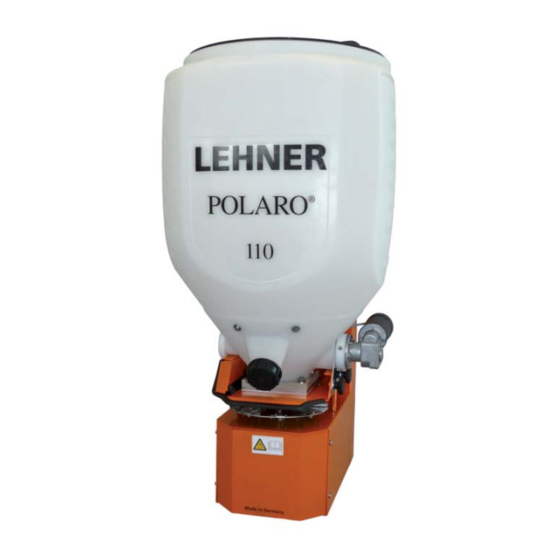
70/110/170/250 Function: The POLARO® is a spreader for distributing road salt, gravel, sand, fertilizer or granulates of various kinds. It is produced in four sizes. These differ in the hopper capacity, 70, 110, 170 and 250 litres. A manually operated slide sets a constant flow rate of the medium being spread. A separate motor drives a slowly rotating agitator, which can be installed both horizontally and vertically. - Page 18 Appendix Declaration of Conformity OM version We, LEHNER Maschinenbau GmbH , D 89198 Westerstetten, GERMANY, Tel. +49 7348959622 declare on our sole responsibility that the product: 12-Volt Spreader Description LEHNER Brand POLARO 70 Type / Model Identification Serial numbers dating from 2021 and onwards...
-
Page 19: Identification
Appendix 6.2 Identification The serial number of the spreader is applied to the rear of the frame. Note the serial number in this operating manual so that it is readily available for inquiries. POLARO 19 / 34 ®... -
Page 20: Distribution Box Reference List
Appendix 6.3 Distribution box reference list POLARO Standard LAS Control cable Junc�on box white blue brown green Mixer motor grey pink blue blue black spreading disc motor violet yellow blue-long grey/pink red-long slide motor blue-short red/blue red-short brown/green free ’not assigned’... -
Page 21: Parts List Polaro
Appendix 6.4 Parts list POLARO ® POLARO 21 / 34 ®... - Page 22 Appendix POLARO® Object Designation Parts number Parts number Husqvarna LEHNER Spreading disc without magnets 582592602 81361 Slide motor, long cable 582592201 80109 Slide motor, short cable 582592101 80108 Spreading disc motor 582592301 80141 Hopper Lid 582591501 80107 POLARO LAS control panel...
-
Page 23: Polaro® Error Message List
POLARO error message list ® 7 POLARO error message list ® Error Cause Solution E1 - Supply voltage Please ensure adequate power supply. < 9 V. E2 = Agitator Occurs if the agitator has not freed Switch off the control panel Empty hopper and... - Page 24 Care and maintenance instructions POLARO ® 8 Care and maintenance instructions POLARO ® ® LEHNER POLARO Update 07/2011 Care and maintenance instructions Lubricate the drive motor on the agitator weekly during the season. You will find the lubricating nipple for this on the front panel on the left.
- Page 25 Load relief roof with and without spring steel Spring steel Please install spring steel if required. This may in cases of: bridging, where there is uneven spreading or poor flow of the spreading material. Installation can result in increased operating noise. POLARO 25 / 34 ®...
- Page 26 Guide the M6x25 screw through the agitator in the holes marked red and mate with the M6 capped nut. Please note that the capped nut also has to be glued into place, for example with a Loctite adhesive. 26 / 34 POLARO ®...
- Page 27 Attaching POLARO to the Husqvarna Rider P 500 series ® 10 Attaching POLARO to the Husqvarna Rider P 500 series ® P500D = 3x P500DX/HX = 5x POLARO 27 / 34 ®...
- Page 28 Attaching POLARO to the Husqvarna Rider P 500 series ® ( - ) 28 / 34 POLARO ®...
- Page 29 Attaching POLARO to the Husqvarna Rider P 500 series ® POLARO 29 / 34 ®...
- Page 30 Attaching POLARO to the Husqvarna Rider P 500 series ® P500 DX/HX ( + ) P500D P500 DX/HX ( - ) ( + ) 30 / 34 POLARO ®...
- Page 31 Attaching POLARO to the Husqvarna Rider P 500 series ® 44mm POLARO 31 / 34 ®...
- Page 32 Attaching POLARO to the Husqvarna Rider P 500 series ® 45° 32 / 34 POLARO ®...
- Page 33 Attaching POLARO to the Husqvarna Rider P 500 series ® ( - ) POLARO 33 / 34 ®...
- Page 34 Attaching POLARO to the Husqvarna Rider P 500 series ® 34 / 34 POLARO ®...
Need help?
Do you have a question about the POLARO and is the answer not in the manual?
Questions and answers