Table of Contents
Advertisement
Quick Links
LEHNER
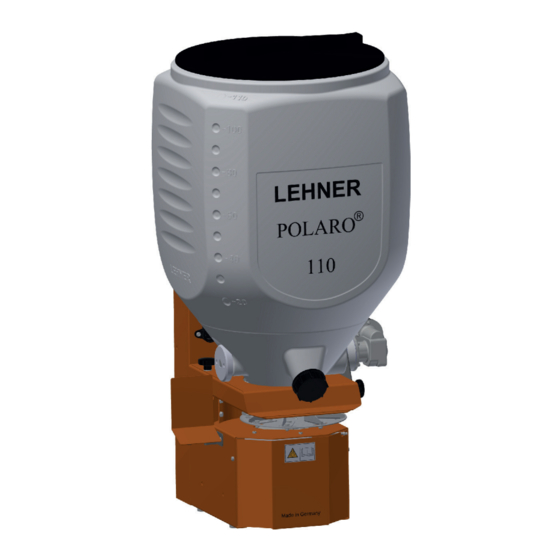
POLARO
E
®
Operating instructions with spare parts list
Control LAS 4
Software from version 3.3
Status: January 2019
Serial number: ..................................................................
Software version: ..............................................................
Original operating
instructions
Advertisement
Table of Contents

Related Manuals for LEHNER POLARO E


Summary of Contents for LEHNER POLARO E
- Page 1 LEHNER POLARO ® Operating instructions with spare parts list Control LAS 4 Software from version 3.3 Status: January 2019 Serial number: ..............Software version: .............. Original operating instructions...
- Page 3 LEHNER Maschinenbau GmbH Haeuslesaecker 14 D-89198 Westerstetten, Germany Tel.: +49 7348 9596-22 Fax: +49 7348 9596-40 www.lehner.eu info@lehner.eu This document may not be distributed, duplicated or utilised, nor may its content be communicated without express permission. Compensation will be sought for all breaches. All rights reserved in the event of patent, utility model or design registration.
-
Page 4: Table Of Contents
Table of contents Contents What you should know ............6 1.1 Foreword ....................6 1.2 About these operating instructions ............6 1.3 Description of the POLARO E ..............7 ® 1.4 Intended use................... 9 1.5 Reasonably predictable misuse ............. 9 1.6 Warranty ....................9 1.7 About your safety ................. - Page 5 Table of contents Settings and displays ............24 4.1 Making settings ..................24 4.2 Language ..................... 25 4.3 Selecting the empty indicator ............... 25 4.4 Setting the signal for the electronic lifting gear control (EHR) ....26 4.5 Adjusting the empty indicator ............... 27 4.6 Displaying the spreader type ..............
-
Page 6: What You Should Know
1 What you should know 1.1 Foreword Congratulations on purchasing the POLARO E, a high-quality and ® innovative product. Thank you for placing your trust in us. Thanks to its advanced design, meticulous material selection, state- of-the art manufacturing techniques and the precision work of our employees, this equipment meets all efficiency, quality, reliability and value requirements. -
Page 7: Description Of The Polaro ® E
1 What you should know Warnings Warnings in these operating instructions are identified as follows: Danger! Warning against immediate danger. Non-observance of appropriate measures may result in death or severe personal injury or serious damage to property. Warning! Warning of possible danger. Death, severe personal injury or serious damage to property are possible. Caution! Warning of possible dangerous situations. - Page 8 1 What you should know...
-
Page 9: Intended Use
1 What you should know 1.4 Intended use The POLARO E is a spreader for spreading winter salt, grit, sand and ® granulated fertilisers. 1.5 Reasonably predictable misuse Only use on approved carrier vehicles with suitable on-board electrical systems and sufficient structural integrity. Only use for approved media. The equipment must not be used for spreading crop protection products. -
Page 10: About Your Safety
• Spreading tables and additional information about the spreading material used can be requested from the spreading material manufacturer in question. • LEHNER Agrar GmbH cannot accept any liability for the storage and application of the spreading material. -
Page 11: Mounting And Starting
2 Mounting and starting 2.1 Installing the frame Warning! Risk of injury due to high component weight The spreader is significantly heavier when the hopper is full. Attention must therefore be paid to the proper mounting of the spreader on the carrier vehicle, and to the carrying capacity of the vehicle tailgate or other panels. If necessary, fit with assistance. -
Page 12: Mounting The Hopper And Deflector Plate
2 Mounting and starting 2.2 Mounting the hopper and deflector plate Warning! Risk of injury and damage to the spreader As an alternative for slow-flowing salt, a refined salt agitator is available as an accessory. This agitator is not suitable for grit or sand. 1. Mount the hopper. 2. C heck whether the hopper fits well in the hopper platform at the bottom. 3. U sing screws, attach the included deflector plate to the spreader (arrow). -
Page 13: Electrical Connection
2 Mounting and starting 2.3 Electrical connection Caution! Risk of functional failures Faulty or incorrectly dimensioned plugs and cables can lead to malfunctions. Only use original plugs and cables, or ones approved by the manufacturer. Caution! Danger of short circuit Ensure that the cable is not routed over any sharp edges. -
Page 14: Filling The Spreading Material Hopper
2 Mounting and starting 3. Plug the spreader cable into the 16-pin socket of the control panel. To ensure an optimum electrical power supply, use the supplied battery cable. Caution! Danger of short circuit Observe the installation instructions of the adapter manufacturer. -
Page 15: Operating The Polaro ® E
3 Operating the POLARO ® 3.1 Controls on the control console 1 Switching on / off 2 Display 3 Opening and closing the slide Slide open: green LED lights up Slide closed: yellow LED lights up 4 Setting the speed or slide opening 5 Switch to change between speed and slide 6 Empty indicator... -
Page 16: Indicators In The Display
3 Operating the POLARO ® 3.2 Indicators in the display Speed Slide 1 Arrow denotes the active line 2 Spreading disc speed 3 Slide opening 4 OK sign for open slide Blockade Teller Disc blockade Slide not open Schieb n. auf For more information, see chapter 6.4 - Troubleshooting. -
Page 17: Switching The Spreading Disc And Agitator On And Off
3 Operating the POLARO ® 3.3 Switching the spreading disc and agitator on and off Danger! Risk of injury by accident When travelling on public roads and streets, observe the road traffic regulations. Warning! Risk of injury The drive motor starts immediately when switched on. Make sure that no-one is in the danger area when you switch the system on. - Page 18 3 Operating the POLARO ® Autostart/automatic freewheeling If a motor is difficult to start due to heavy loads, start the motor up to 10 times in alternating motor direction. For this, the slider must be open so that the material flows out. If the agitator or spreading disc still cannot break free, the motor is automatically switched off. The following message is shown in the display: Agitator stationary, if the agitator cannot break free. Disc blockage, if the spreading disc cannot break free.
-
Page 19: Setting The Speed
3 Operating the POLARO ® 3.4 Setting the speed If necessary, press the toggle switch to > RPM select the speed; the arrow points to Slide the first line in the display. Press the key to set the rotary speed. The speed can be steplessly adjusted from 40 - 600 rpm. -
Page 20: Opening/Closing The Slide
3 Operating the POLARO ® 3.6 Opening/closing the slide Warning! Risk of injury The drive motor starts immediately when switched on. Make sure that no-one is in the danger area when you switch the system on. Press the button to open or close the slide. >... -
Page 21: Setting The Working Width
3 Operating the POLARO ® Troubleshooting The following steps must be observed when the error message Slide not open or Slide not closed appears in the display. 1. Switch off the control console. 2. Wait 15-20 seconds. 3. Switch on the control console. The slide automatically opens/closes by approx. -
Page 22: Setting The Spreading Zone
3 Operating the POLARO ® 3.8 Setting the spreading zone You can set the zone within which the spreading material is to be spread. This allows you to spread the material on a pavement for example when the carrier vehicle is running along the road. Spread the spreading material in the left-hand direction of travel (when mounted at the rear): turn the spindle (arrow) clockwise. -
Page 23: Calibrating The Empty Indicator
3 Operating the POLARO ® 3.10 Calibrating the empty indicator Caution! Machine automatically calibrates the empty indicator. Risk of injury! Danger! The drive motor starts immediately when switched on. Make sure that no-one is in the danger area when you switch the system on. -
Page 24: Settings And Displays
4 Settings and displays The control element can be used to make the following settings: Language Empty indicator selection EHR signal EHR cycle Empty indicator adjustment Spreader type Number of spreaders The EHR cycle and number of spreaders are not needed when working with the POLARO ®... -
Page 25: Language
4 Settings and displays 4.2 Language Press the key to set the language. Language German Press the toggle switch: the setting is saved and now press the next menu item main switch: the setting is saved and the machine switched off. 4.3 Selecting the empty indicator Press the button to select the empty Empty... -
Page 26: Setting The Signal For The Electronic Lifting Gear Control (Ehr)
4 Settings and displays 4.4 Setting the signal for the electronic lifting gear control (EHR) When the spreader is equipped with the headland manager accessory, the hydraulic signal of the tractor can be detected. This signal is emitted when lifting or lowering. The spreader's factory setting is to output the signal when lifting. -
Page 27: Adjusting The Empty Indicator
4 Settings and displays 4.5 Adjusting the empty indicator Depending on the requirement and spreading material, the empty indicator can be set to respond earlier or later. The value for the empty indicator to switch on (if the spreading material falls below a certain fill level) can be adjusted from -50 to +50. -
Page 28: Displaying The Spreader Type
4 Settings and displays 4.6 Displaying the spreader type The control is provided for a variety of spreaders. The POLARO B (Bosch motor) is programmed at the factory. ® Press the toggle switch: the setting is Spreader type 2 saved, press the next menu item POLARO main switch: the setting is saved and the machine switched off. - Page 29 4 Settings and displays Sensor signal 1. Secure the sensor in the joint area of the lower link. 2. Secure the magnetic encoder to the lower link. 3. Set the position of the sensor and the magnetic encoder. Maximum distance 10 mm. • Hydraulics lowered: Sensor not in field of magnetic encoder.
-
Page 30: Checks
4 Settings and displays 4.8 Checks Voltage check To check the operating voltage (in Volts), the spreader must be on. Press the button for 5 seconds. Voltage 14.0 V The operating voltage is displayed for 8 seconds. Factory recommendation min. 12.6 V. Performance check The motor is set at the factory. -
Page 31: Spreading Widths And Turning Procedure
4 Settings and displays 4.9 Spreading widths and turning procedure The reference values for the spreading width are provided in the information supplied by the relevant spreading material supplier. Turning down 1. Put the spreader in the carton or put the carton over the spreader to catch the spreading material. -
Page 32: Maintenance And Cleaning
5 Maintenance and cleaning 5.1 Maintenance Warning! Risk of injury Disconnect the electrical power supply for maintenance work. Warning! Risk of injury due to high component weight If necessary, remove with assistance. Warning! Risk of injury Always wear goggles, dust mask and gloves when cleaning. Comply with the regulations of the spreading material manufacturer. - Page 33 5 Maintenance and cleaning 1. Disconnect agitator plug. 2. Unscrew upper and lower knurled screws 1 on both sides. 3. Remove the hopper 2. 4. Unscrew knurled screws 3 and take off cover plate 4. 5. Unscrew the nuts 5 using a 17 mm spanner. 6.
- Page 34 5 Maintenance and cleaning Drive motor The drive motor of the spreading disc should be cleaned and greased at the end of the season. This extends the service life of the motor. Carry out the maintenance work correctly, otherwise the manufacturer's warranty may be invalidated.
-
Page 35: Cleaning
5 Maintenance and cleaning 5.2 Cleaning Warning! Risk of injury Disconnect electrical power supply for cleaning work. Caution! Risk of injury Always wear goggles, dust mask and gloves when cleaning. Comply with the regulations of the spreading material manufacturer. The hopper can be almost fully emptied by means of the residual discharge. -
Page 36: Appendix
EC Declaration of Conformity EG – Konformitätserklärung in accordance with the EC Machinery Directive 2006/42/EC, Appendix II, 1.A im Sinne der EG-Maschinenrichtlinie 2006/42/EG,Anh.II, 1.A Manufacturer: Hersteller: LEHNER Agrar GmbH LEHNER Agrar GmbH Häuslesäcker 5-9 Häuslesäcker 5-9 89198 Westerstetten 89198 Westerstetten Person resident in the Community who is entitled to assemble the relevant technical documents: In der Gemeinschaft ansässige Person, die bevollmächtigt ist, die relevanten technischen Unterlagen... -
Page 37: Identification
Note the serial number in these operating instructions so that it is readily available for inquiries. The hardware and software versions LEHNER GmbH are briefly displayed when the control LAS4 V3.3 console is plugged in. Note the software version in these operating instructions so that it is readily available for inquiries. -
Page 38: Distribution Box Layout Plan
6 Appendix 6.3 Distribution box layout plan Polaro „E“ with spindle motor „Bosch“ white brown + red green Spreading disc motor - blue blue + red black violet - blue Spindle motor blue/2 red/1 rot/blue PIN 1 brown/green PIN 3 brown PIN 4 white... -
Page 39: Troubleshooting
6 Appendix 6.4 Troubleshooting... -
Page 40: Spare Parts List For The Polaro ® E
6 Appendix 6.5 Spare parts list for the POLARO ®... - Page 41 POLARO E motor box, fully mounted 82087 Strike point adjustment motor retaining plate 81361 Spreading disc POLARO E 80541 Guide rails POM POLARO E disc drive 80496 Base plate POLARO E from POM 81406 Front and bottom plate POLARO E 80542...
-
Page 42: Spare Parts List For The Control Unit
6 Appendix 6.6 Spare parts list for the control unit... - Page 43 6 Appendix Object Number Article No. Name 82375 LAS 4 control panel 80642 Bracket, top part, pivot-mounted 80643 Bracket, bottom part, pivot-mounted 80492 Battery cable 2x 4 mm² 5 m...
-
Page 44: Spare Parts List For The Hopper
6 Appendix 6.7 Spare parts list for the hopper... - Page 45 6 Appendix Object Number Article No. Name 81125 Motor support, agitator with grease nipple 81126 Agitator shaft bearing POLARO 81165 Agitator shaft POLARO 80107 Cover for hopper, black 80393 Cover for residual discharge, black 81892 Agitator, stainless steel 81127 Hopper support for agitator POLARO 80142 Agitator motor POLARO 80168...
-
Page 46: Spare Parts List For The Saline Agitator
6 Appendix 6.8 Spare parts list for the saline agitator... - Page 47 6 Appendix Object Number Article No. Name 81174 Motor platform for saline agitator 81189 Stirrer blade 110-170-250 small 81191 Agitator rod for saline agitator without bracket 80476 Agitator motor for saline agitator 80453 Motor cover, saline + screw conveyor 81328 Relief roof POLARO 170 saline agitator, left and right 81561...
-
Page 48: Wacker Spreading Chart
6 Appendix 6.9 Wacker spreading chart...
Need help?
Do you have a question about the POLARO E and is the answer not in the manual?
Questions and answers