Table of Contents

Related Manuals for CHESTER Voyager Lathe


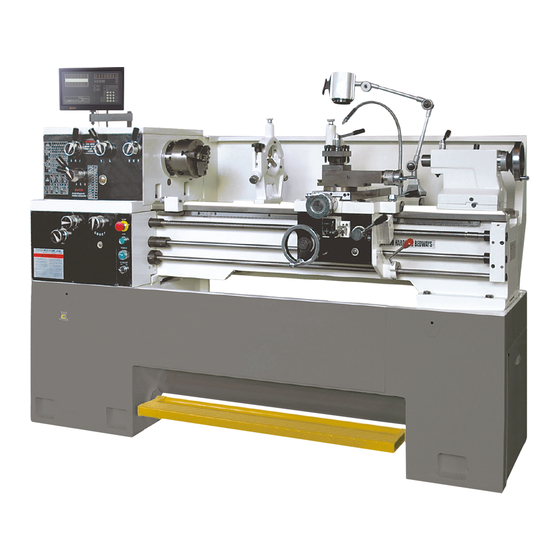
Summary of Contents for CHESTER Voyager Lathe
- Page 1 Voyager Lathe Operation Manual Chester UK Ltd Clwyd Close Hawarden Industrial Park Hawarden Chester CH5 3PZ Tel: 01244 531631 s a l es@c h es t e r m a c h i n e t oo l s . com...
- Page 2 Warning! Read and understand the entire instruction manual before attempting to assemble or operate the machine. This lathe has been designed and is intended to be used by trained and experienced personnel only. If you are not familiar with the correct and safe operation of a lathe, do not operate this machine until you have been properly trained.
-
Page 3: Table Of Contents
Contents Warnings! Specifications Uncrating and Cleaning Chuck Preparation Lubrication Coolant Preparation Electrical Connections General Description Controls Break-In Procedure Operation Adjustments Removable Gap V-Belts Aligning the Tailstock to Headstock Foundation Plans Parts List and Drawings... -
Page 4: Specifications
1. Specifications Swing Through the Gap 508mm Distance Between Centres 1000mm Hole Through Spindle 40mm Spindle Nose D1-4 Taper in Spindle Nose Spindle Taper Adaptor Number of Spindle Speeds Range of Spindle Speeds 40-1800rpm Number of Longitudinal and Cross Feeds Range of Longitudinal Feeds (mm/rev) 0.043-0.653 Range of Cross Feeds (mm/rev) -
Page 5: Uncrating And Cleaning
2. Uncrating and Cleaning Remove the crate from around the lathe carefully. Unbolt the lathe from the shipping crate base. Choose a suitable location for the lathe that is dry, is well lit and that has enough room around to be able to perform maintenance to the entire machine. Place two steel rods or pipes (of sufficient strength) into the four holes (A, Fig 1) of the lathe stand. -
Page 6: Chuck Preparation
3. Chuck Preparation Note: Before removing the chuck form the spindle, place a wooden block across the guideways under the chuck. Support the chuck while turning the three camlocks ¼ turn counter-clockwise with the chuck key. Carefully remove the chuck from the spindle and place it onto an adequate work surface. -
Page 7: Lubrication
Lubrication Caution! The lathe must be kept well lubricated at all times and all reservoirs filled to their operating levels before starting the machine. Failure to comply may cause serious damage to the lathe! Headstock: The oil must be filled to the indicator mark on the oil sight glass (A, Fig 3). - Page 8 Fig. 5 Apron: The oil must be filled to the indicator mark on the oil sight glass (A, Fig 6). The oil can be poured into the apron once the plug (B, Fig 6) has been removed. To drain the oil from the apron, unscrew the drain plug with an 8mm Allen key, drain the oil completely and tighten the drain plug back into place.
- Page 9 Compound Rest: Lubricate one ball oiler (B, Fig 8) once daily Carriage: Lubricate the four ball oilers (D, Fig 8) once daily Fig. 8...
-
Page 10: Coolant Preparation
Coolant Preparation Caution! Follow the manufactures recommendations for use, care and disposal. Remove the rear access cover on the tailstock end and make sure that the coolant tank has not shifted during transport and is properly located under the recovery chute. -
Page 11: General Description
of the phases into the machine before re-connecting the power and restarting the machine. Warning! Disconnect the machine from the power source, failure to do so may cause serious injury! Main Motor: Change the wires according to the diagram on the inside of the motor junction box. - Page 12 Carriage The carriage (A, Fig 11) is made from high quality cast iron, the sliding parts are ground smooth. The cross-slide is mounted on the carriage and moves on a dove tailed slide which can be adjusted for play by adjusting the gibs. The compound slide (B, Fig 11) is mounted on the cross slide (C, Fig 11) and can be rotated through 360°.
-
Page 13: Controls
The gearbox (D, Fig 12) is made from high quality cast iron and is mounted to the left side of the machine bed. Steady Rest The steady rest (E, Fig 12) serves as a support for shafts on the free tailstock end. The steady rest is mounted on the bed way and secured below with bolt, nut and locking plate. - Page 14 Jog Switch (D, Fig 13), press and release immediately to advance the spindle position. Headstock Gear Change Levers (E, Fig 13) – located on the front of the headstock, move the levers according to the speed chart for the desired speed setting. Leadscrew/Feed Direction Lever (F, Fig 13) –...
- Page 15 Feed Selector (E, Fig 14) – located in the centre front of the apron, pushing the lever to the left and dfown activates the cross feed function, pulling the lefer to the right and up activates the longitudinal function. Half-Nut Engagement Lever (Thread Cutting) (F, Fig 14) –...
-
Page 16: Break-In Procedure
Main Power Switch (not shown) – located on the electrical box door on the rear of the lathe. Turns the main power to the lathe on and off. Break-In Procedure During manufacture and testing, this lathe has been run in the low rpm range for three hours. - Page 17 Remove the hex socket cap screws (D and/or E, Fig18) depending on the which gear is being changed. Install the new gear(s) and tighten into place with a hex socket cap screw. Loosen the nut (B, Fig 18) and move the quadrant back so that the teeth mesh on the gears and tighten the nuts (A and B).
- Page 18 Thread Cutting Set the forward/reverse lever (A, Fig 19) up or down depending on the desired direction. Set the selectors (A, B, C and D, Fig 20) to the desired rate. Note:for feeding, lever D will be set at “C” or “E” depending on the desired thread.
- Page 19 Inch Lead and Feed Table Compound Rest...
-
Page 20: Adjustments
The compound rest is located on top of the cross slide and can be rotated around 360°. Loosen the two socket head cap screws (A, Fig 21) on the compound rest base. Use the calibrated dial (B, Fig 21) below the rest to assist the placement of the compound rest to the desired angle. - Page 21 Compound Rest Follow the same procedure as the cross-slide adjustment to adjust the compound rest, the rear gib screw is shown (A, Fig 22), the front gib strip (Not shown) is by the handwheel. Tailstock If the handle will not lock the tailstock, follow the procedure below: Lower the handle to the unlocked position.
- Page 22 From steel bar stock of approximately 2” diameter, cust a piece approximately 8” long. Place 2” of the abr into the chuck and tighten the chuck. Do not use the tailstock or centre to support the other end. Set up and cut along five inches of the bar.
- Page 23 Slide the taper pins into their respective holes and seat using a mallet. Install the nuts on the taper pins finger tight. Install the six socket head cap screws and tighten securely. Belt Replacement and Adjustment isconnect the machine from the power source. pen the end gear cover and lower cover on the headstock side.
-
Page 24: Aligning The Tailstock To Headstock
Aligning the Tailstock to the Headstock Before proceeding, the headstock should be aligned, see above. Fit a 12” ground steel bar between the centres of the headstock and tailstock (Fig 27). Fit a dial indicator to the compound slide and traverse the centre line of the bar using the carriage movement. - Page 25 Parts List and Diagrams Headstock Assembly I...
- Page 26 Part No. Description Size...
- Page 27 C6136-02755 Plug GH1440K-02119 Headstock Cover TS-150308 Hex Socket Cap Screw M6x25 GH1440K-02509 Gasket GB3452.1 O-Ring 14x2.65 GH1440W-04-38 Gear GH1440K-02749 Shaft GB75-85 Set Screw M6x10 GB77-85 Set Screw M6x6 GH1440W-04-37 Gear GH1440W-04-36 Gear GH1440K-02754 Set Screw GH1440W-04-43 Shift Arm GB879-86 Spring Pin 5x30 GB894.2-86 Retainer Fork...
- Page 28 GB2089 Spring 0.9x9x40 GH1440K-02753 Shaft GH1440K-02755 Shaft GH1440K-02747 Shaft GB1096-79 4x10 GB3452.9-86 O-Ring 10.6x2.65 GH1440W-04-56 Collar TS-150303 Hex Socket Cap Screw M6x12 GH1440W-04-57 Collar GH1440W-04-58 Handle Body 04-62 Washer GH1440K-02756 Set Screw GB3452.9-82 O-Ring 25x2.65 GB70 Hex Socket Cap Screw M12x35...
- Page 29 Headstock Assembly II...
- Page 30 Part No. Description Size TS-150404 Hex Socket Cap Screw M8x16 04-12 Washer 04-11 Pulley GH1440K-02722 Break Block GB897-86 5x16 11-09 Shaft GB894.2-86 Retainer Ring GB9877.1-88 Spacer SD25x45x7 GB117-86 A6x26 GB894.2-86 Retainer Ring 11-11 Shaft 04-13 Cover 04-14 Gasket GB894.2-86 Retainer Ring GB/T276-94 Ball Bearing 6205/p5...
- Page 31 GH1440W-04-24 Cover TS-150308 Hex Socket Cap Screw M6x35 TS-150303 Hex Socket Cap Screw M6x14 11-15 Brake Shoe Assembly...
- Page 32 Headstock Assembly III...
- Page 33 Part No. Description Size TS-150303 Hex Socket Cap Screw M6x12 GB894.2-86 Retainer Ring GB/T276-94 Ball Bearing 6204/p5 04-53 Bearing Cap 04-52 Gasket GB894.2-86 Retainer Ring GB/T276-94 Ball Bearing 6005/p5 GH1440W-04-16 Washer TS-150304 Hex Socket Cap Screw M6x16 GH1440W-04-29 Cover 04-60 Gasket GB70-85 Hex Socket Cap Screw...
- Page 34 GH1440K-02102 Plug GH1440K-02732 Shaft 04-43 Gear 04-42 Spline Shaft 04-48 Gasket 04-49 Cover GB9877.1-88 Spacer SD25x40x7 GH1440W-04-65 Collar...
- Page 35 Gearbox Assembly I...
- Page 36 Part No. Description Size 05-73 Plug GH1440K-05101 Gearbox Casting 05-07 Front Cover TS-1532031 Flat Head Machine Screw M4x10 GH1440A-05719 Oil Cover GH1440K-05501 Cover GB70 Hex Socket Cap Screw M8x35 GH1440W-05-09 Bracket TS-153101 Pan Head Machine Screw M3x6 GH1440W-05-11 Electrical Plate 05-61 Gasket TS-150408...
- Page 37 05-08 Washer TS-150304 Hex Socket Cap Screw M6x16 04-90 Indicator Disk TS-150101 Pan Head Machine Screw M3x6 05-70 Indicator Disk TS-152401 Set Screw M8x8 05-72 Spring GB308-84 Steel ball 05-10 Locating Disk GH1440W-05-27 Oil Sight 05-59 Locating Disk GH1440W-05-13 Shift Hub TS-150308 Hex Socket Cap Screw M6x35...
- Page 38 Gearbox Assembly II...
- Page 39 Part No. Description Size TS-150304 Hex Socket Cap Screw M6x16 05-42 Washer 05-41 Gear TS-150305 Hex Socket Cap Screw M6x20 05-39 Flange 05-38 Gasket GB/T276-94 Ball Bearing 6004/P5 GB1096-79 5x14 05-40 Gear Shaft Assembly GB/T276-94 Ball Bearing 16002/95 05-36 Shaft Collar GB1096-79 5x75 05-27...
- Page 40 05-17 Flange GB3452.1-82 O-Ring 15x2.65 GB301-84 Ball Bearing 8104 GH1440K-05704 Shaft GH1440K-05705 Shaft 05-18 Flange 05-53 Gasket 05-20 05-22 Gear 05-24 Collar 05-26 Gear GB894.1-15 Retainer Ring GH1440A-05306 GB117 5x40 GH1440K-05727 GH1440K-05307 GB117 4x30 GH1440K-05726...
- Page 41 Apron Assembly I...
- Page 42 Part No. Description Size TS-150302 Hex Socket Cap Screw M6x10 GH1440A-06303 Half Nut GH1440A-06103 Bracket TS-150304 Hex Socket Cap Screw M6x16 06-33 TS-152303 Set Screw M6x10 TS-150408 Hex Socket Cap Screw M8x40 TS-152401 Set Screw M8x8 06-39 Spring GB308-84 Steel Ball 06-01 Casting 06-42-1...
- Page 43 Apron Assembly II...
- Page 44 Part No. Description Size 06-44 Bushing 06-43 Shaft GB894.1-86 Retainer Ring 06-28 Gear 06-26 Collar GB879-86 5x35 06-20 Gear TS-152301 Set Screw M6x6 GB1096-79 5x15 06-19 Shaft GB3452.1-82 O-Ring 17x1.8 GB896-86 Retainer Ring 06-10 Bushing 06-15-1 Collar 06-15 Cluster Gear 50T/20T TS-152401 Set Screw...
- Page 45 Saddle and Cross Slide Assembly...
- Page 46 Part No. Description Size GH1440K-07402 GH1440K-04706 Gib Adjusting Screw GB818-85 Pan Head Machine Screw M5x10 GH1440K-04504 Plate Wiper GH1440K-04102 Cross Slide Body GH1440K-04704 Clamp Nut GH1440A-04726 GB1155 Oiler TS-150305 Hex Socket Cap Screw M6x20 GH1440K-04705 Sleeve TS-152401 Set Screw M8x8 GB6172-86 Hex Nut GH1440A-04701...
- Page 47 GH1440K-04501 Plate Wiper GH1440K-04707 Rear Pressure Plate GH1440A-04108 GB6170-86 Lock Nut TS-152306 Set Screw M6x20 TS-150404 Hex Socket Cap Screw M8x20 GB4141.14 Knob M10x50 GH1440A-04733 Handle Shaft GH1440A-04730 GH1440A-04502 Oil Cap GH1440K-04712 Lock Stud GH1440K-04708 Front Pressure Plate 14-04 Connected Tube GH1440A-18707A Lamp Bracket GH1440K-04502...
- Page 48 Top Slide and Tool Post...
- Page 49 Part No. Description Size GH1440A-04707 Tool Post GB83-88 Tool Lock Screw 10x50 C0632-04704 Handle Hub GH1440A-04705 Handle Shaft GB4141.14-BM10X50 Knob GH1440A-04706 Spacer GH1440A-04708 Tool Post Pin GH1440A-04709 Tool Post Position Pin GB2089-80 Spring 1x8x11 GH1440A-04725 Clamp Nut GB1155-89 Oiler GH1440A-04105 Compound Slide TS-150305 Hex Socket Cap Screw...
- Page 50 Tailstock Assembly...
- Page 51 Part No. Description Size GH1440K-03713 Index Ring TS-150305 Hex Socket Cap Screw M6x20 GH1440K-03102A GB301-84 Thrust Bearing 8103 GB1096-79 4x20 GH1440K-03702A Screw TS-150304 Hex Socket Cap Screw M6x16 GH1440K-03301A GB4141.14 Knob BM10x50 GH1440K-03705 Lever Handle GH1440K-03704 Lever Support GH1440K-03703 Washer GB1155-89 Oiler GH1440K-03101...
- Page 52 Bed and Shaft Assembly...
- Page 53 Part No. Description Size GB818-85 Pan Head Screw M8x10 GH1440K-18702 Electrical Plate TS-1540061 M8x10 GH1440K-01737 Stud GH1440K-18701 Electrical Box Cover GH1440K-01102 TS-150605 Hex Socket Cap Screw M10x40 TS-1540061 M8x10 GB881-86 8x60 GH1440K-01101 GB5781-86 Hex cap Bolt M16x50 TS-150306 Hex Socket Cap Screw M6x25 GB879-85 6x35...
- Page 54 GH1440K-01703 Collar GH1440K-01702 Shift Collar TS-152305 Set Screw M6x16 GB119-86 16x40 GB73 Set Screw M12x40 GH1440A-01717 Index Ring GB879-85 GH1440A-01716 Shaft GH1440K-01105 Bracket GB79-85 Set Screw M6x10 GH1440A-01108 Plate TS-150304 Hex Socket Cap Screw M6x20 GB879 5x40...
- Page 55 Stand and Brake Assembly...
- Page 56 Part No. Description Size GH1440K-01707 Splash Guard GB823 Head Screw M6x10 GH1440K-01710 Cover GH1440K-01715 Coolant Tank GH1440K-01109 Bed Stand CK6125-01702 Water Leaking Chip Guard GH1440K-01716 Wire Conduit 1440R-01708 Wire Conduit Support GB818 Pan Head Machine Screw M5x80 GB818 Pan Head Machine Screw M5x80 1440R-01706 Locking Plate...
- Page 57 GH1440A-01723 Cover GH1440K-22701A Brake Pedal GH1440K-22717 Stand Front...
- Page 58 End Gear Assembly...
- Page 59 Part No. Description Size 15-02 Gear 15-04 Gear TS-150204 Hex Socket Cap Screw M5x16 05-41 Washer 04-50 Gear GH1440K-05104 Quadrant GB-1096-79 5x14 05-43 Thread Shaft 05-45 Colalr BB6103 Bearing 6103 GB893.1-86 Retaining Ring 05-65 Gear 120/127 05-44 Washer TS-154007 TS-154008 GB97.2-85 Washer GH1440K-05720...
- Page 60 Follow Rest Part No. Description Size GH1440W-09-02 Knob TS-152301 Set Screw M6x6 10B-04 Bushing 10B-05 Screw 10B-02 Sleeve 10B-06 Brass Finger TS-1540041 Hex Nut TS-152301 Set Screw M6x6 GH1440W-09-01 Body Casting TS-150310 Hex Socket Cap Screw M6x45...
- Page 61 Thread Dial Assembly Part No. Description Size 09-11 Body GB70 Hex Socket Cap Screw M6x60 09-13 Shaft 09-14 Gear 09-15 Gear 09-16 Gear 09-17 Gear 09-18 Collar 09-19 Gear 09-20 Washer GB70 Hex Socket Cap Screw M6x16...
- Page 62 Steady Rest...
- Page 63 Part No. Description Size GH1440W-09-02 Knob TS-152301 Set Screw M6x6 10A-05 Bushing 10A-06 Screw 10A-07 Sleeve 10A-08 Brass Finger 10A-03 Upper Body Csting GB119-86 8x40 TS-152306 Set Screw M6x20 TS-1540041 Hex Nut GH1440W-010-01 Lower Body casting 10A-02 Lock pin TS-1540081 Hex Nut TS-1550081 Washer...
- Page 64 Electrical Components...
- Page 65 Part No. Description Size GH1440K3-KM1 Magnetic Starter LC1-D1801 GH1440K3-KM2 Magnetic Starter LC1-D1801 GH1440K-KM3 Coolant Pump Contactor CA2-DN40 GH1440K-KA1 Control Contactor CA2-DN40 GH1440K-FU1 2 Amp Fuse RT21-20/2 GH1440K-FU2 5 Amp Fuse RT21-20/5 GH1440K3-FR1 Motor Overload Relay LR2-D1314 GH1440K3-FR2 Motor Overload Relay LR2-D1304 GH1440K3-TC Transformer...
- Page 66 Safety Guard Cover Part No. Description Size GH1440K-19701 Protection Guard GHB1340A-19501E Protection Guard Visual Glass ZX-19704E Fixing Rod Handle HY32-1 Spring Lock Washers Hexagon Nut Hexagon Thin Nuts Plain Washers Cross Recessed Pan Head Screws M4x12 Plain Washers Hex Socket Cap Head Screws M6x16 GHB1340A-19703E Rest Bar...
Need help?
Do you have a question about the Voyager Lathe and is the answer not in the manual?
Questions and answers