Table of Contents
Advertisement
Quick Links
Advertisement
Table of Contents

Related Manuals for Salente G4


Summary of Contents for Salente G4
- Page 1 MANUAL MODEL VERSION / DATE l. / 16.04.2021...
-
Page 3: Table Of Contents
Table of contents Welcome to use ................. 4 Product Introduction ................4 Key Function .................. 4 Parts List..................5 Robot .................... 6 Charging Base ................6 Installation..................7 Instructions..................12 ON/OFF..................12 Sweep/Pause ................. 12 Charging ..................12 Cleaning mode................13 Fixed-point cleaning ............... -
Page 4: Welcome To Use
Welcome to use Thanks for choosing Smart Robot Vacuum Cleaner Salente G4! It is a programming robot vacuum working base on gyroscope sensor. Working together through navigation algorithms, it is able to program the cleaning path, clean and recharge automatically without manual intervention. -
Page 5: Parts List
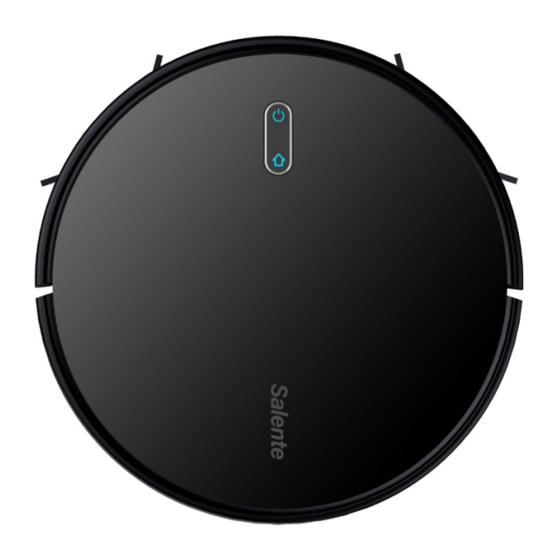
Indicator light • Blue: Normal operation or charging • Red: Abnormal condition or low battery • Purple: Equipment is not connected to the network Reset WiFi • Press two buttons simultaneously for 3s Parts List Charging base HEPA filter + sponge filter Duster cloth 2x Adapter Electric-controlled... -
Page 6: Robot
Robot a- Filter screen cover, b- Dust bin button, c- Wall sensor Sensor and Structure a- Anti-collision sensor, b- Infrared recharging sensor, c- Anti-drop sensor, d- Charging contact, e- Universal wheel, f- Side brush, g- UVC lamp, h- Driving wheel, i- Rolling brush, j- Rolling brush cover buckle Charging Base a- Power indicator light, b- Signal emission area, c- Charging base pins... -
Page 7: Installation
a- Catching groove, b- Cover plate a- Wire slot, b- Power adapter port, c- Wrapping post Installation Connect power line and feed the excess wire into the slot... - Page 8 Place charging base against the wall and connect the power Note Ensure a space of above 0.5m on both sides of the charging base and a • space of above 1.5m in the front If the power line is vertical to the ground, it may be dragged by the host •...
- Page 9 4. Installation of side brush Make the left side brush (L) and the right side brush (R) correspond to L and R on the bottom casing, press L and R and the side brushes are installed till you hear a " cracking " sound. 5.
- Page 10 7. Installation of mopping module Installation of mopping cloth: paste the mopping cloth flatly to the bottom of water tank 2 in 1 Electric-controlled water tank Note: please clean the mopping cloth after using to keep it in good cleaning condition Fill the water tank: uncap the cover and fill with water 2 in 1 Electric controlled water tank...
- Page 11 8. Remove the mopping module When the robot is finished working, press the button in the middle of the water tank to remove the mopping module backwards, empty the water in the water tank and clean the mopping cloth (do not move or turn the robot over during cleaning) 2 in 1 Electric-controlled water tank 9.
-
Page 12: Instructions
Instructions ON/OFF Long press key for 3s, the indicator light is on and the machine is started Long press key for 3s when the machine is under standby mode, the indicator light is off and the machine shuts down Note: The machine cannot shut down when the host is being charged Sweep/Pause After the machine is started, short press key on the host or start the... -
Page 13: Cleaning Mode
Cleaning mode After starting, the machine will follow bow shaped cleaning program to fill up the floor and finish the cleaning of all rooms one by one in an orderly, efficient and fully covered manner. The machine will return back to the recharging base and charge automatically after cleaning finished a- Completed area, b- Area to be cleaned Fixed-point cleaning... -
Page 14: Wifi Reset
WiFi reset If the mobile phone cannot be connected to the machine due to modification of router configuration and password or for other reasons, please press key simultaneously for 3s till a voice prompt "WiFi has been reset" is given and the indicator light turns purple and flickers slowly Silent mode You can turn on/off the robot voice by mobile APP or key “e”... -
Page 15: Remote Control Instruction
Remote control instruction a- Auto cleaning start/pause, b- Go forward, c- Turn left, d- Adjustment of suction power, e- Silent mode on/off, f- Edge cleaning, g- Recharging start/pause, h- Turn right, i- Find robot, j- UVC, k- Spiral cleaning start/pause... -
Page 16: Daily Maintenance
Daily Maintenance Rolling brush (clean it regularly) 1.Turn over the machine and press the buckle on the Rolling brush cover to take out the Rolling brush 2.Remove dust outside and inside the Rolling brush using a tiny brush and clean the Rolling brush 3.Reassemble the Rolling brush and press the Rolling brush cover tightly to fix the buckle a- Buckle, b- Main brush... -
Page 17: Side Brush (Clean It Regularly)
Side brush (clean it regularly) 1.Turn over the machine and pull out the side brush upwards 2.Remove hair and dirt and reassemble the side brush 3.Make the left side brush (L) and the right side brush (R) correspond to L and R on the bottom casing, press L and R to reinstall them Note: Replace the side brush every 3-6 months so as to ensure the cleaning effect... -
Page 18: Dust Box And Filter Screen (Clean It Regularly)
Dust box and filter screen (clean it regularly) 1. Press the button and pull out the dustbin backward 2. Open and clean dustbin... -
Page 19: Filter Screen Cleaning (Clean It Regularly)
Filter screen cleaning (clean it regularly) 1. After a long-time usage, remove the filter gauze, sponge and HEPA 2. Clean the removed filter gauze, sponge and HEPA under water 3. Shake off the water drops and dry it naturally, then use it after completely dried 4. -
Page 20: 2In1 Electric Control Water Tank (Clean It Regularly)
2in1 electric control water tank (clean it regularly) 1. Remove the mop, pour out the water from water tank Electric-controlled water tank 2. Clean the mop, dry the water tank and mop 2 in 1 Electric-controlled water tank... -
Page 21: Sensor (Clean It Regularly)
Sensor (clean it regularly) Clean the sensors by soft mop, include: 1. Clean the sensors along the wall on the right 2. Three anti-dropping sensors at the bottom of the host 3. Infrared avoidance sensor in the front of the host 4. -
Page 22: Sensor (Clean Monthly)
Sensor (clean monthly) (Fig. 2) a- Anti-collision sensor, b- Infrared recharging sensor (Fig. 3) a- Signal emission area, b- Charging base pins Battery The host is furnished with high—performance lithium—ion batteries. To • maintain battery performance, please keep the host charged in daily use If the machine is left unused long, please shut down and keep it properly. -
Page 23: Wifi Connection Guide
WiFi Connection Guide 1. Download the app users, form Google Play register a new account. Apple App store. You For existing users, log can access the App by into the Smart life app. scanning the QR codes above. search „Smart life“ from app store. - Page 24 4. Choose Small Home 3. Open app and press Appliances "Robot "+" to add device, or use vacuum (WiFi)" the add device button...
- Page 25 Enter your WiFi 6. Check that the unit is in standby mode before password press connecting. Push the “Home” confirm. Kind remind and “On” buttons at the that 5GHz same time for at least 3 available until now. seconds until the vacuum cleaner starts flashing and emits a voice message: „WiFi lost, please follow the...
- Page 26 application connects to the device automatically. When you hear the voice prompt, device will connected.
-
Page 27: Common Problems
Common Problems Problem Solution The robot cannot In case of a low battery level, please place the robot on the • be started charging base and align it at the electrode plate, the machine will be started automatically (if the robot is completely powered off, it can be started automatically after charged for a while) If the environment temperature is lower than 0°C or higher... -
Page 28: Troubleshooting
for the first three times Troubleshooting Prompt Tone Solution Error 1: Oh dear! I cannot find the Cleaning is triggered when the dust dust collector box is taken out Error 2: Please check if the radar on The top radar is covered or placed in top has been covered or blocked an open area (there is no obstacle within an area of 6x6m2) -
Page 29: Safety Information
Error 17: Oh dear! Program error, Abnormalities caused please restart me unknown breakdown, restart the robot Error 18: Error encountered initiating The robot reminds the user and shutdown shuts down automatically recharged Error battery, please When the battery level is too low and recharge the robot is not on the charging base, cleaning... -
Page 30: Battery And Charging
• Please do not use the product to clean long-haired carpet (some dark carpets may not be cleaned normally) • Please prevent the host from suctioning hard or sharp objects (such as waste, decorative materials, glass, and iron nails, etc.) •... -
Page 31: Basic Parameters
Basic Parameters Machine Item Parameter Model Salente G4 Overall dimension 350X350X80mm Product weight 3.1 kg Li—battery 2600mAh Rated voltage 14.4V Rated power Charging base Item Parameter Model Salente G4 Overall dimension 160X143X80mm Rated power 11.4W Rated output 11.4W Specification of AC adapter Manufacturer’s name,... - Page 32 DECLARATION OF CONFORMITY Hereby, the company Abacus Electric, s.r.o. declares that the SALENTE G4 is in compliance with the requirements of the standards and regulations, relevant for the given type of device. Find the complete text of Declaration of Conformity at ftp://ftp.salente.cz/ce...
Need help?
Do you have a question about the G4 and is the answer not in the manual?
Questions and answers