Table of Contents
Advertisement
Available languages
Available languages
Quick Links
Advertisement
Table of Contents

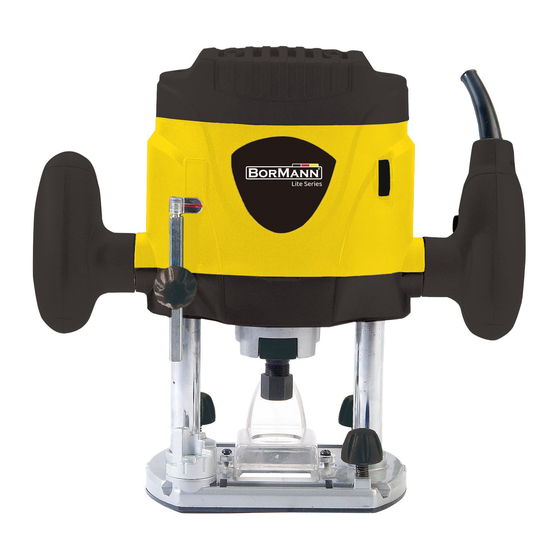
Summary of Contents for BorMann BRT1300
- Page 1 B R T 1300 042679 WWW.BORMANNTOOLS.COM...
-
Page 2: Intended Use
Technical Data Model BRT1300 * The manufacturer reserves the right to make minor changes to product design and technical specifications without prior notice unless these changes significantly affect the performance and safety of the products. The... - Page 3 GENERAL SAFETY INSTRUCTIONS for power tools WARNING ! READ THROUGH THE INSTRUCTIONS FOR USE BEFORE STARTING UP THE EQUIPMENT. Failure to follow all instructions listed below, may result in electric shock, fire and /or serious personal injury. Persons, who are not familiar with the instructions, may not operate the equipment.
-
Page 4: Setting The Depth Stop
Οperation Setting the depth stop 1. Loosen the fixing screw and adjust the depth stop to the required depth. Note the position of the scale on the body and raise the depth stop by the required amount. Each mark on the scale is equal to 1mm. 2. - Page 5 Method 1: Using a piece of wood Fit the router bit, loosen the depth stop fixing screw, pull the plunge lock lever up and press the router down until it comes into contact with the work piece. Lock the router into this position by pushing down the plunge lock lever. Lift up the depth stop and insert a piece of wood the same thickness as the depth of cut between the depth stop and multi depth stop.
-
Page 6: Direction Of Feed
Variable speed control switch The variable speed control switch allows you to vary the speed of the router, enabling the optimum speed to be selected for various sizes of router bits and preventing the work piece from being burnt. This can occur especially when cross cutting. - Page 7 Fitting the parallel guide Before using the parallel guide you will need to assemble it. Remove the two screws and washers from the end of the two rods and fit the guide to the rods using the washers and screws you removed. Tighten screws securely. Insert the rods into the grooves in the base of the router.
-
Page 8: Maintenance
Maintenance Remove the plug from the socket before carrying out any adjustment, servicing or maintenance. Your power tool requires no additional lubrication or maintenance. There are no user serviceable parts in your power tool. Never use water or chemical cleaners to clean your power tool. -
Page 9: Γενικές Οδηγίες Ασφαλείας
Γενικές οδηγίες ασφαλείας ΠΡΟΕΙΔΟΠΟΙΉΣΉ! ΔΙΑΒΑΣΤΕ ΚΑΙ ΚΑΤΑΝΟΉΣΤΕ ΟΛΕΣ ΤΙΣ ΟΔΉΓΙΕΣ. Εάν δεν ακολουθήσετε όλες τις παρακάτω οδη- γίες, μπορεί να προκληθεί ηλεκτροπληξία, πυρκαγιά ή/και σοβαρός τραυματισμός. Πρόσωπα τα οποία δεν είναι εξοικειωμένα με τις οδηγίες, δεν επιτρέπεται να χειρίζονται τον εξοπλισμό. Διατηρήστε τις οδηγίες χρήσης σε ασφαλές... -
Page 10: Ρύθμιση Βάθους Κοπής
Service 1. Αναθέστε τη συντήρηση του ηλεκτρικού εργαλείου σας σε εξειδικευμένο τεχνικό, χρησιμοποιώντας μόνο πανομοιότυπα & γνήσια ανταλλακτικά. Με τον τρόπο αυτό θα διασφαλιστεί ότι διατηρείται η ασφάλεια του ηλεκτρικού εργαλείου. 2. Ακολουθήστε τις οδηγίες για τη λίπανση και την αλλαγή των εξαρτημάτων. 3. - Page 11 Mέθοδος 1: Χρήση ενός κομματιού ξύλου Τοποθετήστε το κοπτικό άκρο (μύτη) του ρούτερ, χαλαρώστε τη βίδα στερέωσης του στοπ βάθους, τραβήξτε το μοχλό ασφάλισης βύθισης προς τα πάνω και πιέστε το ρούτερ προς τα κάτω μέχρι να έρθει σε επαφή με το τεμάχιο...
- Page 12 Επιλογέας μεταβαλλόμενης ταχύτητας Ο επιλογέας μεταβαλλόμενης ταχύτητας σας επιτρέπει να μεταβάλλετε την ταχύτητα του ρούτερ, επιτρέποντας την επιλογή της βέλτιστης ταχύτητας για διάφορα μεγέθη κοπτικών άκρων και αποτρέποντας το κάψιμο τεμαχίου κατεργασίας. Αυτό μπορεί να συμβεί ιδιαίτερα στην κοπή κατ' εγκάρσια διεύθυνση.
- Page 13 Τοποθέτηση του παράλληλου οδηγού Πριν χρησιμοποιήσετε τον παράλληλο οδηγό θα πρέπει να τον συναρμολογήσετε. Αφαιρέστε τις δύο βίδες και τις ροδέλες από τα άκρα των δύο ράβδων και τοποθετήστε τον οδηγό στις ράβδους χρησιμοποιώντας τις ροδέλες και τις βίδες που αφαιρέσατε. Σφίξτε καλά τις βίδες. Τοποθετήστε τις ράβδους...
-
Page 14: Επίλυση Προβλημάτων
Συντήρηση Αφαιρέστε το φις από την πρίζα πριν προβείτε σε οποιαδήποτε ρύθμιση, επισκευή ή συντήρηση. Το ηλεκτρικό εργαλείο δεν απαιτεί πρόσθετη λίπανση ή συντήρηση. Στο ηλεκτρικό εργαλείο δεν υπάρχουν εξαρτήματα που μπορούν να συντηρηθούν από τον χρήστη. Μην χρησιμοποιείτε ποτέ νερό ή χημικά καθαριστικά...


Need help?
Do you have a question about the BRT1300 and is the answer not in the manual?
Questions and answers