Table of Contents
Advertisement
Quick Links
Advertisement
Table of Contents

Related Manuals for MicroTouch DT-215P-A1


Summary of Contents for MicroTouch DT-215P-A1
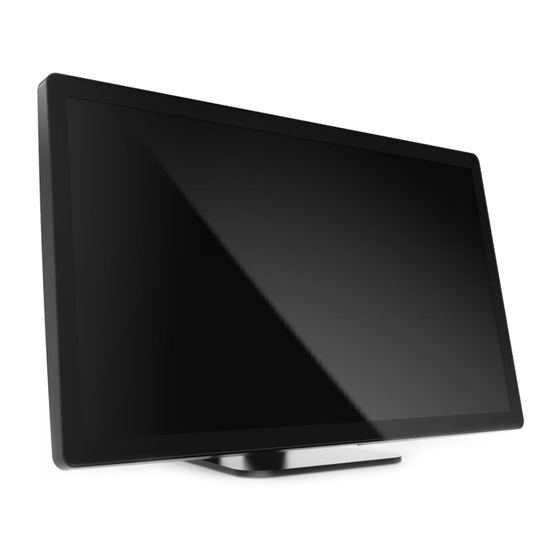
- Page 1 USER MANUAL DESKTOP TOUCH MONITOR DT-215P-A1 Rev 2 April 2022...
-
Page 2: Table Of Contents
Table of Contents About This Document ................. 4 Compliance Information ................5 Important Safety Instructions ..............7 Usage Notice ......................7 Precautions....................... 7 Installation Tips ..................10 Product Overview ..................11 Key Features ......................11 Unpacking .......................11 Package Contents ....................12 Product Setup and Use ................ - Page 3 Optional Accessory Installation ..............30 Installing the Stand ............ Error! Bookmark not defined. Installing the Camera ..........Error! Bookmark not defined. Installing the MSR ............ Error! Bookmark not defined. Appendix ....................38 Cleaning ......................... 38 Solutions to Common Problems ................39 Warranty Information ....................
-
Page 4: About This Document
No part of this publication may be reproduced, transmitted, transcribed, stored in a retrieval system, or translated into any language or computer language, in any form or by any means, including, but not limited to, electronic, magnetic, optical, chemical, manual, or otherwise without prior written permission of MicroTouch a TES Company. -
Page 5: Compliance Information
Compliance Information For FCC (USA) This equipment has been tested and found to comply with the limits for a Class B digital device, pursuant to part 15 of the FCC Rules. These limits are designed to provide reasonable protection against harmful interference in a residential installation. This equipment generates, uses, and can radiate radio frequency energy, and if not installed and used in accordance with the instructions, may cause harmful interference to radio communications. - Page 6 Renseighements relatifs à la conformité Pour la FCC (États-Unis) Ce matériel a fait l’objet d’essais qui ont déterminé qu’il respectait les limites d’un appareil de classe B selon la partie 15 des règlements de la FCC. Ces limites sont établies pour assurer une protection raisonnable contre les parasites nuisant à...
-
Page 7: Important Safety Instructions
Important Safety Instructions Before using this monitor, please read the user manual thoroughly to help protect against property damage and to ensure your personal safety and the safety of others. Be sure to observe the following instructions. For installation or adjustment, please follow the instructions in this manual and refer all servicing to qualified service personnel. - Page 8 Avis d’utilization Mise en garde Pour prévenir les risques d’incendie ou d’électrocution, ne pas exposer le produit à l’humidité. Mise en garde Prière de ne pas ouvrir ou démonter le produit, car cela pourrait entraîner l’électrocution. Mise en garde Le cordon d’alimentation doit être branché à une prise pourvue d’une mise à la terre. Précautions Veuillez suivre toutes les mises en garde, précautions et entretiens recommandés dans ce manuel d’utilisation pour maximiser la durée de vie de votre unité.
- Page 9 Warnings To turn off monitor power, press “Power” on the OSD wired remote. When turning off the monitor by pressing the POWER button on the remote keypad, the main power of the monitor is not turned off completely. To disconnect power completely, remove the power plug from the outlet. If any of the following occur, remove the power plug from the outlet immediately: the monitor is dropped;...
-
Page 10: Installation Tips
Installation Tips No Touch Screen Drivers Required MicroTouch Touch Monitors are plug and play when connected to Windows 7 or later Windows devices; Kernel 3.2 for most builds of Linux; Android 1.0 and most other modern Operating Systems. If you have a non-Plug and Play operating system, please refer to the Technical Support Section of www.microtouch.com or contact MicroTouch Technical Support to inquire about driver support for your... -
Page 11: Product Overview
Product Overview This desktop monitor is designed and developed to provide a flexible desktop touch screen solution with easily installed optional Camera and MSR accessories. Key Features Size: 21.5" TFT LCD Resolution: 1920 x 1080 Contrast Ratio: 1000:1 Aspect Ratio: 16:9 Brightness: 225 cd/m View Angle: H:178˚, V:178˚... -
Page 12: Package Contents
Package Contents Part Picture LCD Monitor AC Power Cord IEC C15/C16 (1.8 m) AC-dc adapter DP (Display Port) cable (1.8 m) HDMI cable (1.8 m) USB Type-C to USB A CABLE (1.8 m) USB Type-C cable (1.8 m) Audio Cable (1.8 m) OSD Wired Remote... -
Page 13: Product Setup And Use
Product Setup and Use Input and Output Connectors Power, OSD and Audio Connectors DC: Power connector (Center pin: + 12 vdc; Barrel: ground). RJ-11: Connector for the on-screen display (OSD) remote controller, which is used to access the on- screen display menu to select the various options, and to turn the monitor on/off. AUDIO: Audio input connector Video Signal Input Connectors DP (Display Port): Digital video input. -
Page 14: Turning The Monitor On And Off
For computer/source equipment that does not have USB Type C with Alt Mode DP capability, HDMI and DP video cables are included and either may be used to connect the video signal. Connect the on-screen display remote controller to the RJ-11 connector. The on-screen remote provides the power on/off function as well as image adjustment options. -
Page 15: On-Screen Display (Osd)
On-Screen Display (OSD) Using the OSD Wired Remote This monitor provides an RJ45 port for connecting the OSD wired remote. The following is the OSD keypad function table: Button Normal Video Display When OSD Menu is Displayed MENU Activate the main menu Exit selection / Exit OSD ... -
Page 16: Locking The Osd And Power Button Functions
Locking the OSD and Power button functions Lock OSD prevents all the monitor settings from being changed. When this function is activated, all OSD controls and hotkey operations will be disabled except for the Power button. Lock Power button Prevents monitor from being turned off by the Power button. The monitor will power on automatically when power is applied. - Page 17 Picture Menu This menu is used for making common image adjustments. Note that some of the adjustments may be grayed out, indicating that they are not selectable. This indicates the use of a digital video input signal (DP, HDMI or USB Type-C). These selections are fixed/not adjustable for digital video signals. The VGA video signal (because it is analog) may require all adjustments, so they are all selectable when VGA is being used.
- Page 18 V-Position Adjust the vertical position of the picture. Press or to select the desired level, and then press SELECT. Selectable only when VGA input is in use. Range: 0-100 Phase Adjust the pixel phase of the picture. Press or to select the desired level, and then press SELECT.
- Page 19 Advanced Menu This menu is used to adjust color temperature and image sharpness. Color Temp Select the color temperature Options: 5500K, 6500K, 7500K, 9300K, User Adjust the amount of red in color content Range: 0-100 Green Adjust the amount of green in color content Range: 0-100 Blue Adjust the amount of blue in color content...
- Page 20 OSD Menu This menu is used to make set-up adjustments to the OSD itself, as well as other on-screen messages. OSD Timeout Adjusts the time in seconds before the OSD menu disappears after no usage. Range: 0-60 sec OSD Position Selects the OSD Position (center or corners).
- Page 21 Option Menu This menu is used select or display various functions. Reset Restore the factory default settings. Options: Yes, No Language Select the OSD language Options: English, French, Deutsch, Italian, Spanish, Japanese, Traditional Chinese and Simplified Chinese Source Select Select the Video Input Source Options: Auto, VGA, HDMI, DP Display Mode Display the current video source and resolution information.
-
Page 22: Osd Default Settings
OSD Default Settings Note: N/A applies when a digital video input (DP or HDMI) is in use Menu Parameter Default Settings Contrast Brightness H-Positon Picture V-Positon Phase Clock Auto Adjust Color Temp User Advanced Sharpness OSD Timeout OSD Positon User OSD H-Positon OSD V-Positon Reset... -
Page 23: Mounting Options
Mounting options The monitor may be mounted to a stand or other device that has a 100mm x 100mm standard VESA mount hole pattern. VESA Mount The monitor has an integral VESA standard mount pattern that conforms to the “VESA Flat Display Mounting Interface Standard”... -
Page 24: Specifications And Dimensions
Specifications and Dimensions Specifications Item Category Specifications 21.5” TFT LCD Size Resolution 1920 x 1080 Brightness (typical) 225 cd/m2 LCD Panel Contrast Ratio (typical) 1000:1 Number of Colors 16.7 million Viewing Angle (typical) Horizontal: 178 degrees; Vertical: 178 degrees Touch Type P-CAP Touch Screen Simultaneous touch points... -
Page 25: Supported Timings
Supported Timings Polarity Mode Resolution H-Freq. (KHz) Bandwidth (MHz) 720 x 400 @ 70Hz 31.47 28.322 640 x 480 @ 60Hz 31.47 25.175 640 x 480 @ 66Hz 32.24 640 x 480 @ 72Hz 37.86 31.5 640 x 480 @ 75Hz 37.5 31.5 800 x 600 @ 56Hz... -
Page 26: Dimensions (Without Stand)
Dimensions (without stand) Front view Side View... - Page 27 Rear View...
-
Page 28: Dimensions (With Stand)
Dimensions (with stand) Front view Side View... - Page 29 Rear View...
-
Page 30: Optional Accessory Installation
Optional Accessory Installation Installing the Stand Step 1: Place the touch monitor face down on a clean padded surface. Step 2: Place the stand on the VESA mount and align the screw holes. Step 3: Install the four M4 screws to secure the stand to the monitor. - Page 31 Removing the stand Step 1: Place the touch monitor face down on a clean padded surface. Step 2: Loosen the four screws Step 2: Pull the stand out from touch monitor and remove. Step 2 Step 1...
-
Page 32: Installing The Camera
Installing the Camera Step 1: Remove the cover. Step 2: Connect the MSR cable to the touch monitor. Important: Do not force - Be sure to properly align the polarity keys in the two connectors. The cable colors will also match from cable to cable. Step 3: Install the two M3 screws to secure the camera. - Page 33 Removing the Camera Step 1: Remove the two M3 screws. Step 2: Disconnect the camera cable from the touch monitor. Step 3: Replace the cover. Step 3 Step 2 Step 1...
-
Page 34: Installing The Msr
Installing the MSR Step 1: Remove the cover. Step 2: Connect the MSR cable to the touch monitor. Important: Do not force - Be sure to properly align the polarity keys in the two connectors. The cable colors will also match from cable to cable. Step 1 Step 2 Step 3: The metal bracket hooks into the gap between cover glass and bezel. - Page 35 Step 4: Install the two M3 screws to secure the MSR. Step 4...
- Page 36 Removing the MSR Step 1: Loosen the screws. Step 1...
- Page 37 Step 2: Disconnect the MSR cable from the touch monitor and pull the metal bracket free of the slot. Step 3: Replace the cover. Step Step 2...
-
Page 38: Appendix
Appendix Cleaning Turn off the product and disconnect from AC power before cleaning. Turning the product off protects against accidental touch selections that could cause problems or hazardous results. Disconnecting power protects against hazardous interaction between accidental liquid entry and electricity. To clean the case, dampen a clean cloth lightly with water and a mild detergent and wipe gently. -
Page 39: Solutions To Common Problems
Check that the DC power connector is fully seated. Check that the AC cable is securely connected to the wall outlet and to the AC to DC converter. Make sure the MicroTouch power converter is being used. Try another MicroTouch-approved power converter if possible. -
Page 40: Warranty Information
Warranty Information Except as otherwise stated herein, or in an order acknowledgment delivered to Buyer, Seller warrants to Buyer that the Product shall be free of defects in materials and workmanship. The warranty for the touchscreen display and their components is three years. Seller makes no warranty regarding the model life of components. -
Page 41: Rohs Declaration
RoHS Declaration Type designation (Type) : Equipment name:Touch LCD Monitor DT-215P-A1 Restricted substances and their chemical symbols Component Hexavalent Polybrominated Polybrominated Lead Mercury Cadmium chromium biphenyls diphenyl ethers (Pb) (Hg) (Cd) (PBDE) (PBB) ○ ○ ○ ○ ○ ○ Plastic Parts ○... - Page 42 TES AMERICA LLC | 215 Central Avenue, Holland, MI 49423 | (616) 786-5353 The information presented in this user manual is intended as general information about MicroTouch products and is subject to change. Product specifications and warranties will be governed by TES America, LLC. Standard terms and conditions of sale. Products are subject to availability.
Need help?
Do you have a question about the DT-215P-A1 and is the answer not in the manual?
Questions and answers