Table of Contents
Advertisement
Quick Links
Advertisement
Table of Contents

Related Manuals for MicroTouch DT-215P-A1


Summary of Contents for MicroTouch DT-215P-A1
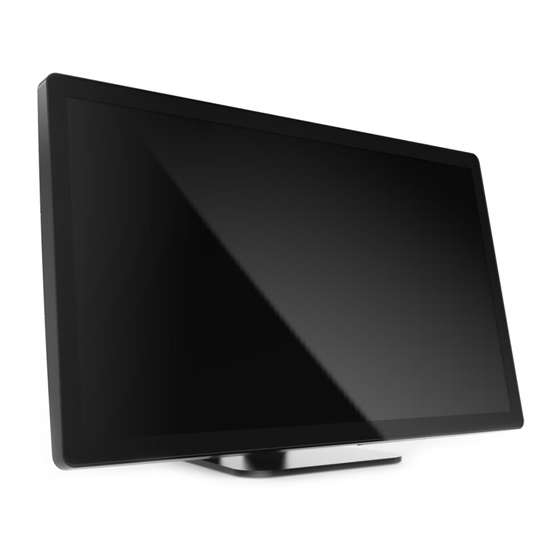
- Page 1 User Manual DT-215P-A1 Desktop Touch Monitor...
- Page 2 MicroTouch a TES Company. The information in this document is subject to change without notice. MicroTouch TES Company makes no representations or warranties with respect to the contents herein, and specifically disclaims any implied warranties of merchantability or fitness for a particular purpose.
- Page 3 Compliance Information For FCC (USA) This equipment has been tested and found to comply with the limits for a Class B digital device, pursuant to part 15 of the FCC Rules. These limits are designed to provide reasonable protection against harmful interference in a residential installation. This equipment generates, uses, and can radiate radio frequency energy, and if not installed and used in accordance with the instructions, may cause harmful interference to radio communications.
- Page 4 Renseignements relatifs à la conformité Pour la FCC (États-Unis). Ce matériel a fait l’objet d’essais qui ont déterminé qu’il respectait les limites d’un appareil de classe B selon la partie 15 des règlements de la FCC. Ces limites sont établies pour assurer une protection raisonnable contre les parasites nuisant à...
- Page 5 Usage Notice Warning - To prevent the risk of fire or shock hazards, and do not expose the product to moisture. Warning - Please do not open or disassemble the product as this may cause electric shock. Warning - Power cord shall be connected to a socket-outlet with earthing connection.
- Page 6 Avis d’utilisation Mise en garde — Pour prévenir les risques d’incendie ou d’électrocution, ne pas exposer le produit à l’humidité. Mise en garde — Prière de ne pas ouvrir ou démonter le produit, car cela pourrait entraîner l’électrocution. Mise en garde – Le cordon d’alimentation doit être branché à une prise pourvue d’une mise à...
-
Page 7: Table Of Contents
2.2.2 Timing Table Chart ................... 25 2.2.3 EDID Data ......................26 2.3 Dimension ........................ 26 2.3.1 DT-215P-A1 w/o Stand ..................26 2.3.2 DT-215P-A1 w/ Stand ..................26 2.4 Optional Accessory Installation ................29 2.4.1 Install the Stand Module ................... 29 2.4.2 Dismantle the Stand Module ................ -
Page 8: Chapter 1
Chapter 1 Product Introduction... -
Page 9: Overview
The DT-215P-A1 series is a 22” touchscreen monitor is designed and developed to provide flexible monitor that can optional install Camera or MSR. The DT-215P-A1 is a 22 inches SXGA (1920 x 1080) LCD monitor with a P-cap touch screen and 10 touch points. -
Page 10: Block Diagram
1.4 Block Diagram... -
Page 11: Interface Connectors
1.5 Interface Connectors 1.5.1 Power Connector The AC/DC converter shall have an IEC320 type male power receptacle for connection to AC mains power. The power cord, exact type to be supplied in the appropriate Option Kit, shall be length of 1.8 0.05 meters, and PC99 compliant. -
Page 12: Video Signal Connector
1.5.2 Video Signal Connector The video signal input via D-type 15-pin female connector. Connector Pin Assignment: Signal Red video signal input Green video signal input Blue video signal input DDC ground for the VESA DDC2B function Analog signal ground for the red video Analog signal ground for the Green video Analog signal ground for the blue video + 5V: Input from host system for the VESA DDC2B function... - Page 13 Display Port(1.2a) Signal Signal ML_Lane 0(p) Data0 + Signal ground Signal ground ML_Lane 3(n) Data3 - ML_Lane 0(n) Data0 - Signal ground ML_Lane 1(p) Data1 + Signal ground AUX_CH(p) AUX + Signal for Signal ground Auxiliary Channel ML_Lane 1(n) Data1 - Signal ground AUX_CH(n) AUX - Signal for ML_Lane 2(p) Data2 +...
- Page 14 HDMI(1.3a) Signal Signal TMDS Data2+ TMDS Clock Shield TMDS Data2 Shield TMDS Clock– TMDS Data2– TMDS Data1+ Reserved (N.C. on device) TMDS Data1 Shield TMDS Data1– TMDS Data0+ DDC/CEC Ground TMDS Data0 Shield +5V Power TMDS Data0– Hot Plug Detect TMDS Clock+...
- Page 15 DC JACK Signal +12V RJ11(Remove OSD key) Signal Signal MENU SELECT LEFT_UP KEY_PWR RIGHT_DN GROUND...
- Page 16 AUDIO IN JACK Signal Signal Left_IN DC_5V Right_IN...
- Page 17 Type-C USB Connector Signal Signal SSTXp1 SSRXp1 SSTXn1 SSRXn1 VBUS VBUS SBU2 SBU1 VBUS VBUS SSRXn2 SSTXn2 SSRXp2 SSTXp2...
-
Page 18: Package Overview
1.6 Package Overview LCD Display Power Cord DC Power Supply TYPE-C to USB-A cable DP cable VGA cable (Optional) (Optional) (Optional) OSD Remote key USB TYPE-C HDMI cable cable(Optional) (Optional) Stand(Optional) Screw... - Page 19 2.0A minimum (complied with LPS or PS2), Tma = 40 degree C minimum, and the altitude of operation = 3048m minimum. If it needs further assistance with purchasing the power source, please contact to MicroTouch for further information. Mise en garde! Cet appareil est conçu avec une alimentation de courant CA, d’une tension...
-
Page 20: Chapter 2
Chapter 2 Product Installation... -
Page 21: About Vesa Mount
2.1 About VESA Mount “VESA Flat Display Mounting Interface The DT-215P-A1 series conform to the Standard” which defines a physical mounting interface for touch monitor, and corresponding with the standards of touch monitor mounting devices. The VESA mount is located on the back of this unit. -
Page 22: On-Screen Display
2.2 On-Screen Display Menu off status Menu on status Menu appear Menu disappear/ return to main item Brightness Main item select up/ Adjust up ▲ Mute Main item select down/ Adjust down ▼ Enter/Select sub-item function Power On/Off 1. Press the “MENU” button to pop up the “on-screen menu” and press “Up” or “Down”... - Page 23 Press the “Select" key 3 seconds, The “Lock/Unlock” menu will be appeared. The “Lock/Unlock” is showed for 3 seconds Use the "Select” key to select OSD or Power setting then set at “Lock” by pushing the "UP" or "Down" button When the "UP"...
-
Page 24: Osd Function Description
2.2.1 OSD Function Description Item Content Default Contrast The monitor luminance level control. Brightness The monitor backlight level control. Auto Adjust Fine-tune the image to full screen automatically. Left/Right Moving screen image horizontal position to left or right. Up/Down Moving screen image vertical position to up or down. Horizontal size The screen image horizontal dot clock adjustment. -
Page 25: Timing Table Chart
2.2.2 Timing Table Chart Polarity H-Freq. Bandwidth Mode Resolution (KHz) (MHz) VGA 720x400 70Hz 31.47 28.322 VGA 640x480 60Hz 31.47 25.175 MAC 640x480 66Hz 32.24 VESA 640x480 72Hz 37.86 31.5 VESA 640X480 75Hz 37.5 31.5 VESA 800x600 56Hz 35.16 VESA 800x600 60Hz 37.88 VESA 800x600 75Hz 46.88... -
Page 26: Edid Data
2.2.3 EDID Data The monitor assembly shall provide a display communications channel that conforms to VESA DDC2B hardware requirements. This configuration shall contain the 128-byte EDID file as specified by VESA EDID Standard. DP/HDMI/TYPE-C The monitor assembly shall provide a display communications channel that conforms to VESA DDC2B hardware requirements. -
Page 27: Dimension
2.3 Dimension 2.3.1 DT-215P-A1 (w/o stand) Front View Side View Rear View Bottom view... -
Page 28: Dt-215P-A1 W/ Stand
2.3.2 DT-215P-A1 (w/ stand) Front View Side View Rear View Bottom view... -
Page 29: Optional Accessory Installation
2.4 Optional Accessory Installation Note: Please install/ dismantle the product when the monitor system is in the shutdown state. 2.4.1 Install the Stand module Place stand module on back of touch monitor and align the screw holes. Install the four M4 screws to fasten the stand. 2.4.2 Dismantle the Stand module Step 1: Loosen the screws Step 2: Pull it to out from touch monitor and remove stand module. -
Page 30: Install The Camera Module
2.4.3 Install the Camera Module Camera Module max. 19g Step 1: Remove the side cover. Step 2: Connect the camera module cable to the touch monitor. Step 3: Install the two M3 screws to fasten the camera module. Step 1 Step 3 Step 2 2.4.4 Dismantle the Camera Module... -
Page 31: Install The Msr Module
2.4.5 Install the MSR Module MSR Module max. 62g. Step 1: Remove the side cover. Step 2: Connect the MSR module cable to the touch monitor. Step 1 Step 2 Step 3: The metal bracket hook into the gap between cover glass and bezel. -
Page 32: Dismantle The Msr Module
Step 4: Install the two M3 screws to fasten the MSR module. Step 4 2.4.6 Dismantle the MSR Module Step 1: Loosen the screws. Step 1... - Page 33 Step 2: Remove the MSR module cable from the touch monitor. Step 3: To assemble the side cover. Step 3 Step 2...
-
Page 34: Appendix
Appendix... - Page 35 Declaration of the Presence Condition of the Restricted Substances Marking 設備名稱:觸控螢幕 型號(型式):DT-215P-A1 Type designation (Type) :DT-215P-A1 Equipment name:Touch LCD Monitor 限用物質及其化學符號 Restricted substances and its chemical symbols 單元 Unit 六價鉻 多溴聯苯 多溴二苯醚 鉛 汞 鎘 Cadmium Hexavalent Polybrominated Polybrominated Lead...
Need help?
Do you have a question about the DT-215P-A1 and is the answer not in the manual?
Questions and answers